This section contains setup information for using ATID X6 Reader with the TagMatiks AT Lite Application
This document is divided into multiple sections as:
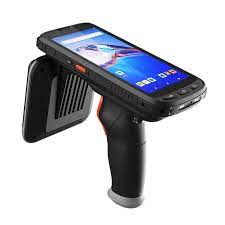
I. Turn ON the ATID reader
1. Turn on the Reader by pressing the Power button until the buzzer sounds
2. LED communicated mode Turns ON after the Switch on the Reader
II. Turn OFF the ATID reader
1. While Power is On, Press the Power button upto the buzzer sound.
2. If the communication mode LED turns off after the buzzer sounds, then the reader is powered off
After successfully installing the TagMatiks AT Lite application on your ATID X6 Reader, if the bluetooth connection is turned ON, the reader automatically connect when we open the application. We can find the reader connection by following the below steps
1. Open the TagMatiks AT Lite Application and login onto it.
2. On the Home Page, click on the Settings Icon (at the bottom right side of screen); as shown below image
3. To check the ATID X6 reader connection; press the “Manage Reader” button on the left-hand side of the application.
4. Connected Reader should display in the Available Device page
5. Click Reader Name to adjust the Reader Settings
6. The Settings menu has the following options:
If previously the ATID device is not configured with any region we must configure the region. Configuration can be also done by using TagMatiks AT Lite application by using following steps,
1. Open the TagMatiks Application and login onto it.
2. On the Home Page, click on the Settings Icon (at the bottom right side of screen); as shown below image
3. Click the Manage Reader button.
4. Click the Available Device Name.
5. Click Configure Region and Map the Region and Frequency for the ATID Reader.
6. After configuring the region, the ATID reader is automatically connected with the application.
In TagMatiks AT Lite, please first ensure the configuration settings are in sync with the RFID tags.
1. Please click on the Settings Tab and then click on the "Configuration" under "Admin Settings"
2. Please click on "Asset Configuration" under Asset Tag Format
3. A new window will open, where you can see tabs for Tagging Options, EPC Data and Other Memory Banks. As shown below
4. To modify the behavior of associating RFID tags to assets; please read the article named:"Configured Overview"
5. Once the tag format configuration is properly saved; go to "Home" page
6. To read the RFID tags from the ATID X6 reader; press the "Inventory" button on the bottom left-hand side of the application.
7. Then a new window will open, named: "Inventory."
8. For taking the inventory, click on a Location; for example, here it is "CBE".
9. Press the "Start" icon bar button on the AT Lite application, then the ATID X6 reader will start reading the RFID tags. Please refer to the image below:
10. Once you Press the "Stop" icon bar button on the application; then the ATID X6 reader will stop reading the tags.
11. As a result, the read tag will populate on the application window, as shown in below image.
NOTE: The reading start / stop can also be controlled with the "Trigger" button of the ATID X6 reader.