RFID Sensor Tags are RFID tags with built in sensors for data collection including options for temperature, humidity, moisture, impact, tamper and more. The tags can be passive, semi-passive or active.
This article covers the various steps that are involved in the sensor profile available with the TagMatiks AT Lite Application in Windows. In Particular, we will look at using the Temperature / Humidity Loggers that are supported, which are the TagMatiks Temperature & Humidity RFID Logger Tags.
This article divided into multiple section
1. Open the TagMatiks AT Lite application and login into it.
2. Click on the “Sensor Profile” button from the left hand side of the application.
3. An RFID temperature/ humidity logger can be attached to the shipment.
4. In strategic points of the supply chains, RFID readers and handhelds can be used to quickly check if the temperature or humidity barriers have been broken.
5. Click on “Add Sensor Profile” from the top right-hand side of the application.
6. Enter the sensor profile name
7. Select the sensor type “Temperature Logger” from dropdown.
8. Select the sensor unit from “Sensor unit” dropdown button
9. Enter the Threshold, Min, and Max value of temperature.
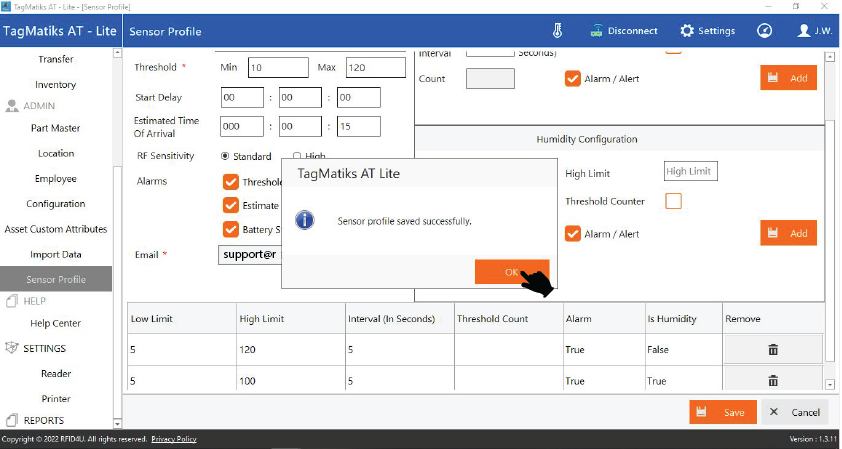
10. Enter the details in temperature configuration in right hand side of application and click on “Add” to add the temperature configuration
11. A popup will appear stating that “Sensor profile configuration added successfully”. Click on “OK” button to close the popup.
12. Click on the “Save” button to save the sensor profile.
13. A new popup will open stating that “Sensor profile saved successfully”
14. Click on “Create Asset” to create the asset and assign a tag with sensor profile.
15. Enter the details of the asset including Asset ID, Serial Number, Location, and Tag ID.
16. Click on the “Sensor Profile” field to open the sensor profile list.
17. A popup will open with the sensor profiles list, click on the sensor profile, and click on “Select” button to select the profile.
18. A new popup will open in which sensor type and sensor tag details will appear
19. Click on the “Assign Tag” button to assign the tag with sensor profile
20. Click on the “Save” button to create the asset.
21. A new popup will open stating that “Asset created successfully. Do you want to create a similar asset?”, if you want to create a similar asset click on “Yes” otherwise click on “No” to close the popup.