In TagMatiks AT Lite, there are multiple ways by which you can associate the tag to an asset. In case of non-printed RFID tags, please follow the steps to associate the tag ID to the asset.
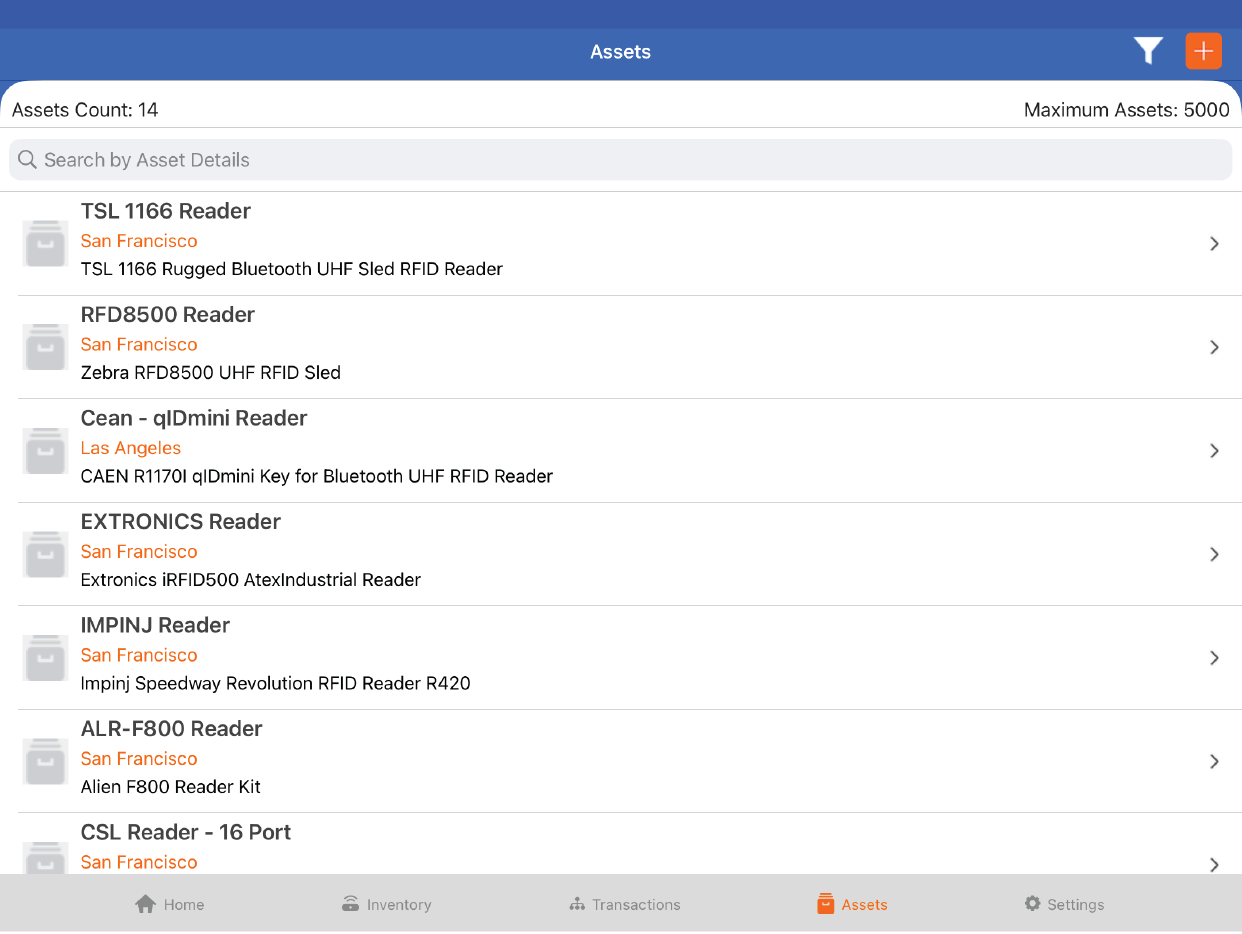
1. Go to “Assets” to create asset as shown in the image below.
2. Tap on “+” icon to add a new asset as shown in the image below.
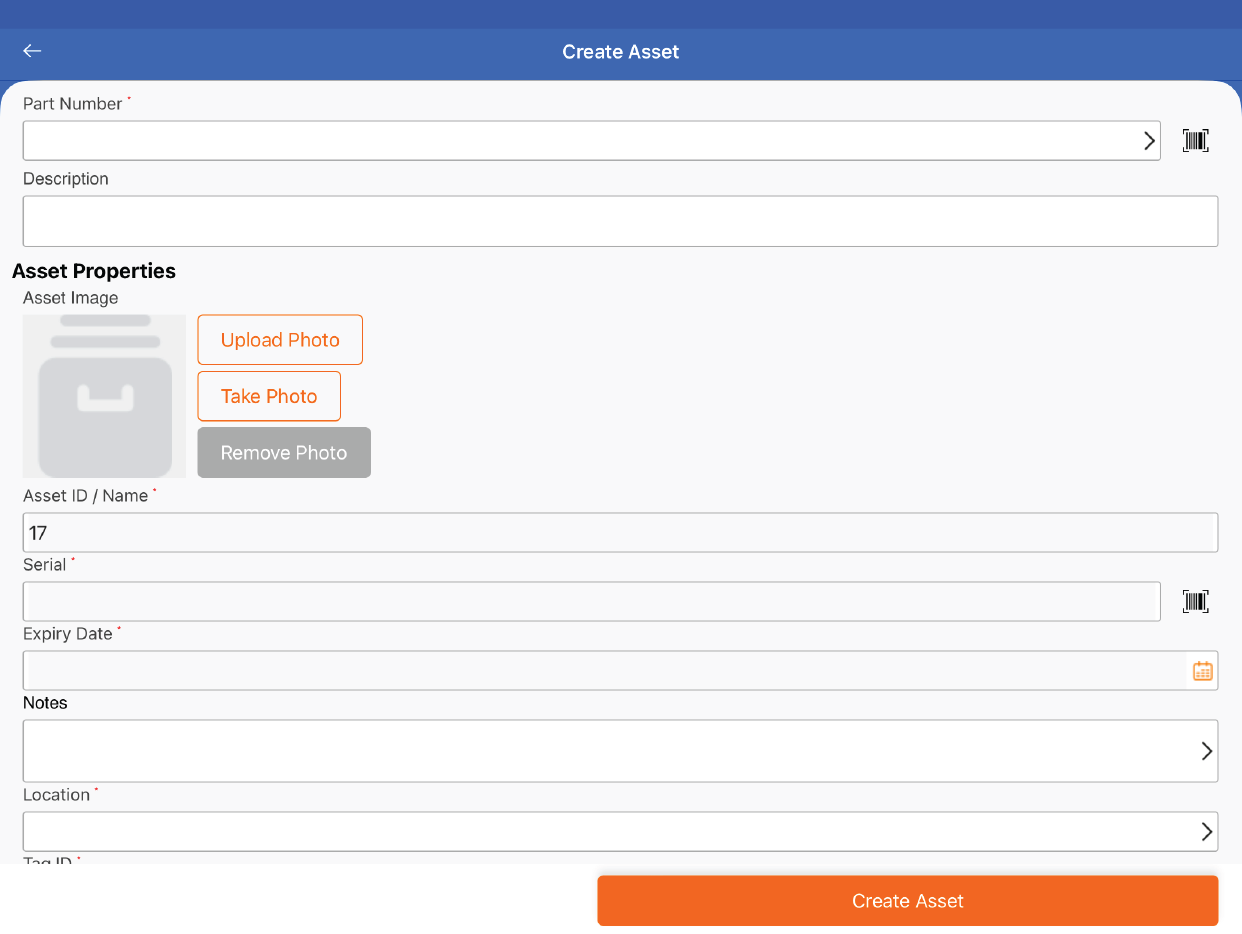
3. Enter all the asset details, to enter Tag ID which is a mandatory field tap as shown in the image below.
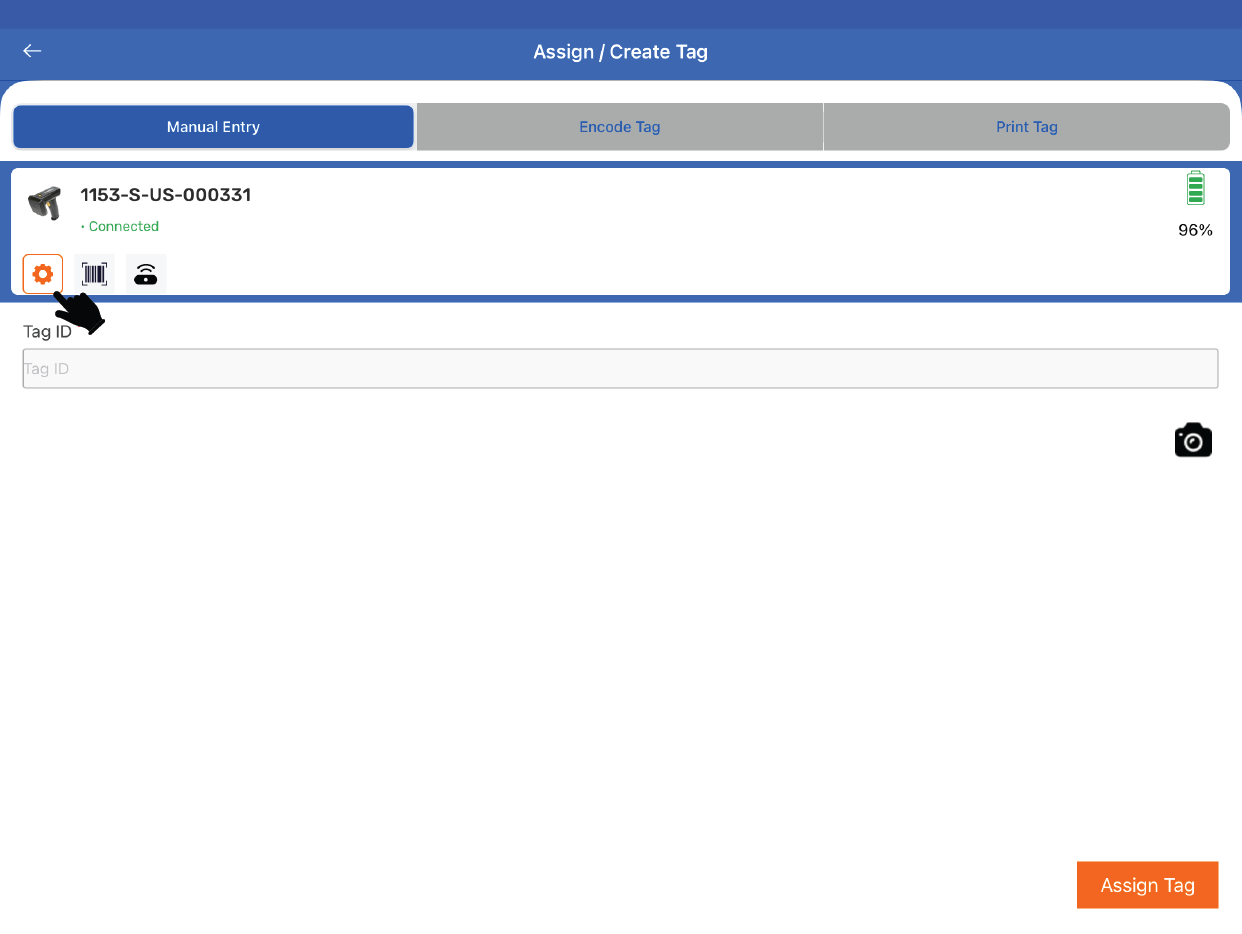
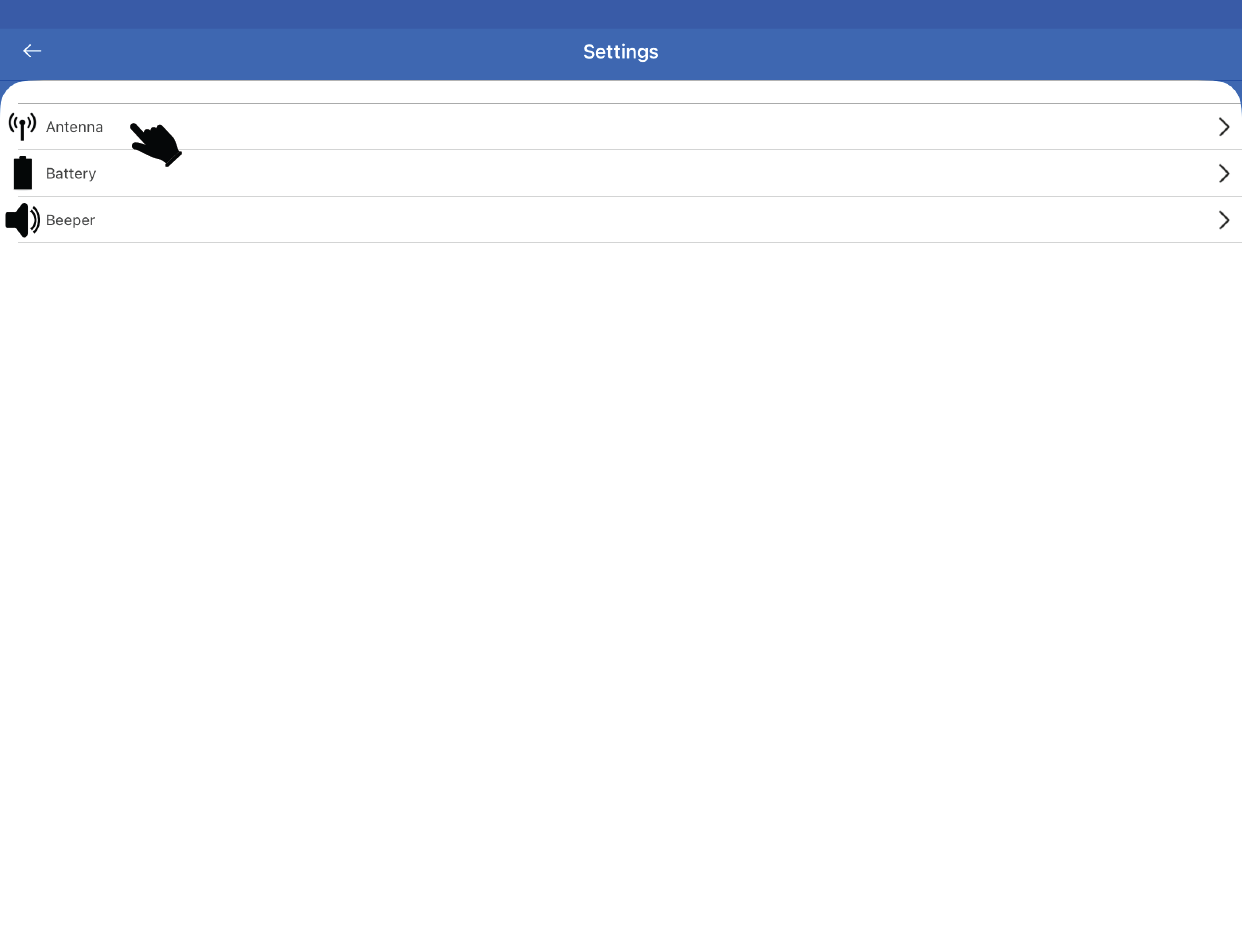
4. As the reader is already connected, click on the Gear Icon to decrease the antenna power of the reader as shown in the image below.
5. Click on Antenna to change the antenna power as shown in the image below
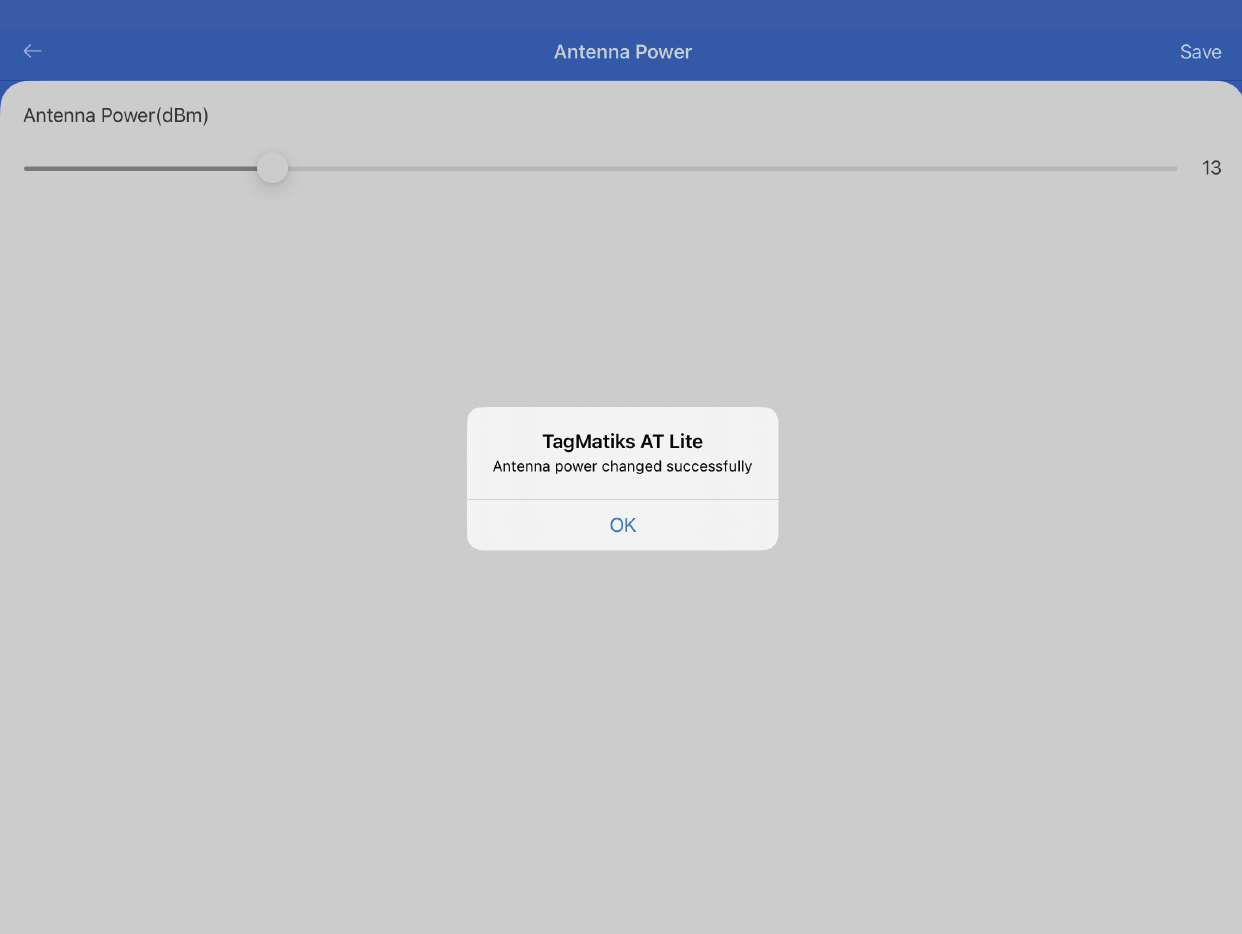
6. Decrease the power of the RFID reader and tap on Save. An acknowledgement will appear “Antenna power changed successfully” as shown in the image below.
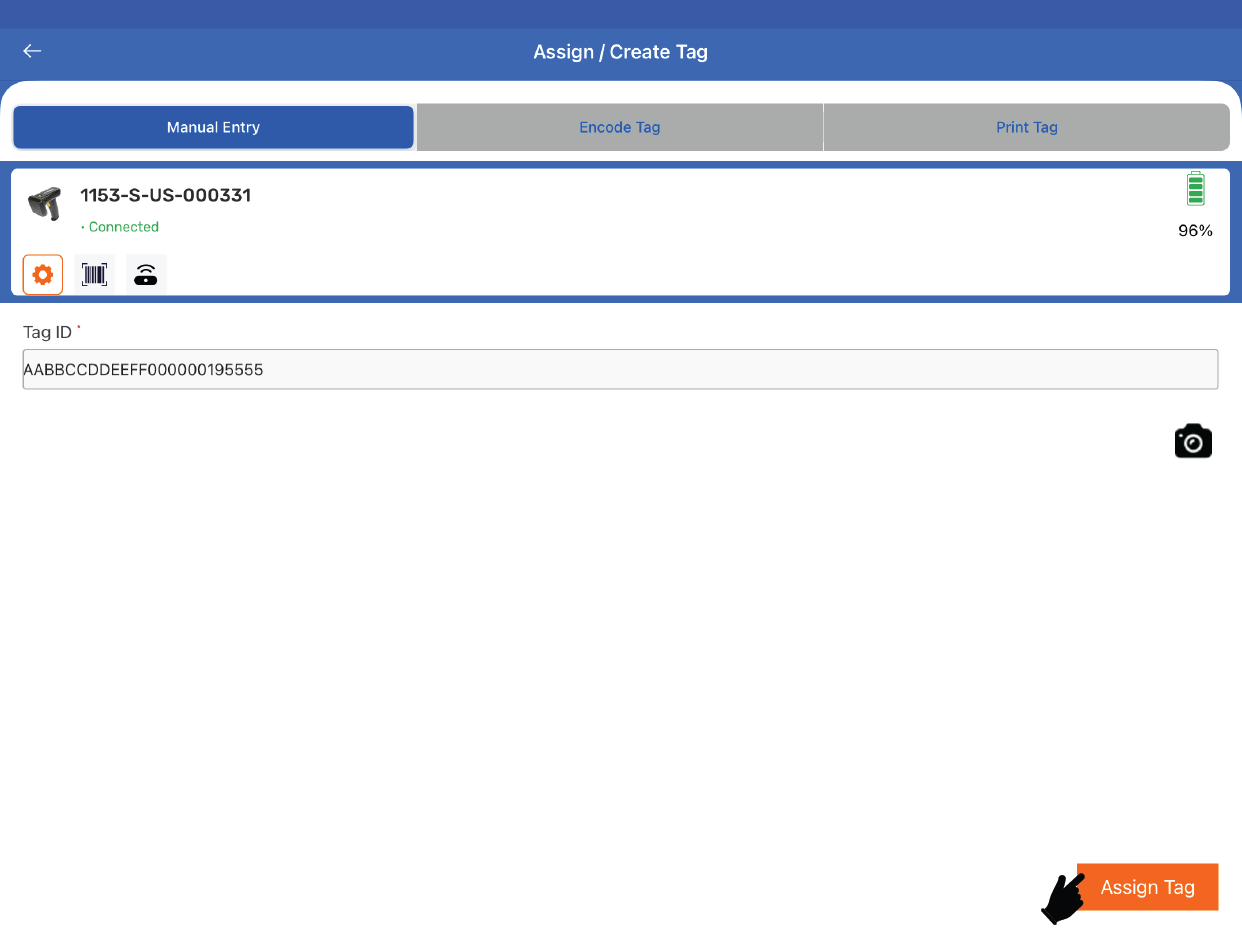
7. Go back to the menu and keep the desired tag isolated from any other RFID tags. Press the trigger of the reader to read the nearby tag. It will autofill the Tag ID column. If there are other tags in the vicinity, they will also show up in a list, select the desired one and tap on Assign Tag.
8. Tap on “Create Asset” and asset will be created successfully as shown in the image below.