Creating assets is the first major step to start using RFID for asset tracking. The intent of creating an asset is to not only populate details about an asset but also associate an RFID tag / label to that asset so it can be used in transactions.
Pre-requisites
At least one part must be defined
At least one location must be defined
Access to an RFID handheld
Access to RFID labels / tags. We suggest using TagMatiks Pre-printed/ pre-encoded RFID labels/ tags but you can use any supported UHF (RAIN) RFID labels/ tags.
Navigating to Assets Menu
Click on the Assets Tab
On this page, you’ll see all of the created assets in the system. You’ll also see a counter of how many you have including how many more you can create.
Click on + to create an asset
Creating your First Asset
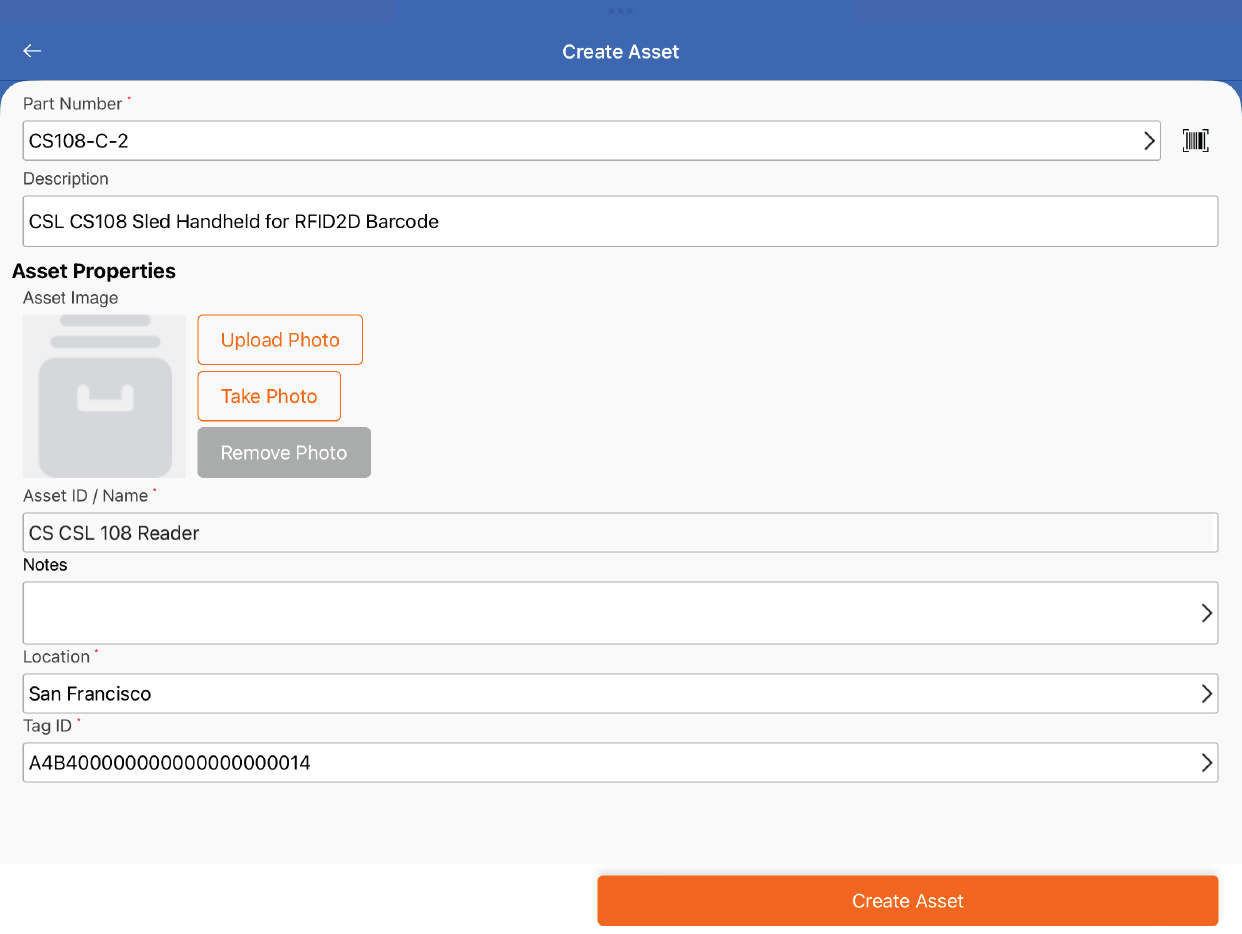
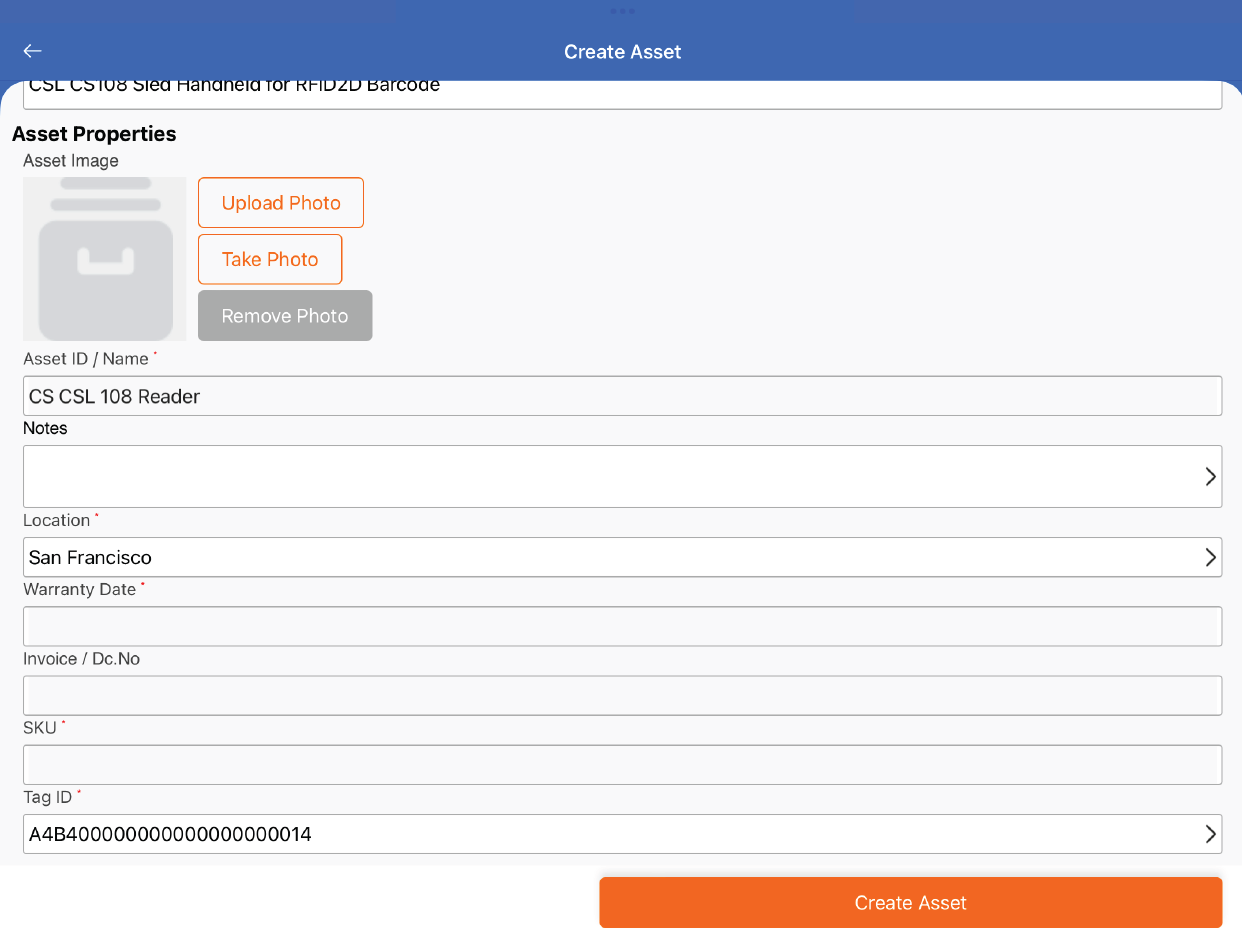
To get started you’ll have to enter in a few details regarding the asset including:
Part Number: Select this from a searchable dropdown of your created parts. Once you enter this, the description will automatically populate. For the specified part, if you had set up the serial or expiry date options, then they will continue to show. Otherwise, they will be hidden.
Asset Image: You can either take or upload a photo for the asset. [Optional]
Notes: You can enter notes regarding the asset [Optional]
Location: Select this from a searchable dropdown of your created locations. This is the initial location where the asset is located.
Any custom asset fields that you define.
Tag Id: The Tag Id field is used to associate an RFID tag / label to the asset. Click on the field to get started.
The default option to associate an RFID tag / label is to use the manual entry tab. This feature allows you to either:
RFID scan the tag (If one tag is found, then it will autofill into the Tag ID field. If there are multiple, then you can choose from the popup)
Figure 1: Create Asset
Barcode scan the RFID Tag ID. If your RFID reader supports barcode scanning, you can use the device’s barcode scanner. Alternatively, you can also use the camera on a smart device to scan barcode (Again, the smart device must have a camera)
Manually type in the Tag ID.
Once you scan / enter the Tag ID on this tab, press Assign Tag.
Other options for associating RFID tags are to use the Encode Tag and Print Tag Options. To use these, you must enable them under the Configuration -> Asset Tag Format Configuration tab. Please see the article "Configurations Overview"for more details.
If you do enable the Encode Tag option, the next Tag ID for the EPC value will be displayed automatically in the Tag ID field. Press the Encode Tag option to encode the RFID tag.
If you do enable the Print Tag option, the next Tag ID for the EPC value will also be displayed automatically in the Tag ID field. In addition, you’ll be able to choose the Printer and Template you’d like to use to print. You’ll need to have a printer and template setup before doing this step. Press the Print Tag option to print the RFID tag.
Once you do this, you’ll be navigated back to the Create Asset page. You’ll need to hit the Create Asset button to finish up. You’ll be asked if you want to create a similar asset. This essentially will autofill in the part details for another asset so you can save time if creating many of the same assets.