This article describes common problems you may encounter using Zebra RFID printers and helps you to resolve them.
The possible issues are:
Note: For demonstration purposes, Zebra ZD500R is taken as an example.
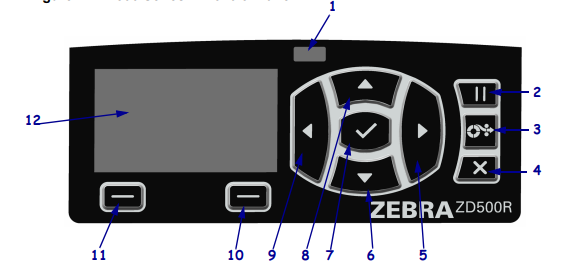
The control panel indicates the printer’s operating status and allows the user to control basic printer operation.
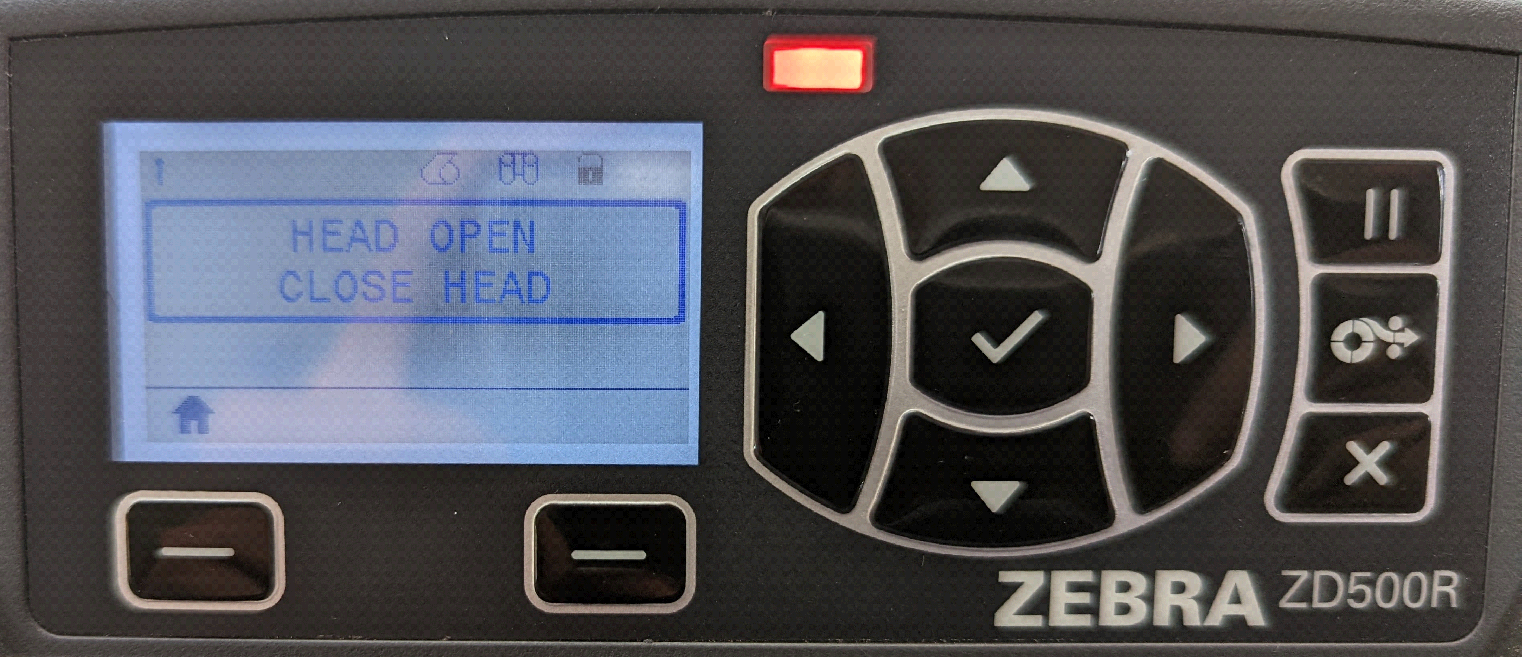
If the STATUS light is steady red indicates one of the following:
Then printer needs attention and cannot continue without user intervention
Please see if the printhead is not fully closed, close the printhead completely.
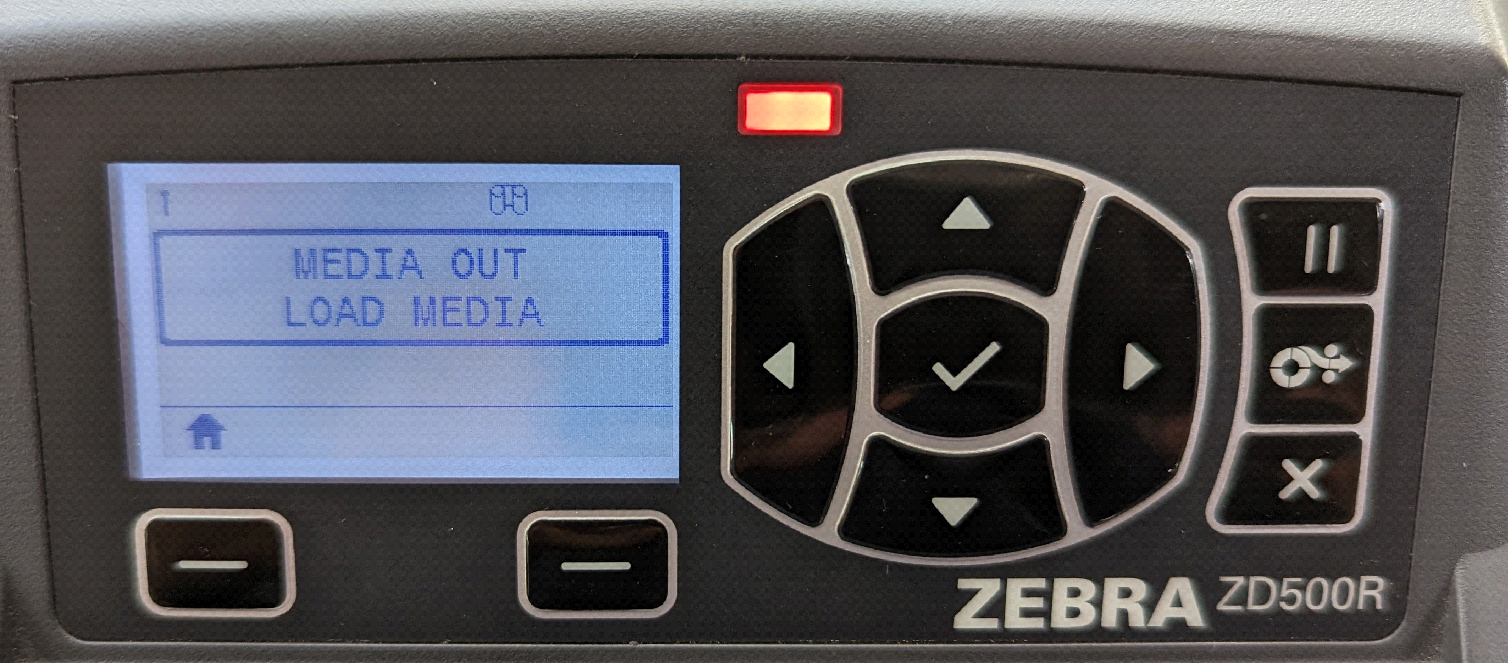
Possible Cause
1. Please check whether the media is not loaded incorrectly, load media correctly.
2. Check if there is Misaligned media sensor, adjust the position of the media sensor.
3. If the printer is set for noncontinuous media, but continuous media is loaded. Install the proper media type or reset printer for the current media type and calibrate the printer.
Procedure for calibration of label media with liner and inter-label ‘GAP’ between labels.
1. Load the printer with your chosen label media. Verify the media sensor is in the centre position for label gap (transmissive) sensing.
2. Remove the first 3 inches or 80 mm of labels from the liner. Place the label-less liner over the platen (driver roller) and the leading edge of the first label under the media guides.
3. Close the printer. Turn the printer power ON. Press the menu’s ‘Home’ button.
4. Navigate to the ‘SENSORS’ menu button and press the ‘Select’() button.
5. Use the ‘Left’ and ‘Right’ navigation arrows to browse to the ‘MANUAL CALIBRATION’ procedure.
6. Press the select button (—) below the START on the lower right hand of the display.
7. The display will have a message: LOAD BACKING PRINTER PAUSED
8. Press the Pause button once to start the calibration procedure. When it has finished the first part of the calibration, the display will read: RELOAD ALL CONTINUE.
9. Press the Pause button once again to continue the calibration procedure. The printer will begin feeding several labels and then it will stop with the display message reading: READY
Possible Cause
In thermal transfer mode the end of the ribbon roll has been detected.
1. Then replace the empty ribbon with a new roll.
1. If printhead is damaged, replaced incorrectly, or was replaced with one that is not a genuine Zebra™ printhead. Then please Install a genuine Zebra™ printhead.
1. Check if the printhead is dirty, Clean the printhead
2. Please check if the printer is set at an incorrect darkness level and/or print speed. for optimal print quality, set the darkness to the lowest possible setting for you for bar codes and balance that with graphic and text quality in your application. Do not set print speeds above the manufacturer’s maximum rated speed for your media or ribbon.
3. Check if you are using an incorrect combination of labels and ribbon for your application.
I. Switch to a different type of media or ribbon to try to find a compatible combination.
4. You may be using the wrong power supply
I. Verify the printer has the correct 100Watt power supply that came with this printer.
5. The printhead has worn out.
I. Replace the printhead. The printhead is a consumable item and will wear out due to friction between the media and printhead. Using unapproved media may shorten life or damage your printhead.
6. The platen may need cleaning or replacement.
I. Clean or replace the platen (drive) roller.
1. A label format was sent to the printer but was not recognized. The DATA light does not flash.
Possible Cause
A. The communication parameters are incorrect.
I. Check the printer driver or software communications settings (if applicable).
II. Check your printer communication Interface with your computer, if your printer is connected with ethernet, ping the IP address of printer in your pc.
III. When the printer is directly connected to the PC, make sure the PC is on the same network & subnet as the printer or vice versa.
IV. After connecting the ethernet cable to printer, just check the pinging status of the Printer.
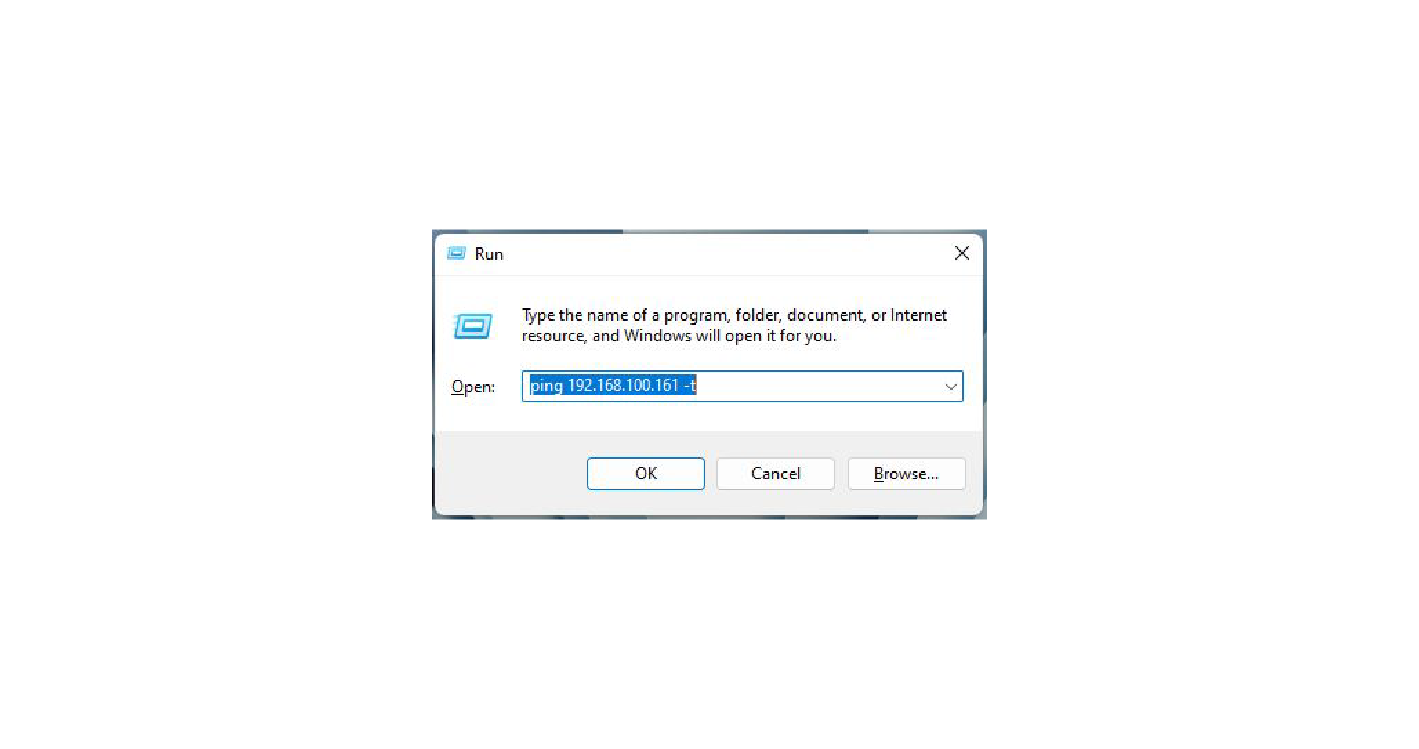
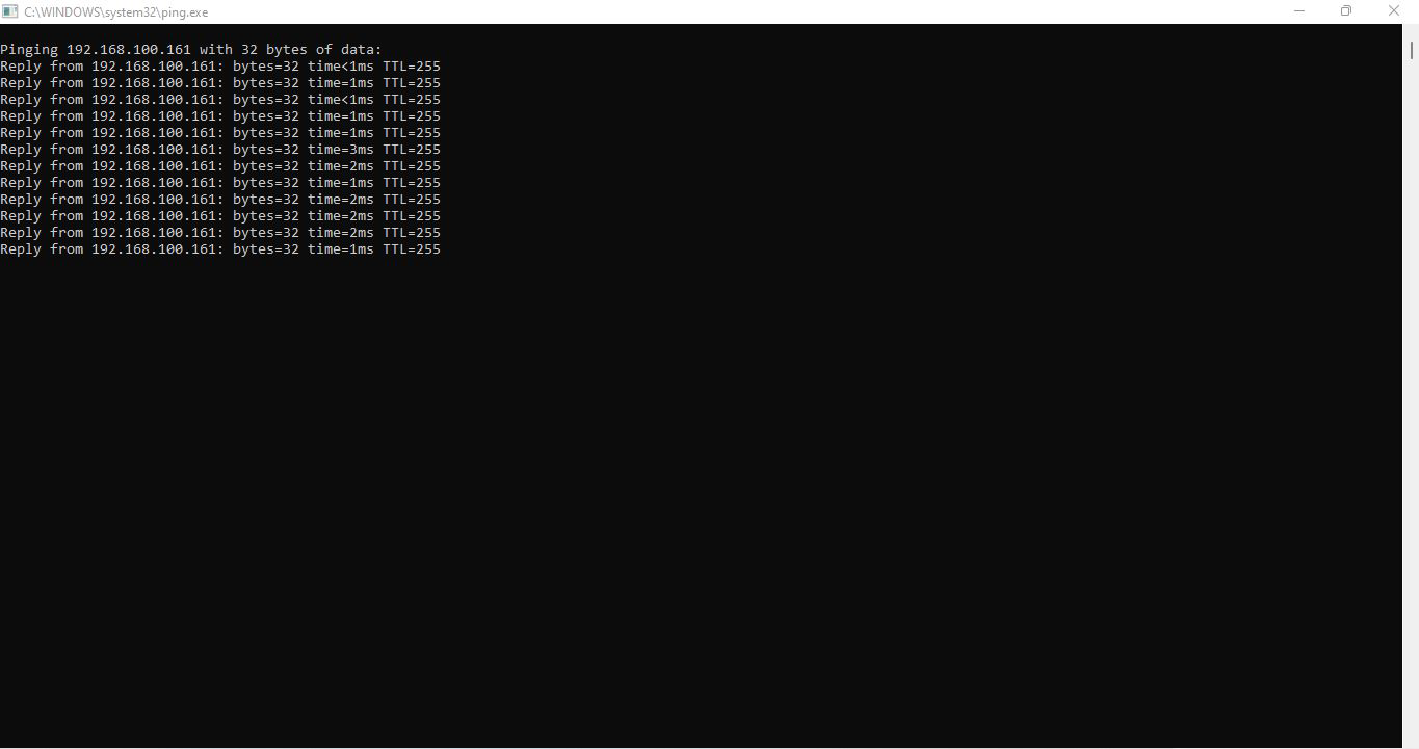
V. Open the command prompt and type the command as:
VI. "ping < Printer IP > -t"
VII. For example, the Printer IP address is 192.168.100.161; so, command is "ping 192.168.100.161 -t". Refer the image above.
VIII. If the ping is successful.
IX. you will probably see the reply as “Reply from 192.168.100.161: bytes=32 time=2ms TTL=64”, as shown below:
If the printer encodes the wrong tag or printed data does not match the encoded data. It means, the printer is not calibrated for the media being used.
Recommended Solution is
1. Perform media calibration.
2. Perform RFID tag calibration
I. Press the feed button once to feed (advance) one label.
II. Press the menu’s ‘Home’ button. Navigate to the ‘RFID’ menu button and press the ‘Select’ button.
III. Use the ‘Left’ and ‘Right’ navigation arrows to browse to the ‘RFID CALIBRATE’ procedure. Press the select button (—) below the START on the lower right hand of the display.
IV. The printer will slowly feed a label while adjusting the location and RFID read/write communication settings for your chosen RFID tag/label. The printer will feed an additional label in some cases when calibration has completed successfully with the display message reading: READY
V. Remove excess media. media calibration has finished, and you are ready to print.
3. if necessary, adjust the RFID settings manually
Note: For demonstration purposes, Zebra ZD500R is taken as an example.
To connect the Printer with the TagMatiks AT Lite application with LAN follow the below mentioned steps:
1. To connect the printer with the IOS device, Open TagMatiks AT Lite and log into it. Tap on Settings.
2. Select printer option available in the settings option
3. Tap on No printer connected to start making connection with the Zebra ZD500R.
4. Select the Network Connection as “NETWORK”. Enter the IP address of the printer & Printer Name to complete the connection and tap on save.
Note: For example here the IP Adress of the printer which is on LAN Network is 192.168.100.161
5. An acknowledgement will appear stating “Printer Details Saved successfully.” Now you can start printing your new Tags as you create new assets.