This article covers the Part Master module. The intent of the part master is to simplify adding base data regarding your assets in TagMatiks AT Lite. In most cases, businesses have many assets that are similar and to reduce the efforts of data entry, the part master allows you to create part numbers that can be assigned to assets.
No prerequisites are required to start populating the part master.
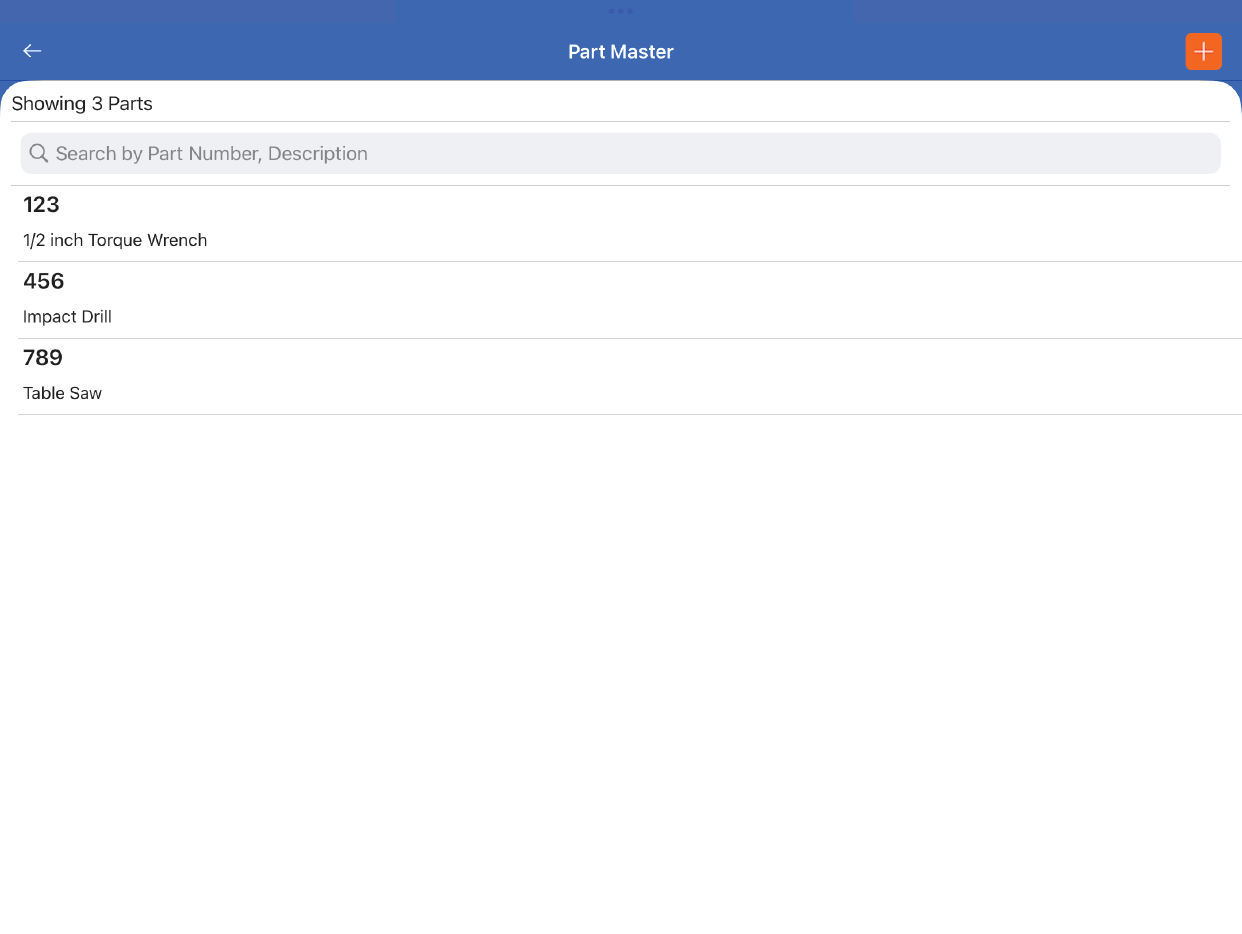
On the Part Master, you will be able to see the list of already created parts. To create a new part, click on the + icon on the top right-hand side of the screen.
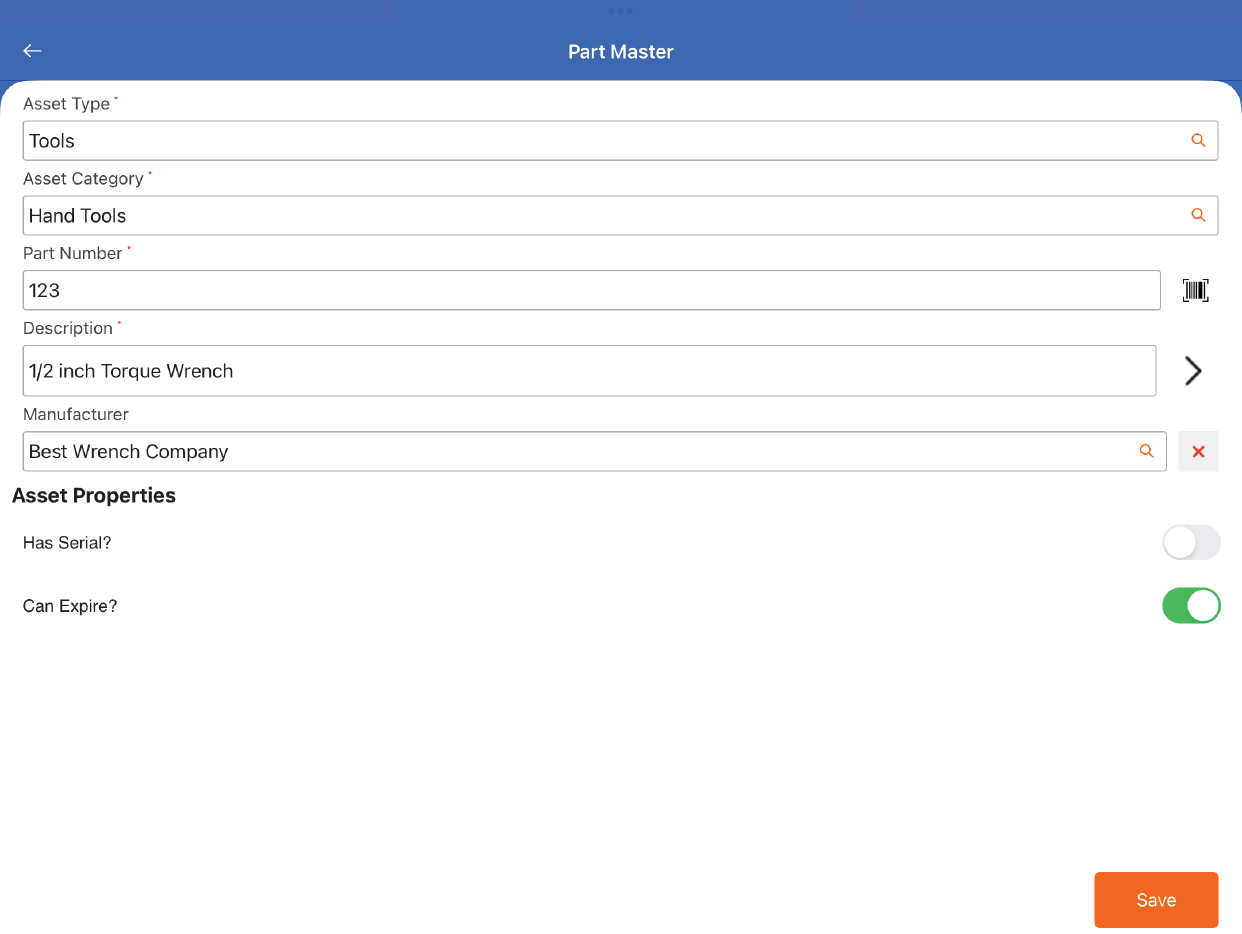
On the Part Creation page, there are various fields that can be populated regarding the specific part.
The first two fields are Asset Type and Category. These fields allow us to group parts (and thus assets) so we can easily run reports on assets. The hierarchy is that an Asset Type may have many Categories. Equally, each part would also have a part number and a description that we can reference when creating that asset. You can also optionally associate a manufacturer to each part.
Tools (Asset Type)
To create your first Asset Type, select the search icon on the field. This will allow you to view the Asset Type module. To create a new Asset Type, click on the + icon on the top right-hand side of the screen. Enter the Asset Type, optionally enter a description. Press the Save button.
Follow the same steps for the Asset Category. You can not have duplicate Asset Categories under the same Asset Type.
The part number can be either auto-generated or you can enter your own. Note that the part number is unique and can not be duplicated.
To add the description, click on the tab icon next to the description field.
Optionally, you can also add a Manufacturer. The steps are similar to adding an Asset Type or Category.
Lastly, you can also specify properties for assets. The two properties available are Has Serial and Can Expire. If Has Serial is enabled, then when creating an asset, the user will be prompted to enter a serial number for the asset. Similarly, if Can Expire is prompted, then the user will be prompted to enter an expiry date for the asset when creating an asset.
To finish adding the Part, press Save. The new part should display on the Part Master page and can be used when creating an asset.