TagMatiks AT Lite is designed to be used out of the box. However, there are certain features that may be applicable to certain use cases or approaches to leveraging RFID technology. To provide flexibility, there is a configuration section on TagMatiks AT Lite where certain features can be enabled or can be adjusted.
No prerequisites are required to set the configurations.
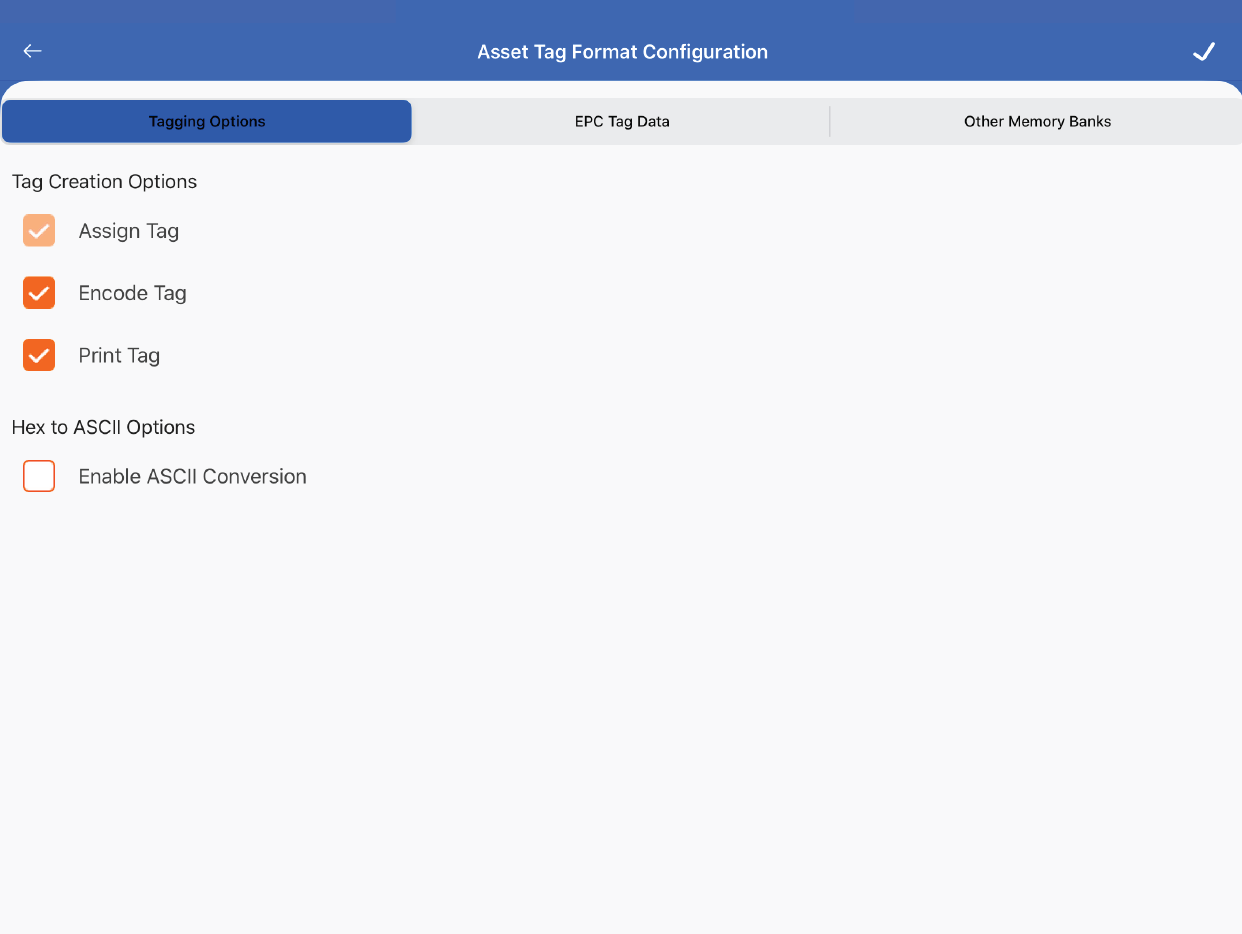
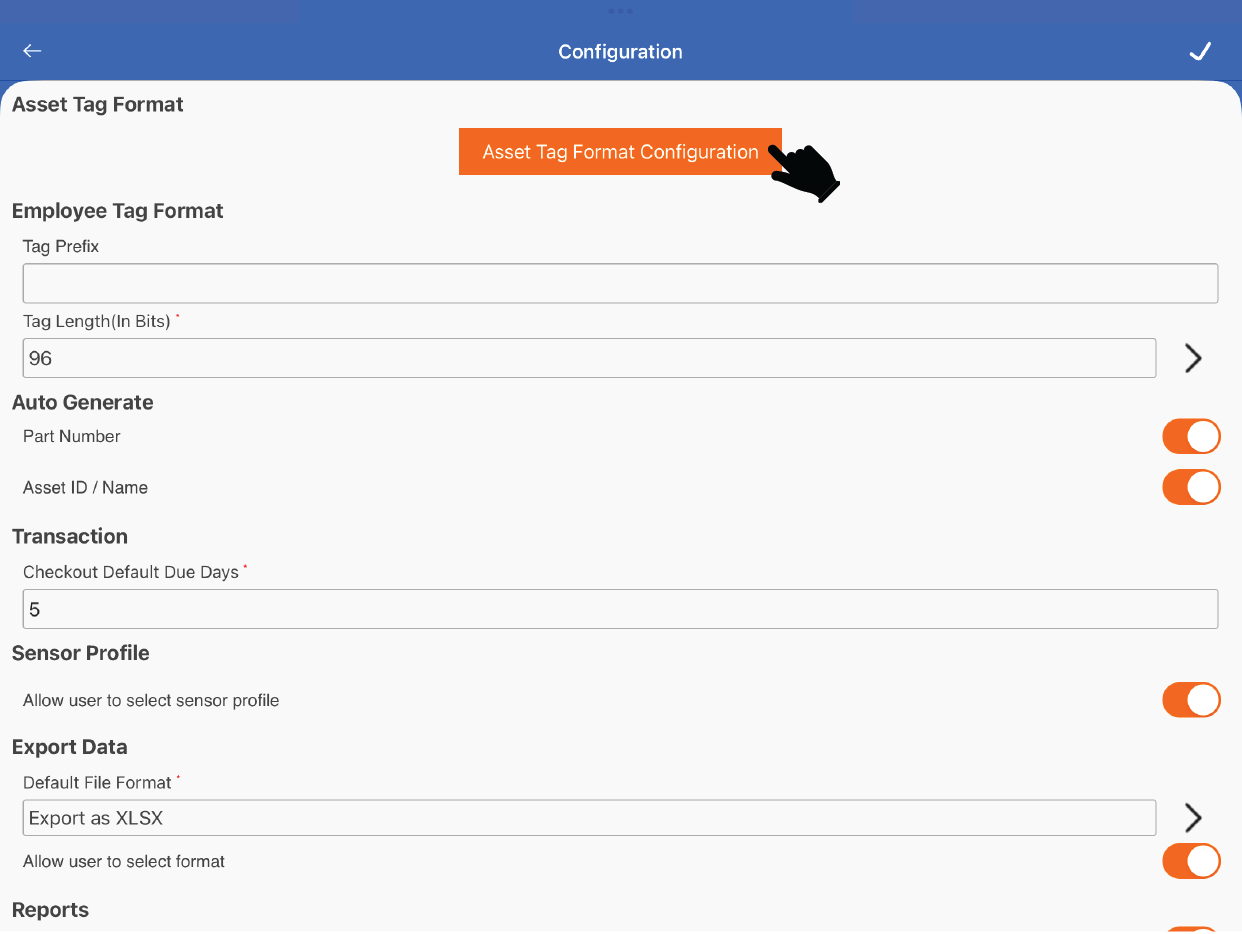
The asset tag format configurations allow users to modify the behaviour of associating RFID tags to assets. To access the Asset Tag Format Configurations, click on the button. On this page, you will see tabs for Tagging Options, EPC Data and Other Memory Banks.
Under Tag Creation Option, Assign Tag will be enabled by default. TagMatiks AT Lite does also have the ability to Encode or Print RFID Tags.
If you enable Encode Tag or Print Tag then when creating assets, you will have the ability to use these options for associating RFID tags.
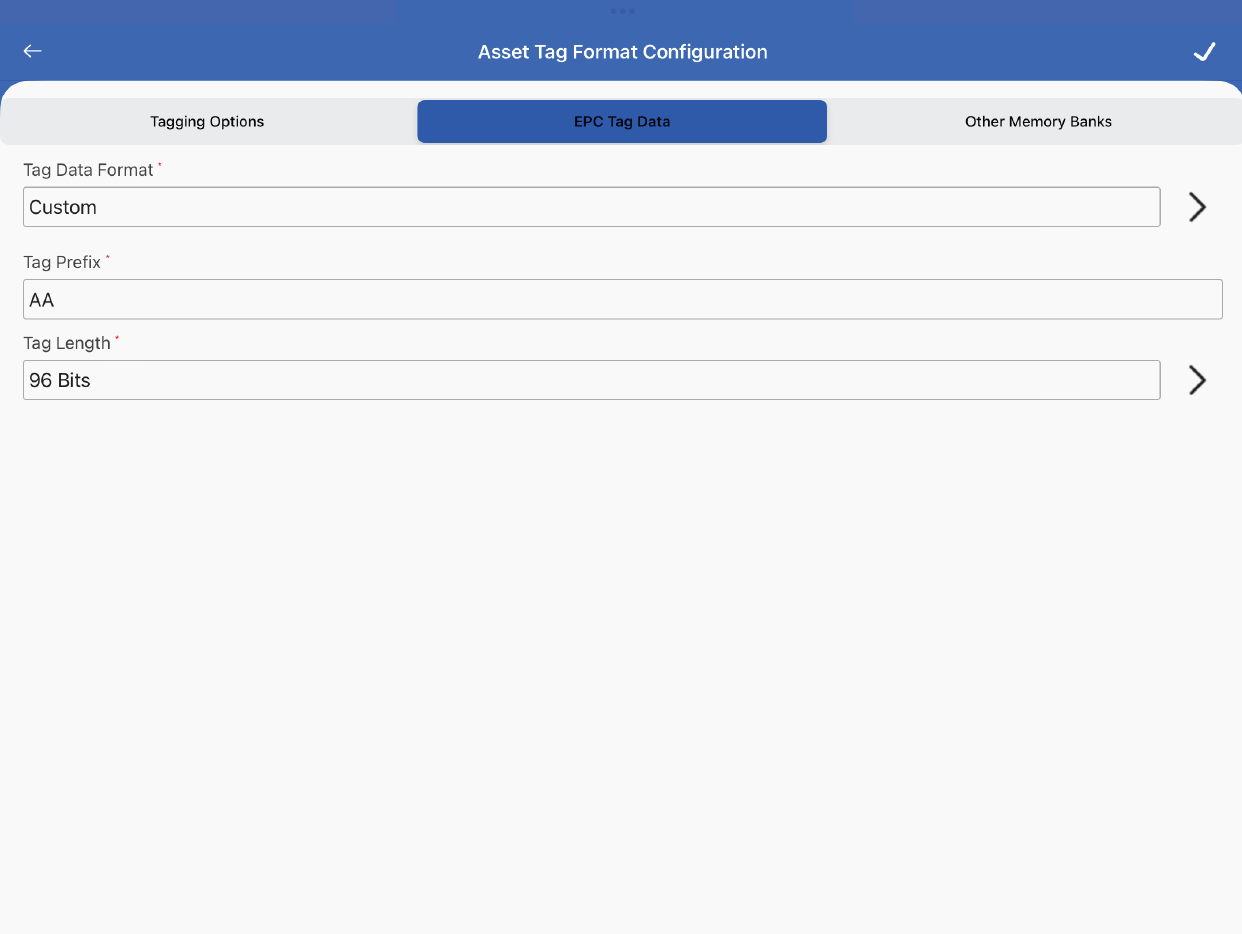
The EPC Tag Data tab allows you to configure the content that is used to generate the EPC value if you are encoding or printing RFID tags/labels.
You can choose the following options - Tag Data Format: Either choose a custom schema where you can define your own encoding rules or use the SGTIN format.
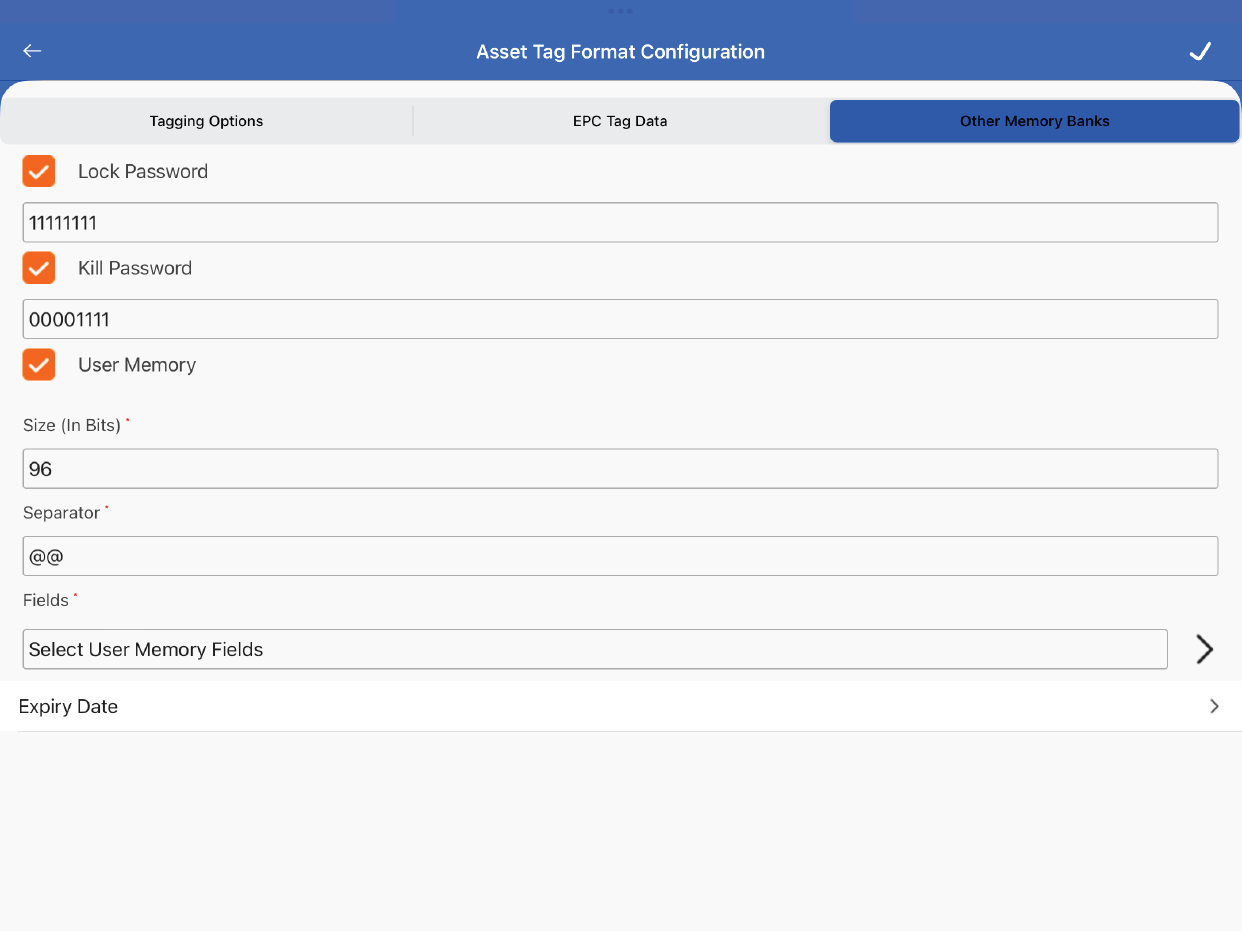
The Other Memory Banks tab lets you enable the banks for the lock password, kill password as well as the user memory bank. By default, they are disabled.
For the lock password and kill the password, based on the UHF (RAIN) standard, the values are defined in hexadecimal (A-F, 0-9) for a maximum of 8 total characters.
For the User Memory bank option, the size in bits is how large the user memory bank is defined on your desired tag. You need to define a separator that is used in between the desired fields you are looking at adding.
The options outlined above are advanced and for that reason, we recommend you to stick with TagMatiks Pre-Printed, Pre-encoded tags and labels.
This feature enables the application to show the Tag ID of the Asset in ASCII format as well. To enable this feature, please follow below steps:
1. Login into TagMatiks AT Lite application, then open the "Settings" and then go into the "Configuration"
2. Select "Asset Tag Format Configuration"
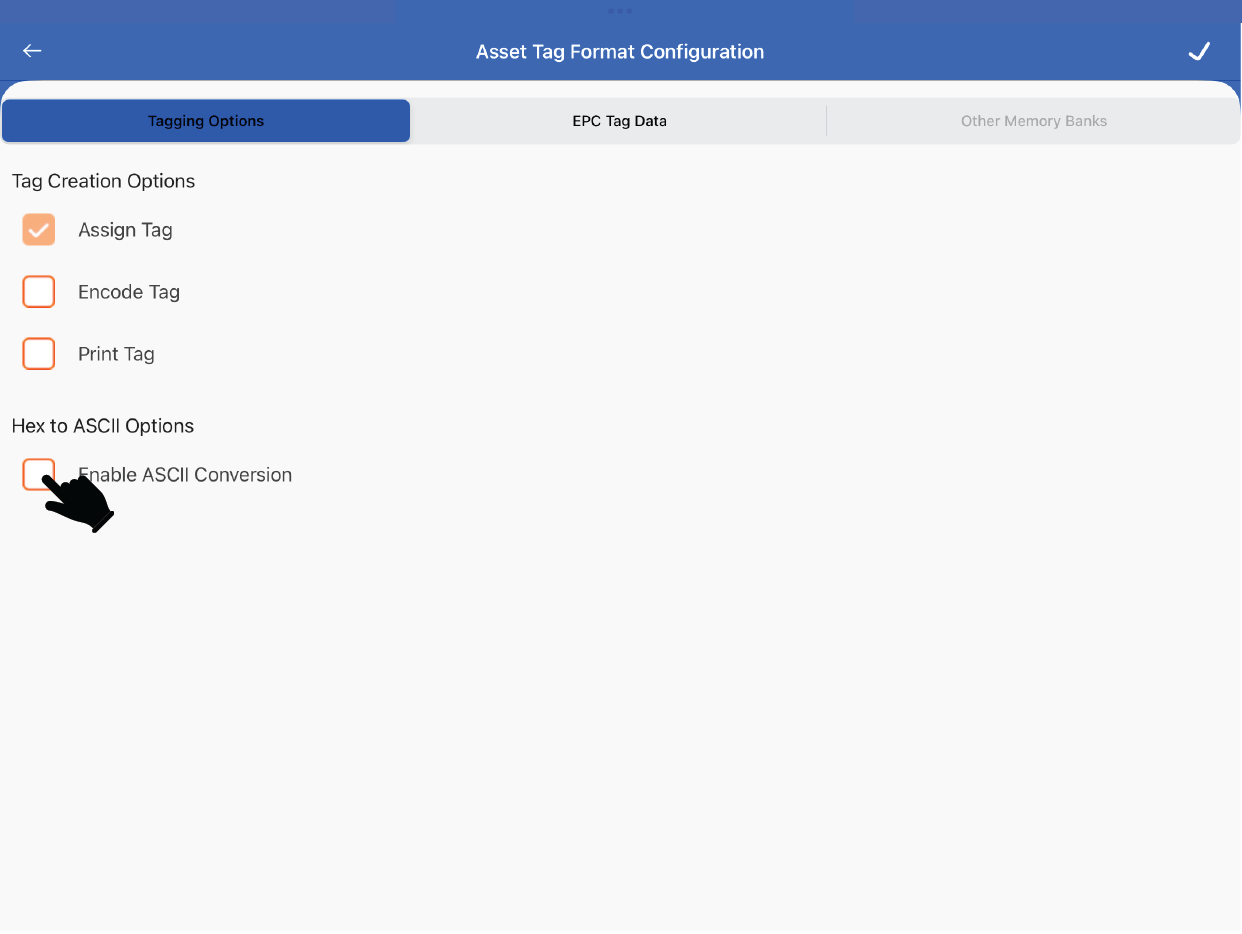
3. Then please make sure you are in "Tagging Options" screen.
4. There you can see the option of “Enable ASCII Conversion” under “Hex to ASCII Options”; as shown in the image below
5. Please enable this feature to have the Asset Tag IDs in ASCII as well.
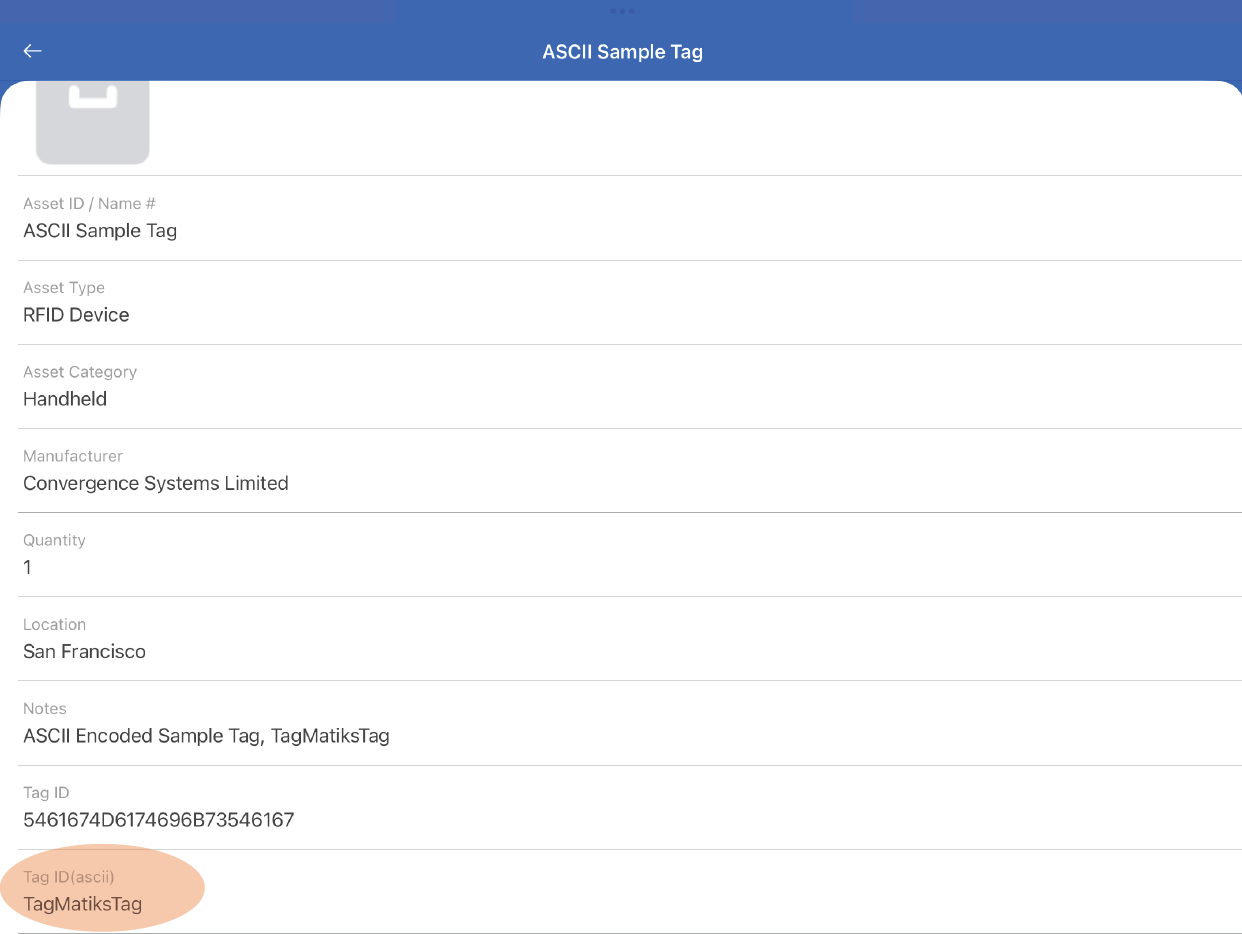
6. After enabling it, now go back to the Assets and check their Tag ID’s.
7. Then the application will be showing the Asset Tag ID’s in ASCII as well.
8. Please refer below image and the encircle "TagMatiksTag" is the ASCII value of Asset Tag, whose equivalent Tag ID in hex is: "546167d6174696b73546167".
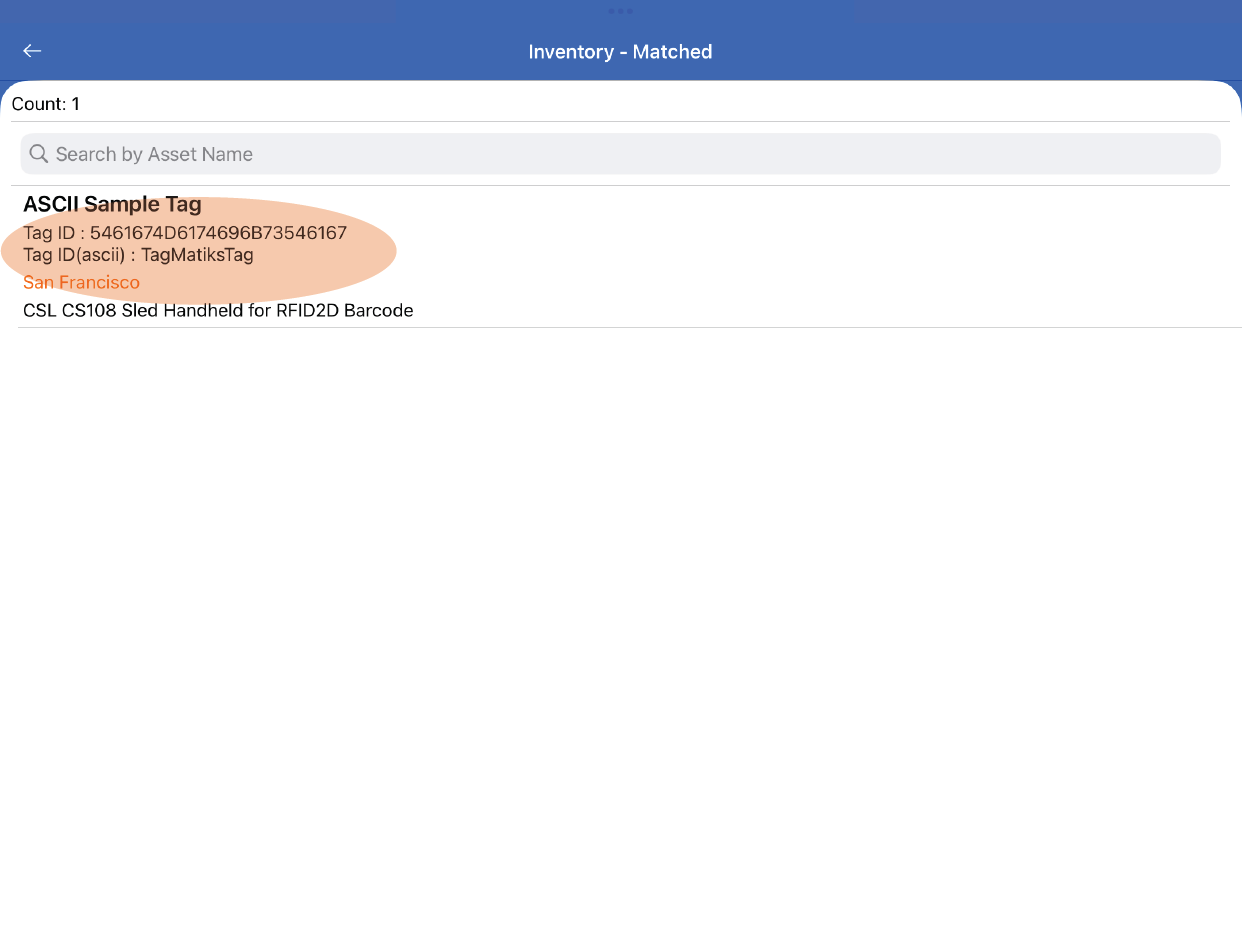
9. Same can also be observed in the “Inventory” as well. Please refer below image.
10. The encircle “TagMatiksTag” is the ASCII value of Asset Tag.
Similar to the asset tag format, TagMatiks AT Lite allows you to define an RFID tag value for employees as well. This functionality is simply for the association as the linking of employee tags and assets tags are only available in TagMatiks AT Enterprise.
The autogenerate tab provides the functionality to auto-generate the values defined for the part number and the asset id/name. If enabled, the values will auto-populate and be autogenerated.
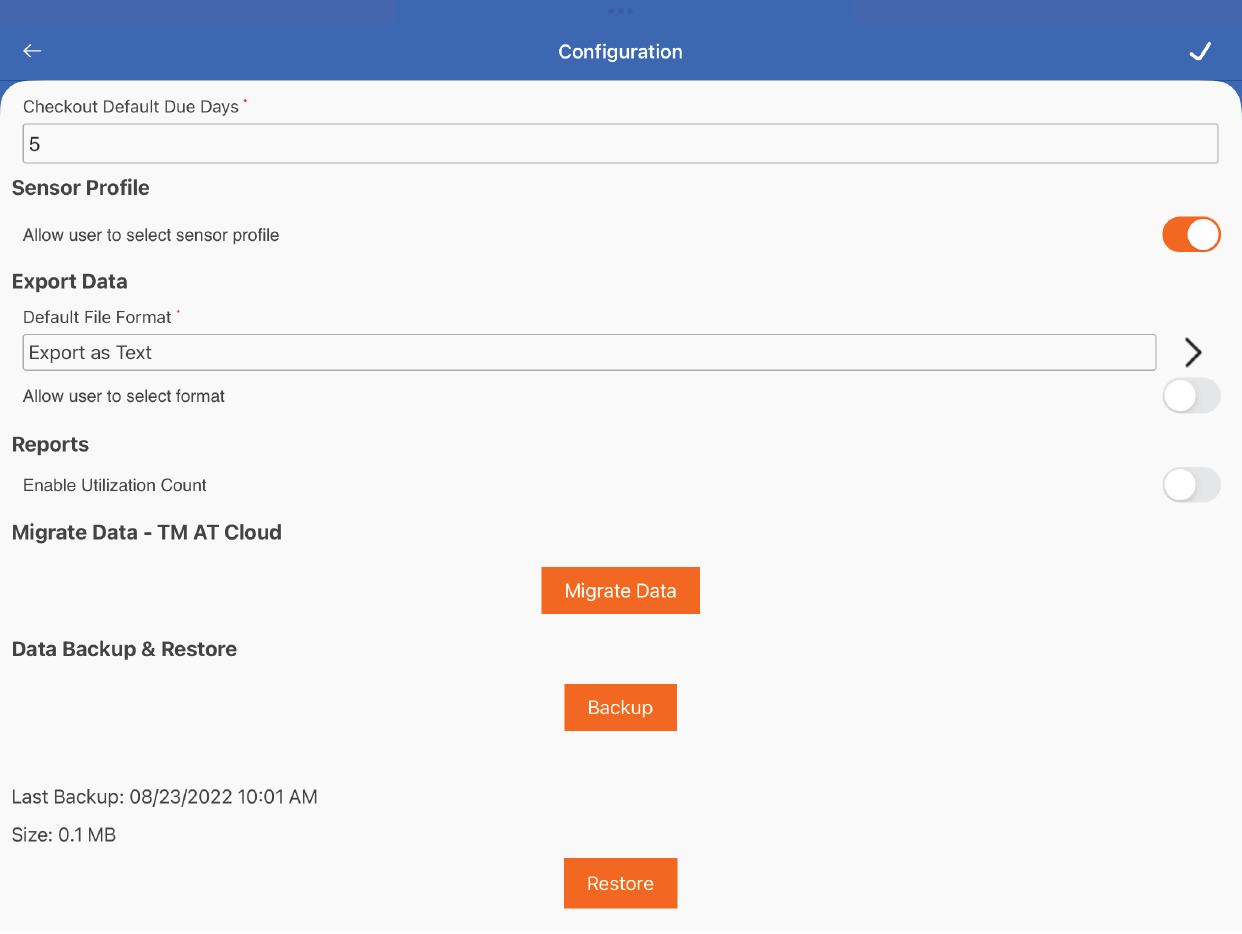
The transaction configuration available is to help define the default number of days after a checkout that an asset is due back. This value is used when using the checkout workflow.
As part of the reporting features in TagMatiks AT Lite, you can set a default file format when generating reports so it doesn’t ask you to choose every time. In addition, you can also choose to allow the user to be able to select the format of the report.
Under the reports section, a feature in TagMatiks AT Lite is to be able to track how many cycles an asset has been checked in and out. The option to enable the utilization count will keep track of these cycles and display them under the reporting.
Please see the articles Migrating to a New Device & Migrating to TagMatiks AT Lite for more details on these topics.