This article provides information about setting up & configuring the skID RFID readers with TagMatiks Asset Tracking Lite.
This document is divided into multiple sections as:
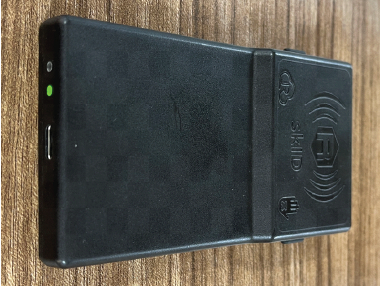
The skID (Model R1280IE/U) is the portable reader with integrated antenna and ideal for Asset Tracking & Inventory Management applications. skID reader is designed to achieve fast reading speed and can be used in dense tag environments for top-class rated performances. The skID is a perfect addon for any Bluetooth® enabled device (such as an iPhone/Android/Windows based smartphone/laptop/tablet) and can quickly & easily transform the device into a RFID reader.
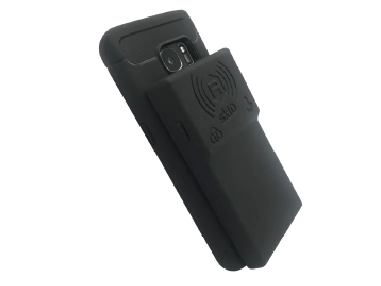
The image below shows a smartphone and skID working together during operation:
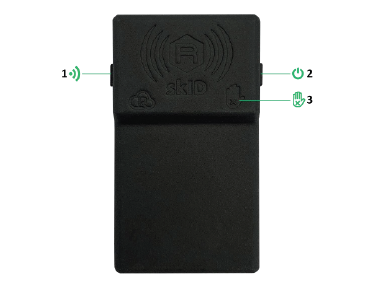
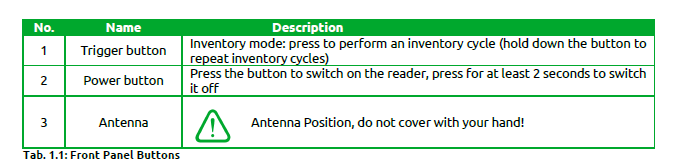
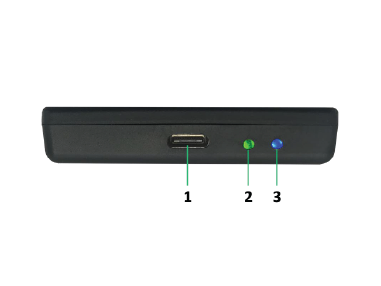
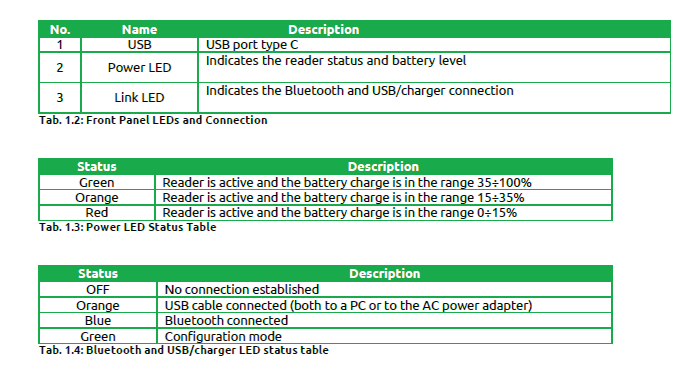
Below image is the front panel view of the skID reader.
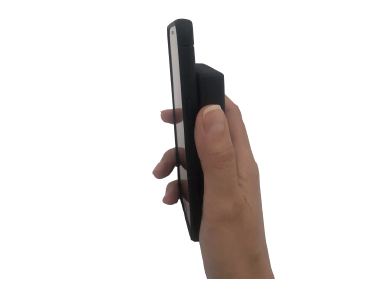
Below image is the bottom panel view of the skID reader.
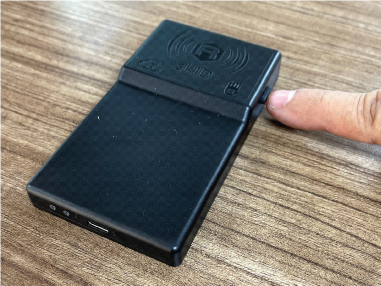
Switching ON the skID Device:
1. Press the Power button continuously for 3 seconds only.
2. Then its LED lights up GREEN along with beep & vibration; which means power is on.
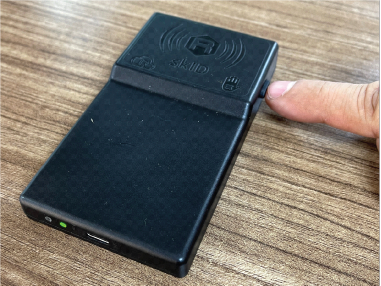
Switching OFF the Device:
1. To switch off when the skID reader is on, press the Power button continuously for 3 seconds only.
2. Then its GREEN LED light is off, which means skID device is powered off.
Immediate after when skID device is powered on,
Then the “Power LED” will turn:-
either, Green - if battery is more than 35%
or, Orange – if battery is more than 15 % & lesser than 35%
or, Red – if battery is lesser than 15%
And the “Link LED” will be off; this acknowledges that the skID device is not connected to any iOS device.
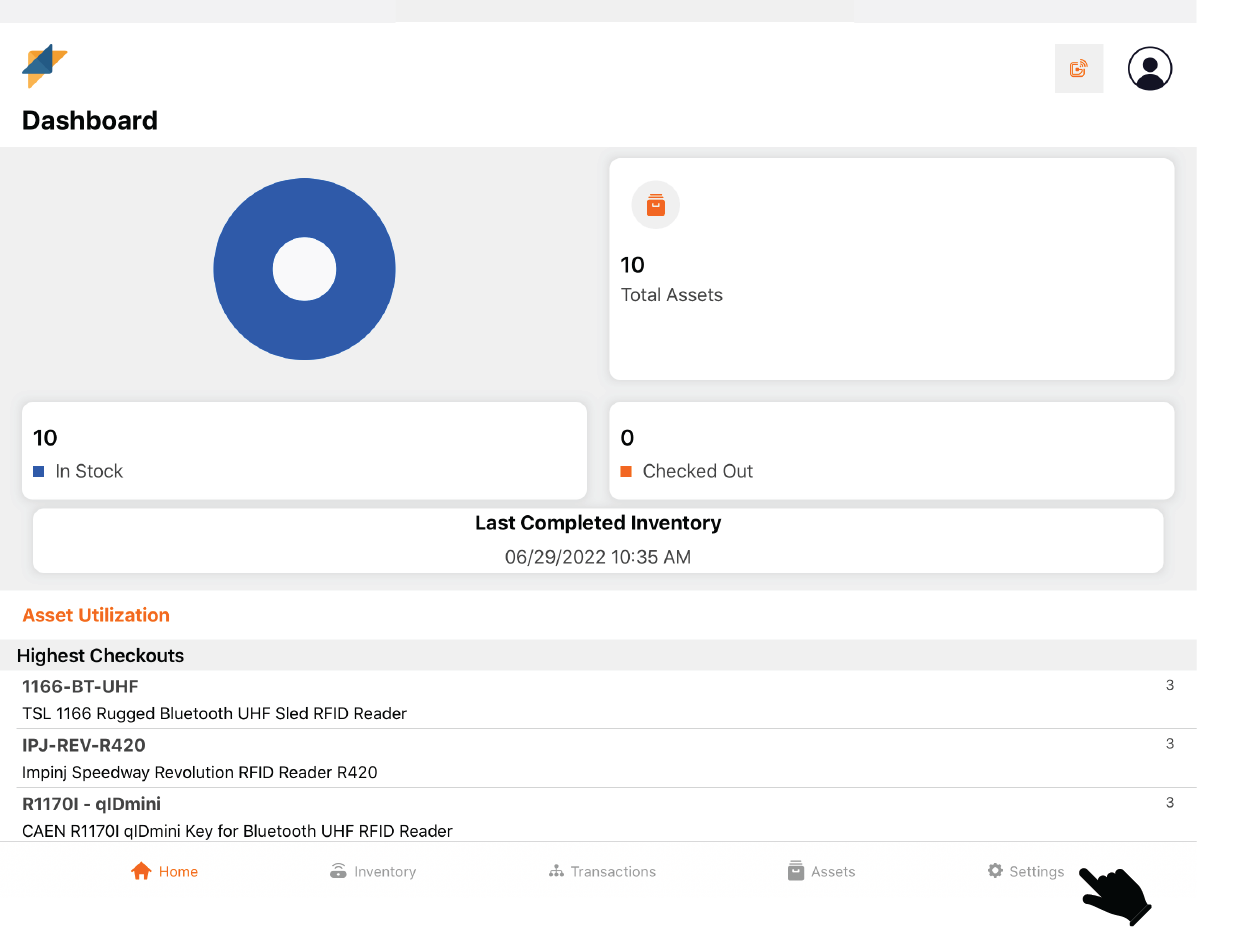
1. Open the TagMatiks AT Lite application and login into it.
2. On the Home Page, click on the Settings Icon (at the bottom right side of screen); as shown below:[Figure 08]
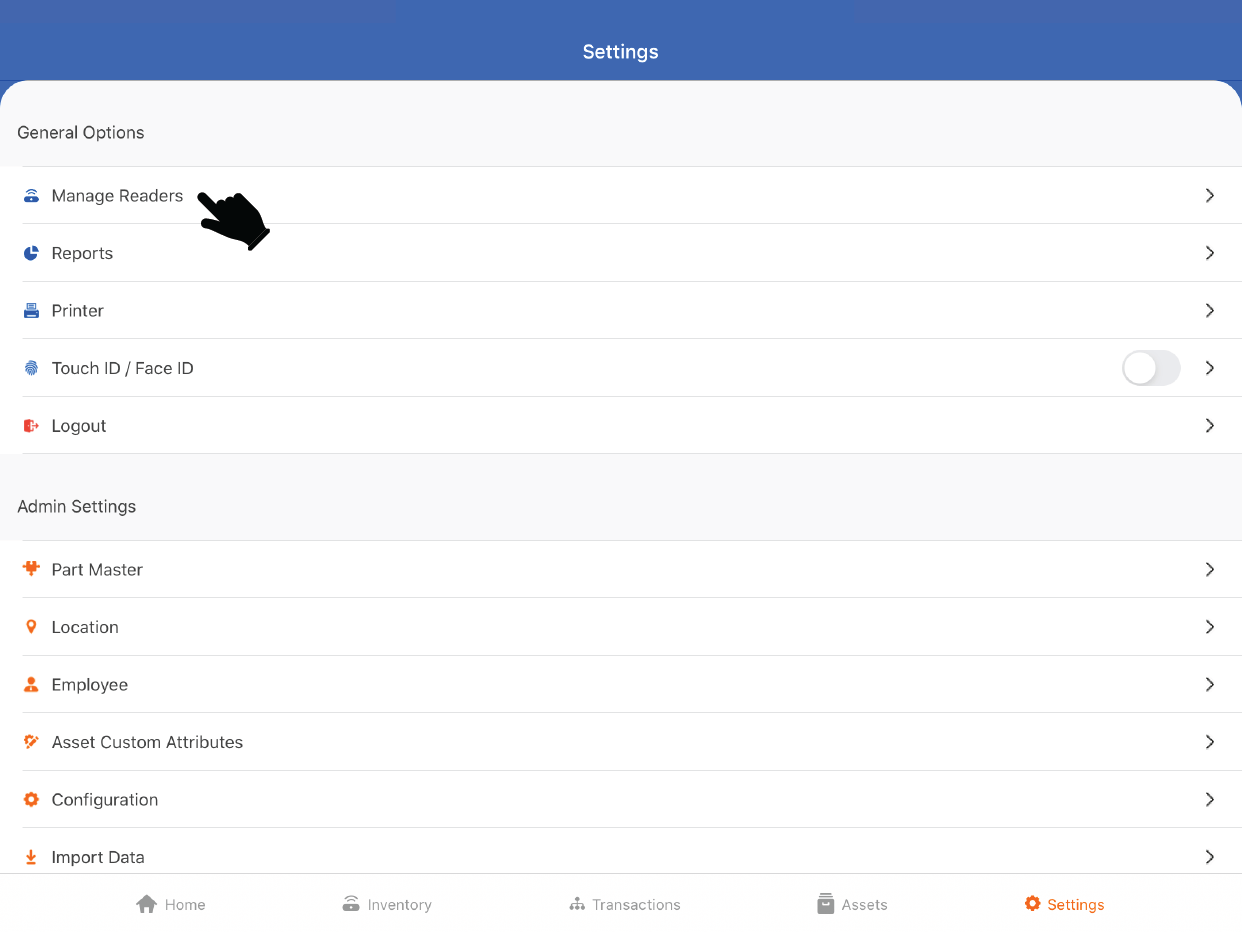
3. To make the connection with skID reader; press the “Manage Reader” button - on the left-hand side of application (highlighted in red color).
NOTE: Make sure the iOS device’s Bluetooth must be on.
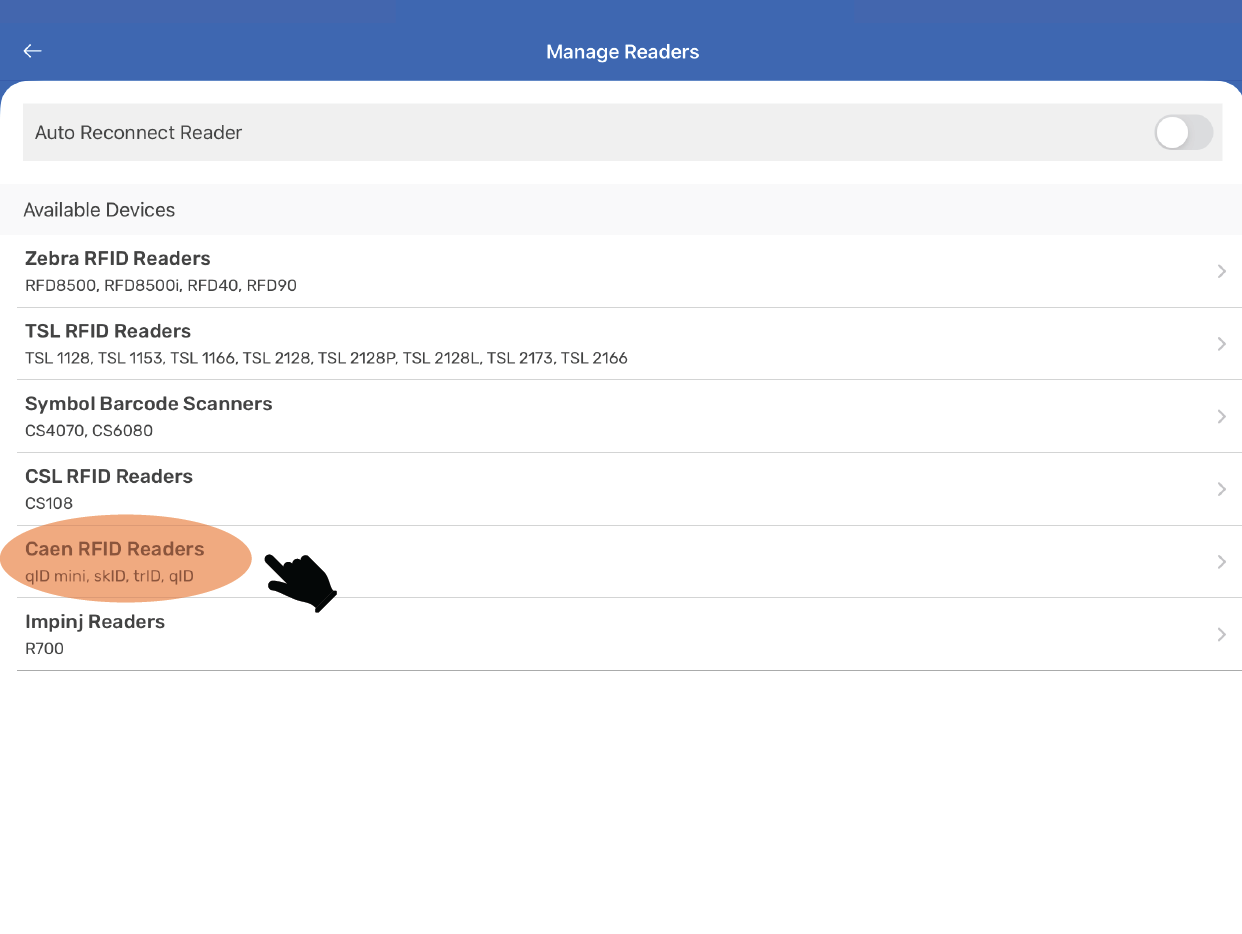
4. Select “Caen RFID Readers” (highlighted with red).
5. Then a new window will open, named: “Readers List.”
6. Bring skID reader close to the iOS device.
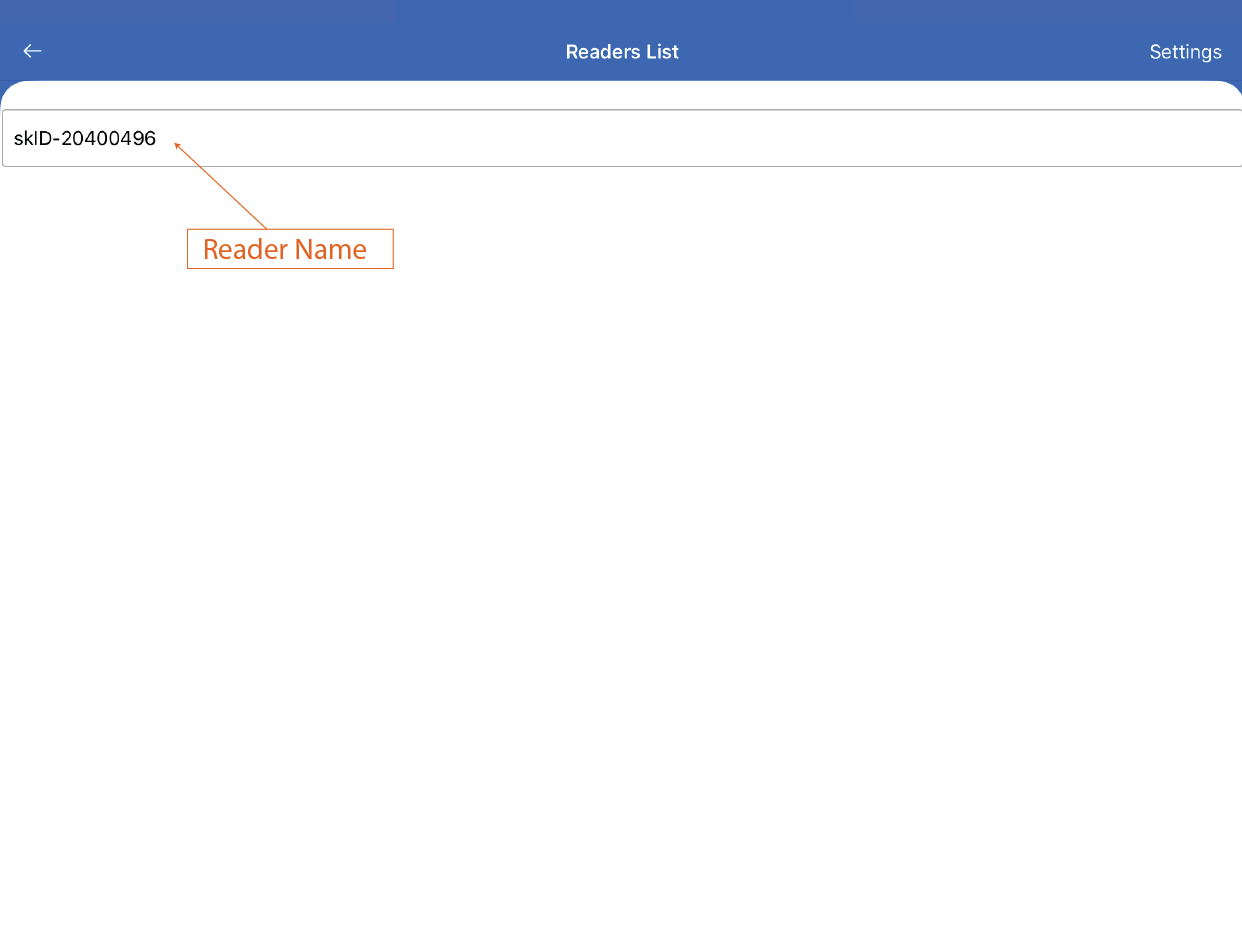
7. TagMatiks AT Lite application will show the discoverable reader’s name; as shown below[figure 11]
8. The reader’s name will be “skID-XXXXXXXX”; where “XXXXXXXX” is the last eight-digit value of device serial number.
9. E.g. In the above image, the value “20400496” is the last eight-digit value of device serial number.
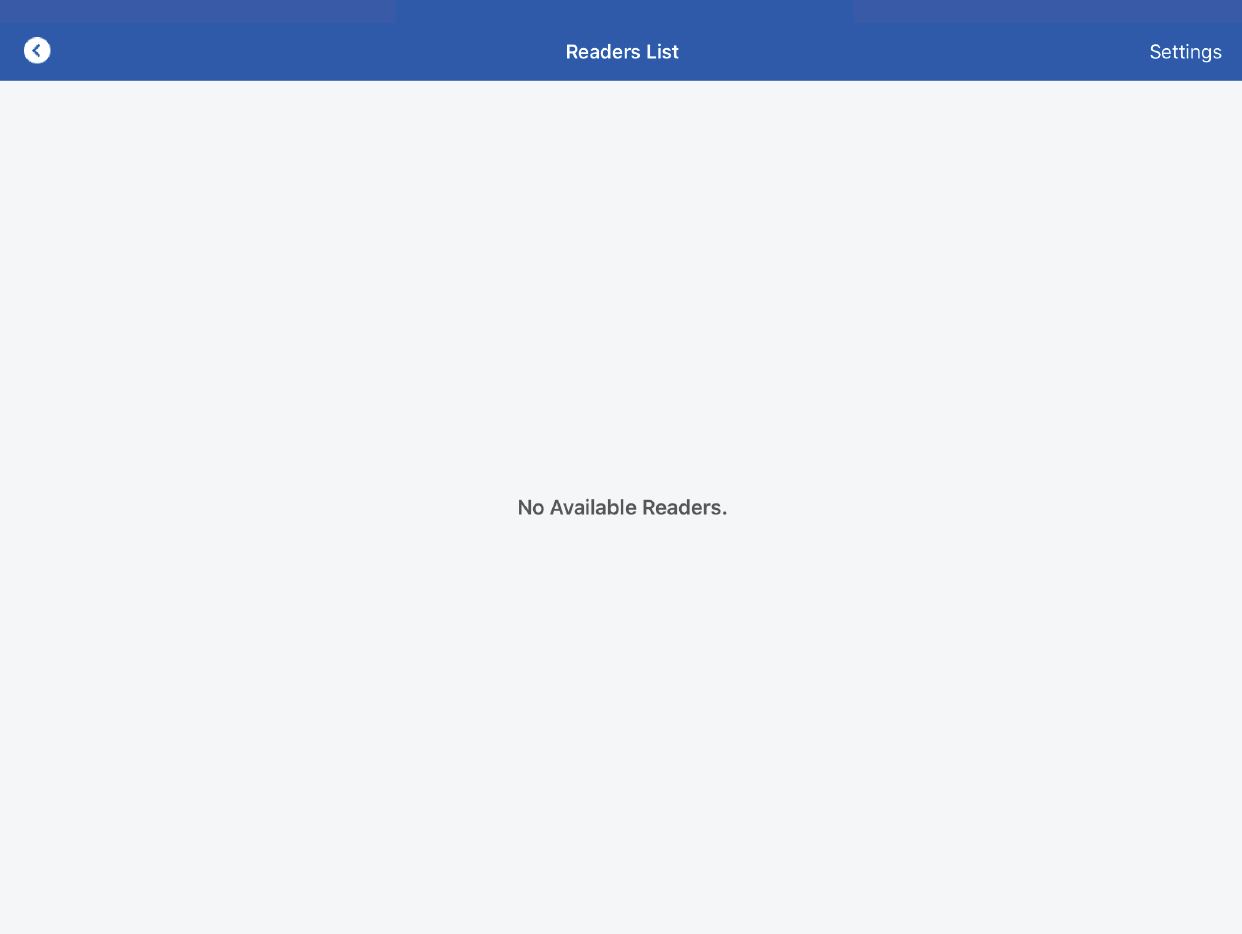
NOTE:
When no skID reader is there nearby the iOS device.
OR
If the Bluetooth of skID reader is Off.
OR
skID Reader is not in pairing mode.
OR
skID Reader is already paired with another iOS/Android device.
Then TagMatiks AT Lite application will show “No Available Readers.” Refer below image.
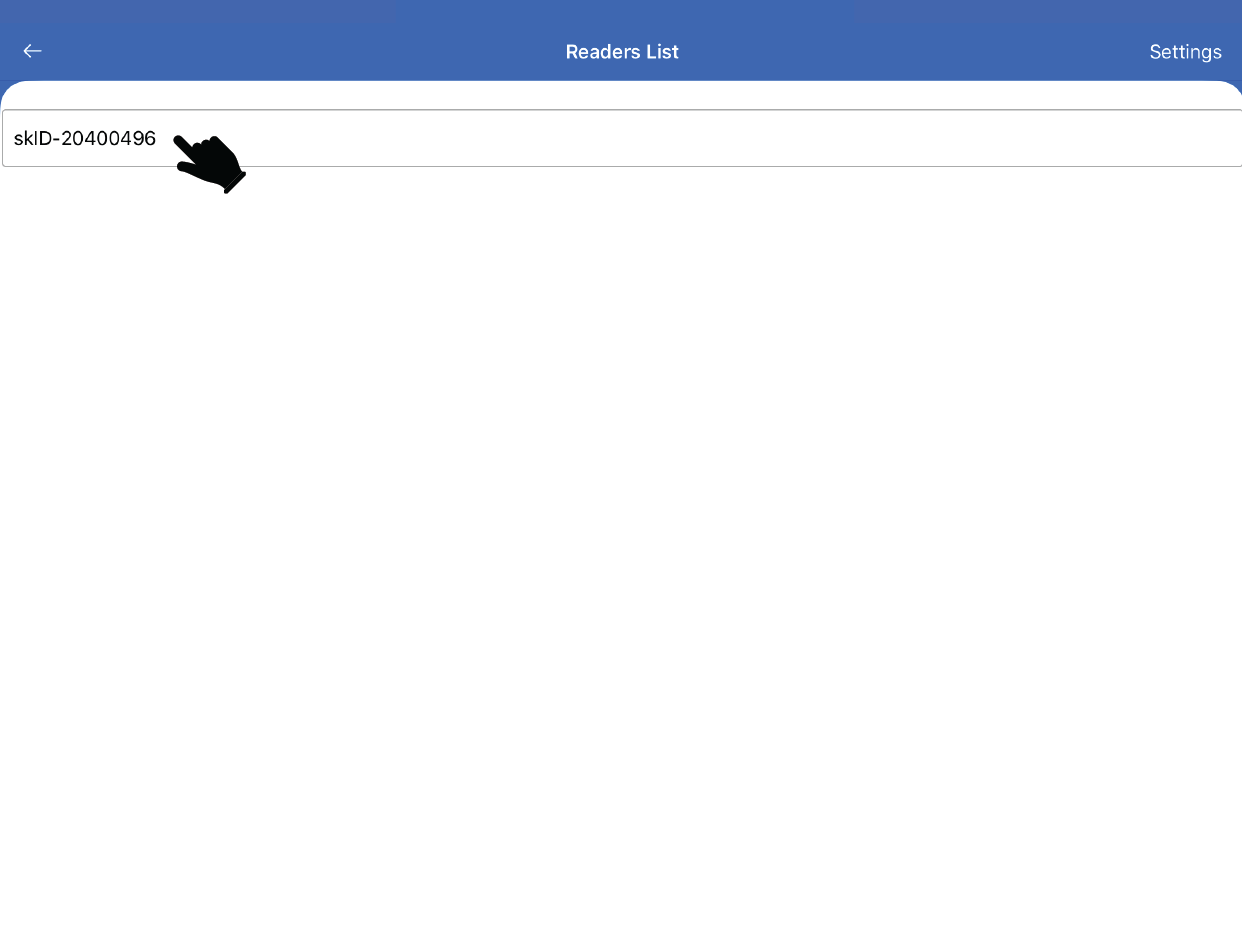
10. Now press on the available Reader name.
11. Once you press on the reader's name, then the application will make a connection with that skID device.
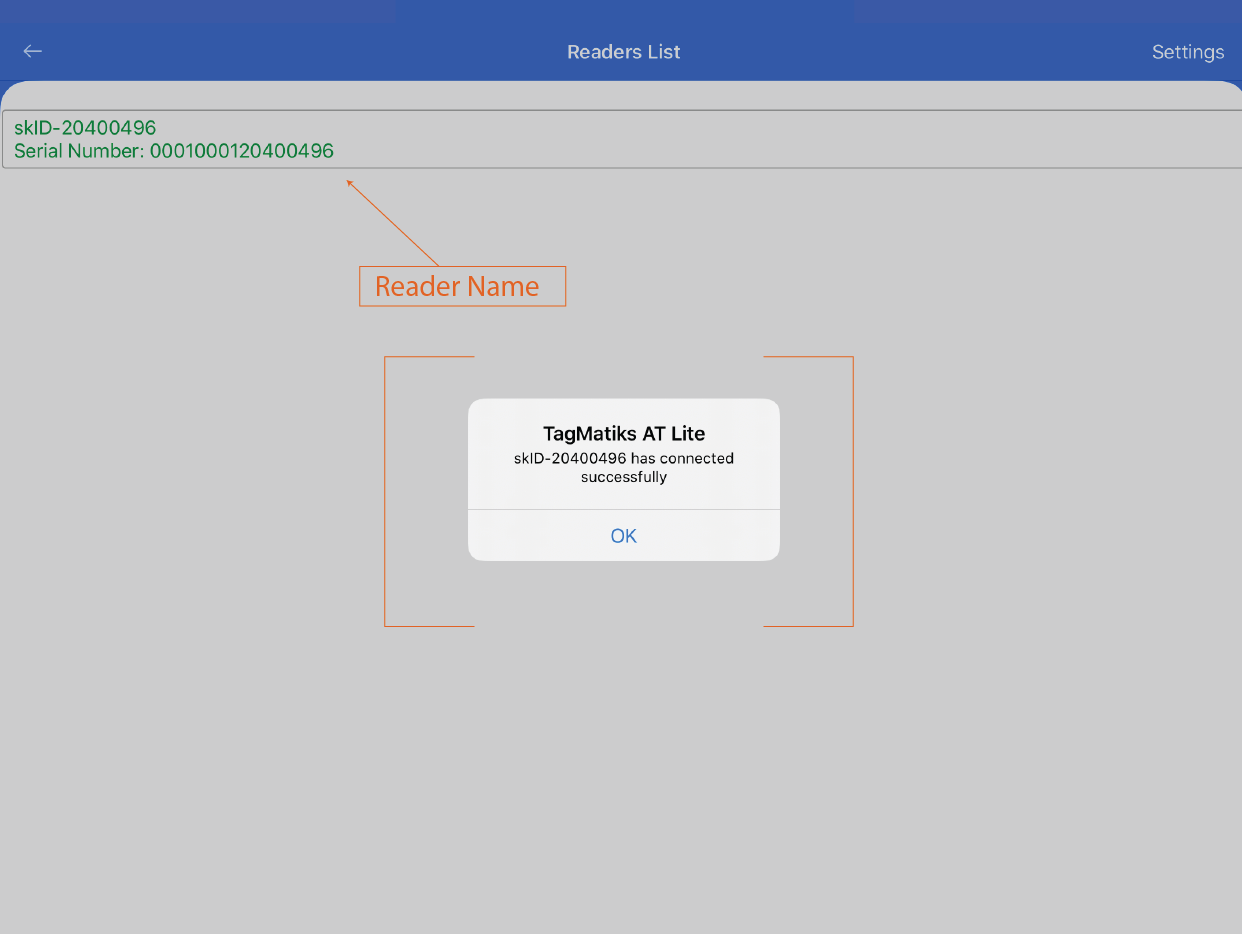
12. On successful connection, an acknowledgment/pop window will come – stating that "skID-204000349 has connected successfully"; refer below image[figure 14]
13. Application will also fetch the Serial number of connected device and show it along with the reader’s name; as shown in above image[figure 14].
NOTE: The TagMatiks AT Lite App directly searches and pairs with skID. There is no need to first pair with the skID via the normal Bluetooth connection.
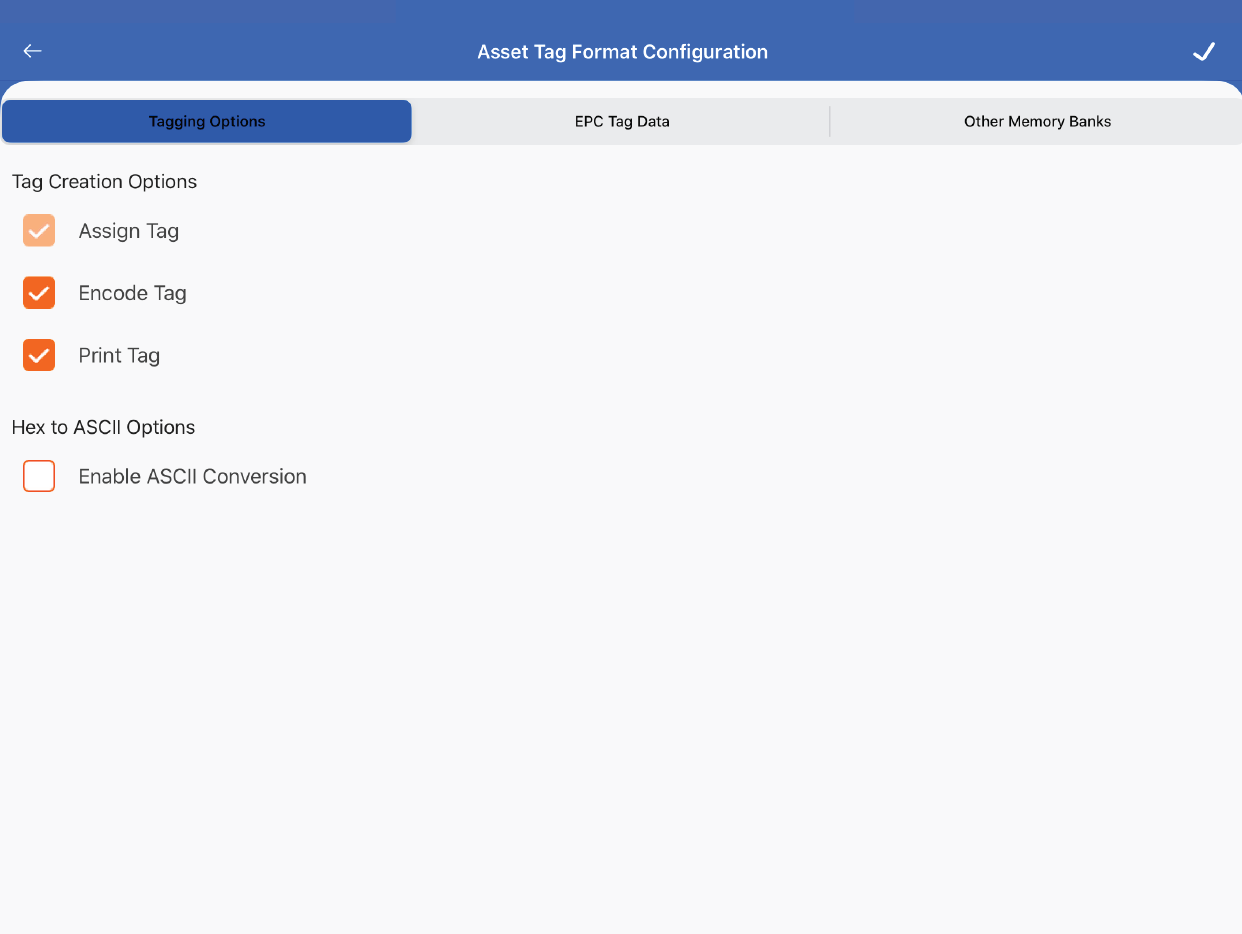
In the TagMatiks AT Lite Application, please first ensure the configuration settings are in sync with the RFID tags.
1. Please click on the Settings Tab and then click on the “Configuration” under “Admin Settings”
2. Please click on “Asset Tag Format Configuration” under Asset Tag Format
3. A new window will open, where you can see tabs for Tagging Options, EPC Data and Other Memory Banks. As shown below image
4. To modify the behaviour of associating RFID tags to assets; please read the article named:"Configured Overview"
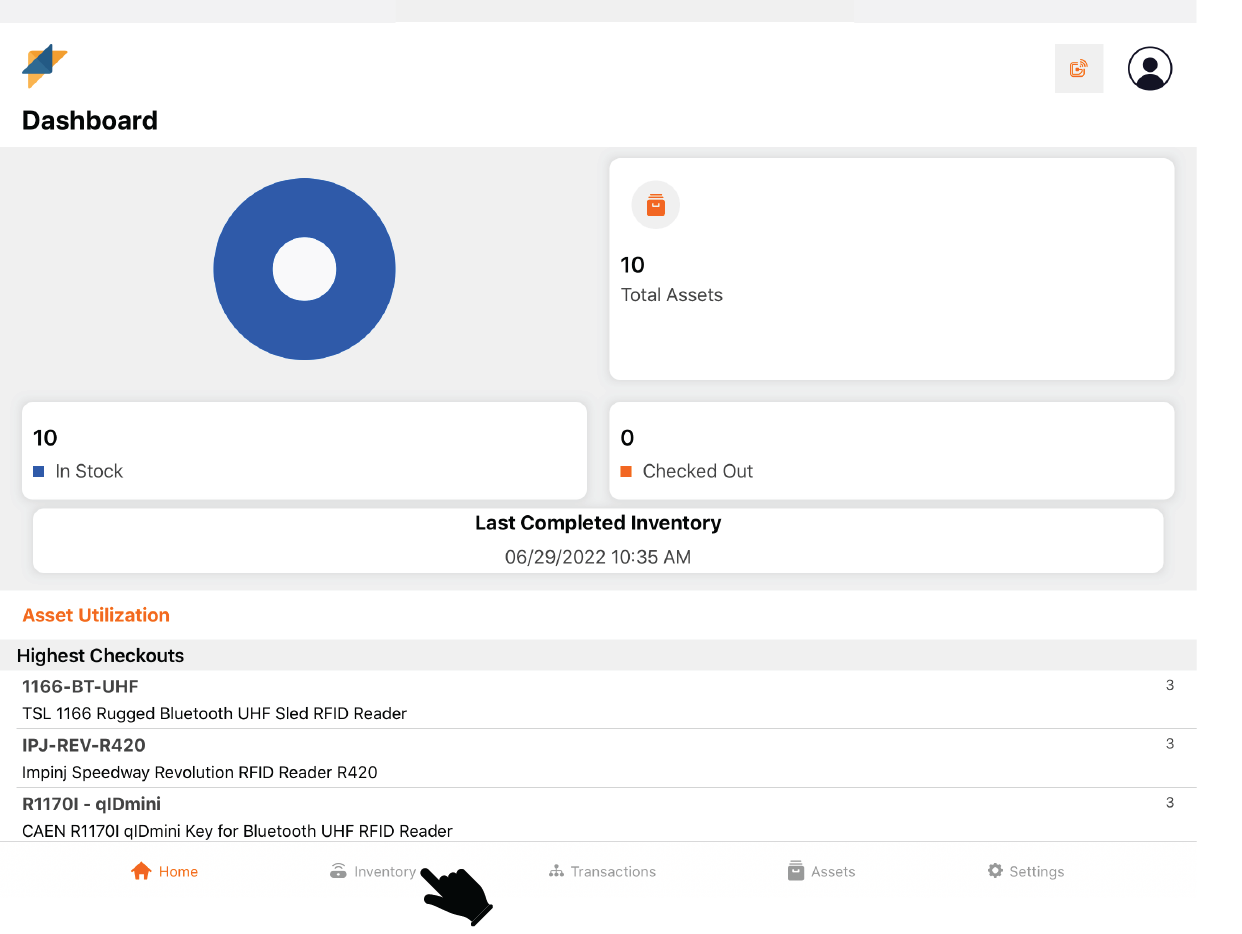
5. Once the tag format configuration is properly saved; go to “Home” page.
6. Press the “Inventory” button - on the bottom left-hand side of application.
7. Then a new window will open, named: “Inventory.”
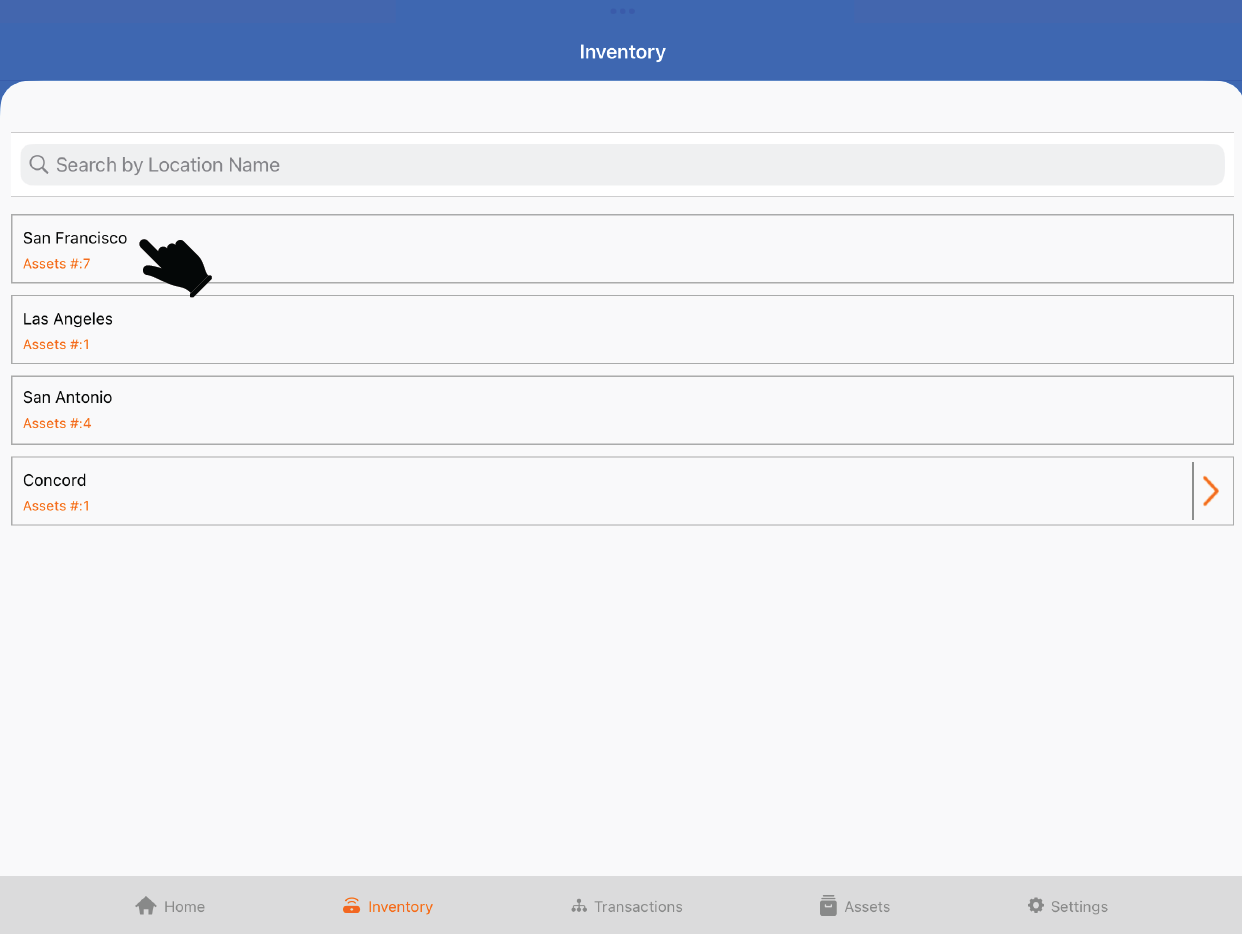
8. For taking the inventory, click on the any Location; like here it clicked on “San Francisco”
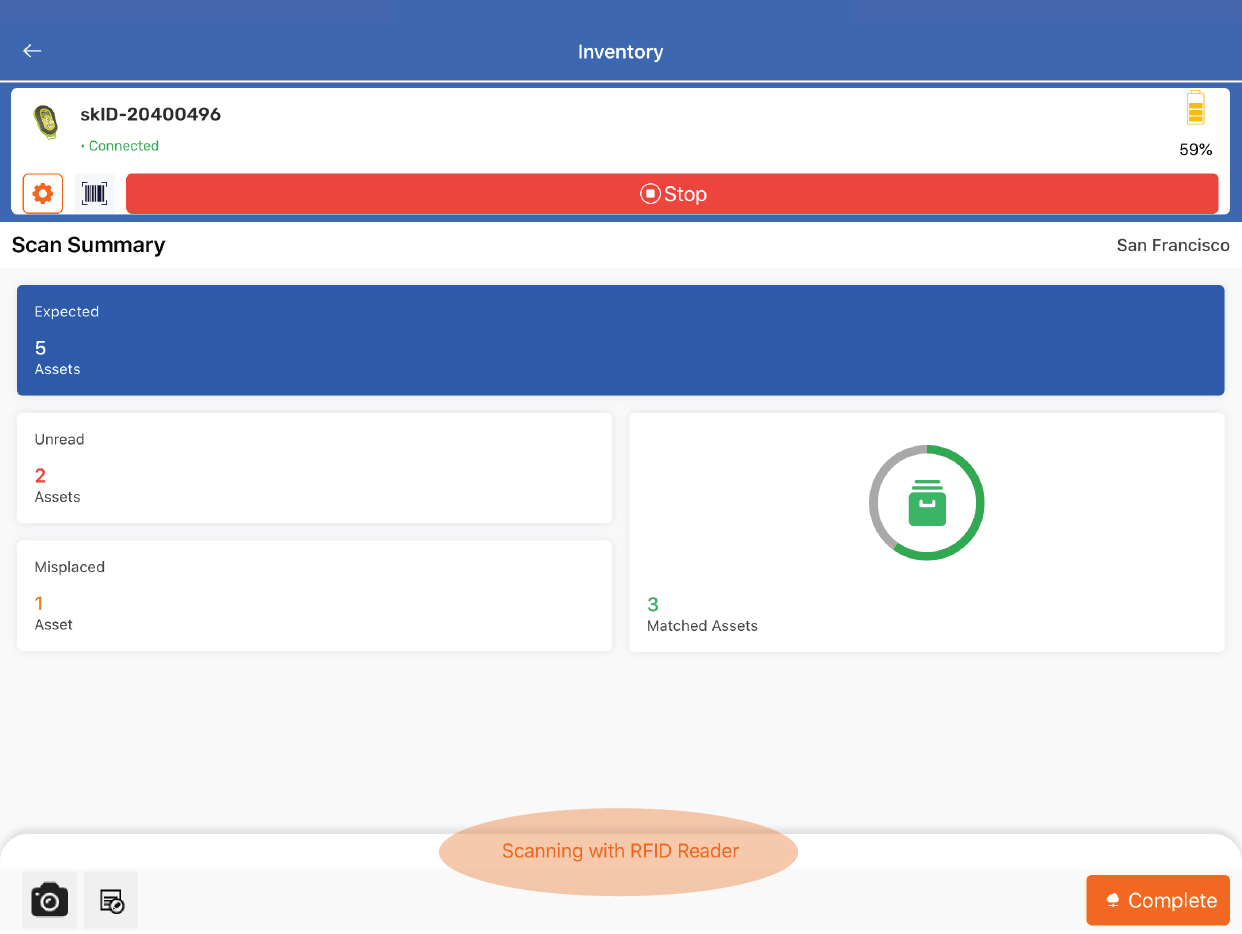
9. Press the “Start” icon bar button on the AT Lite application, then skID reader will start reading the RFID tags. Please refer below image [figure 18]
10. Once you Press the “Stop” icon bar button on the application; then the skID reader will stop reading the tags.
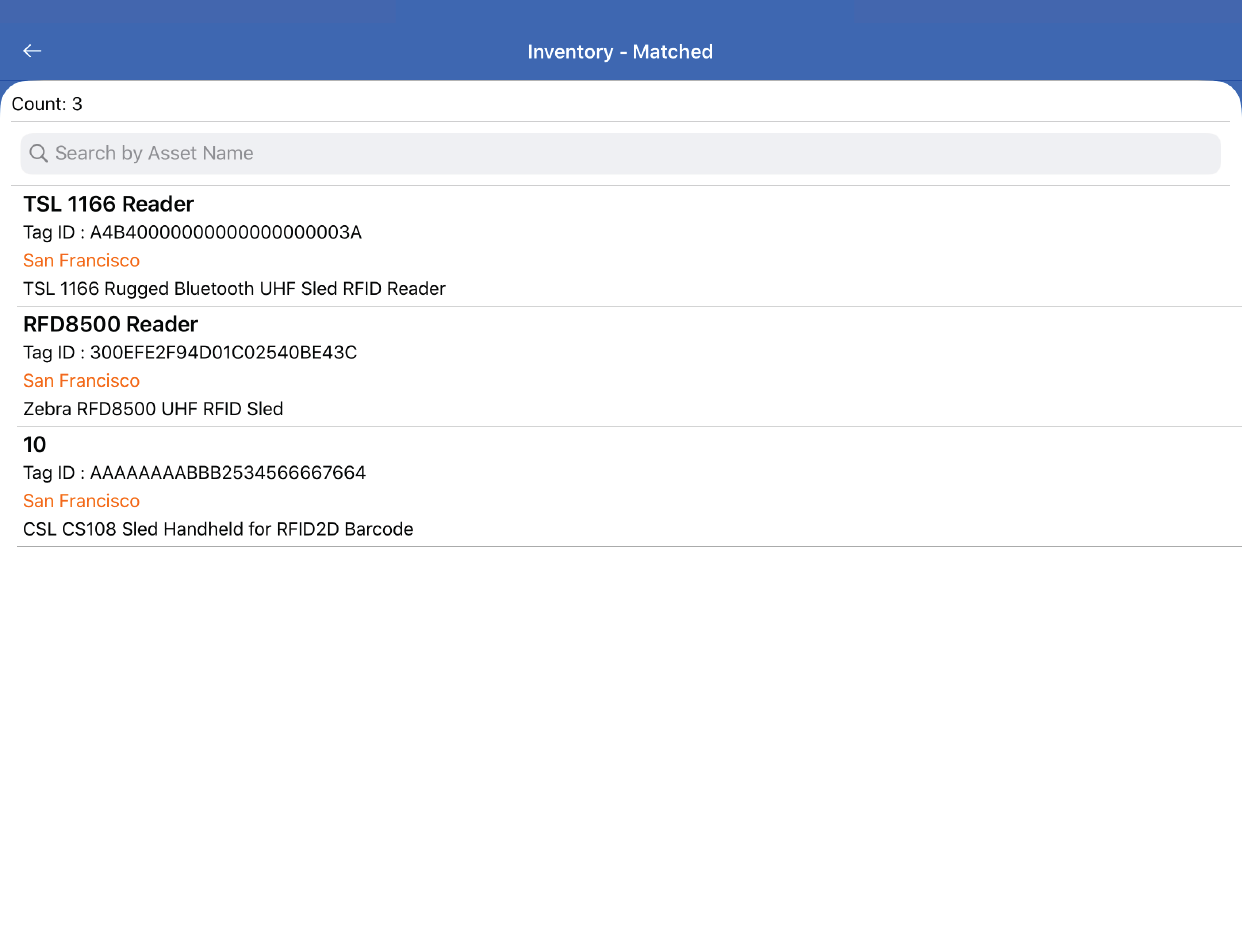
11. As a result, the read tag will populate on the application window, as shown in below image[figure 19].