This section contains setup information for using the Zebra RFD40/90 sled RFID readers with TagMatiks AT Lite.Although many of the steps may refer to the RFD40, similar steps can be considered for the RFD90.
Please follow the steps below to pair your RFD40 reader:
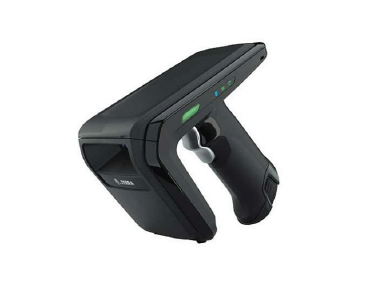
Zebra RFD40 can easily be turned ON by pulling the trigger. The connection Status LED will become amber, blue as indication of the reader being awake and ready to connect.
Step 1: Turn ON the Reader
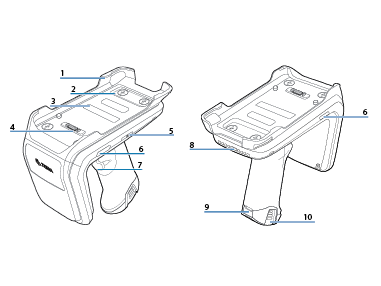
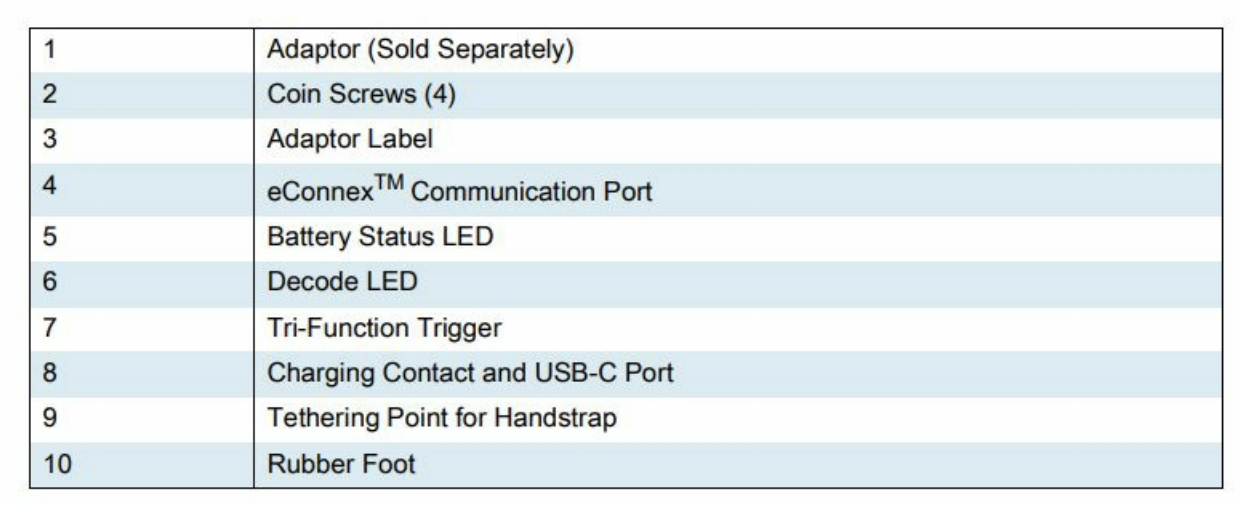
Press the Trigger Button to turn the RFD40 ON.
Step 2: Bluetooth Pair the RFD40 to your iPhone or iPad.
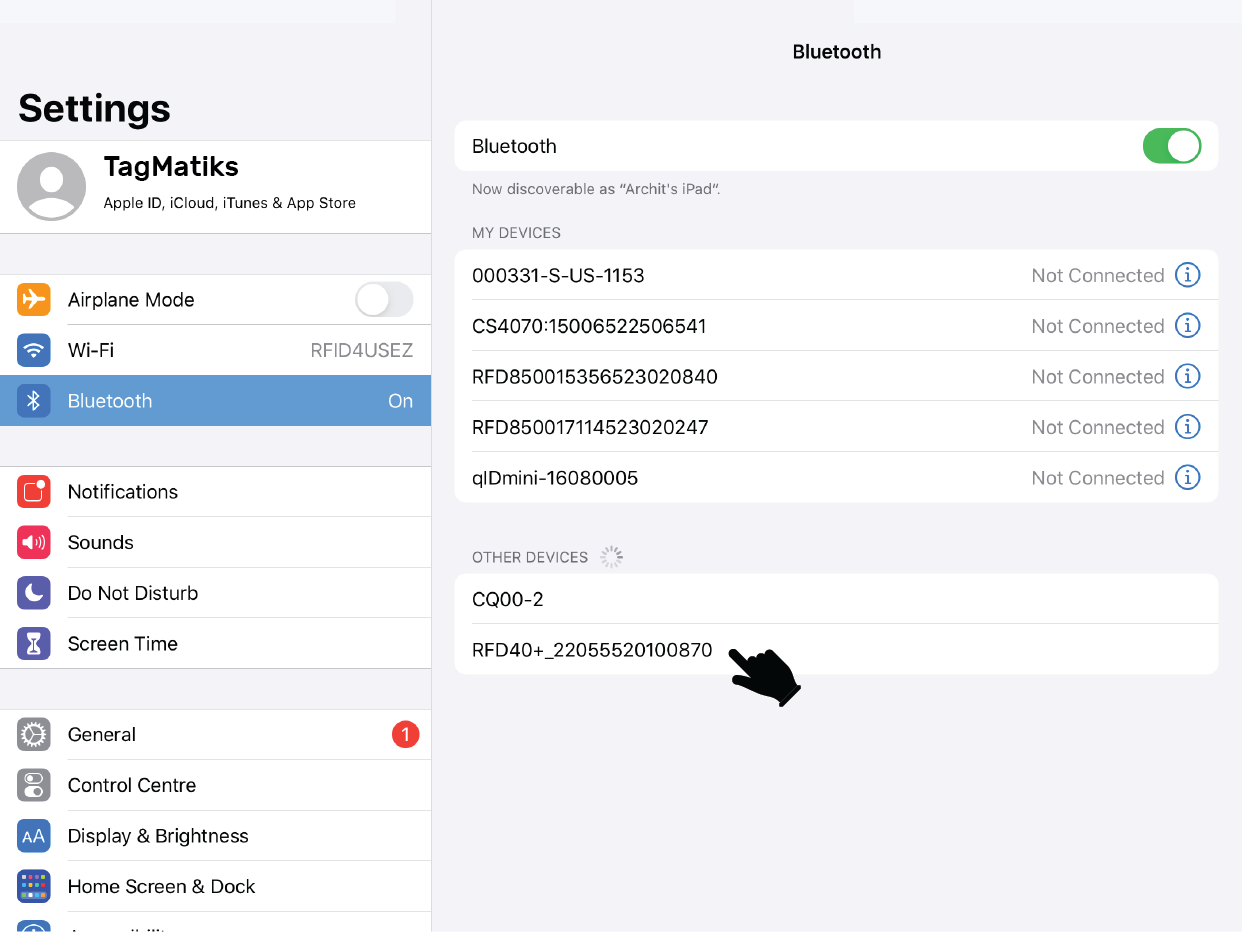
1. You’ll need to pair the reader to your iPhone or iPad device using the iOS Bluetooth pairing process before using it with TagMatiks AT Lite.
2. Go to the Bluetooth settings page, select the “RFD40” Device.
3. Pull the RFD40 trigger to pair. A beep will sound when pairing completes successfully.
Pairing with TagMatiks AT Lite:
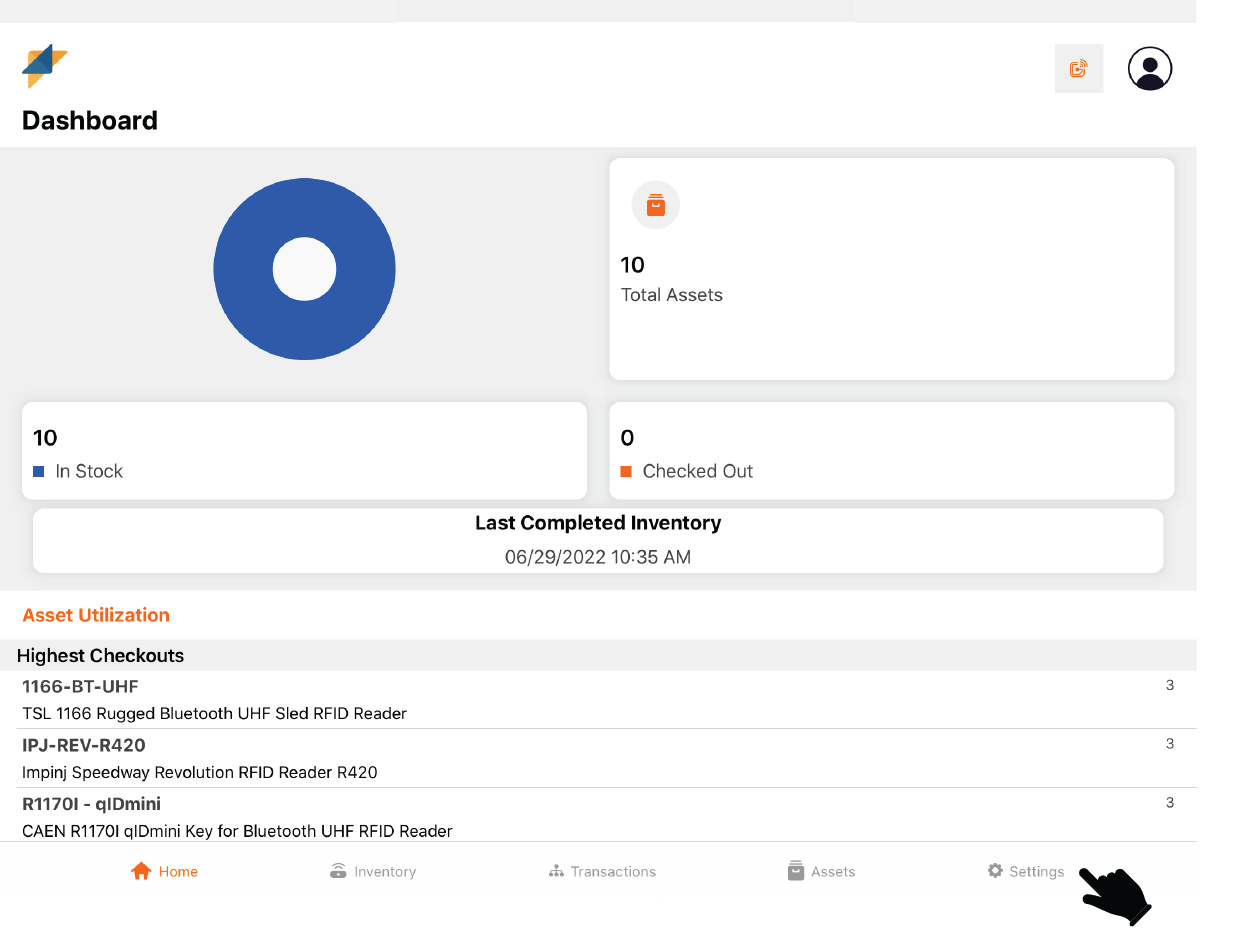
4. Open TagMatiks AT Lite and tap on “Settings” button from bottom right-hand side of application
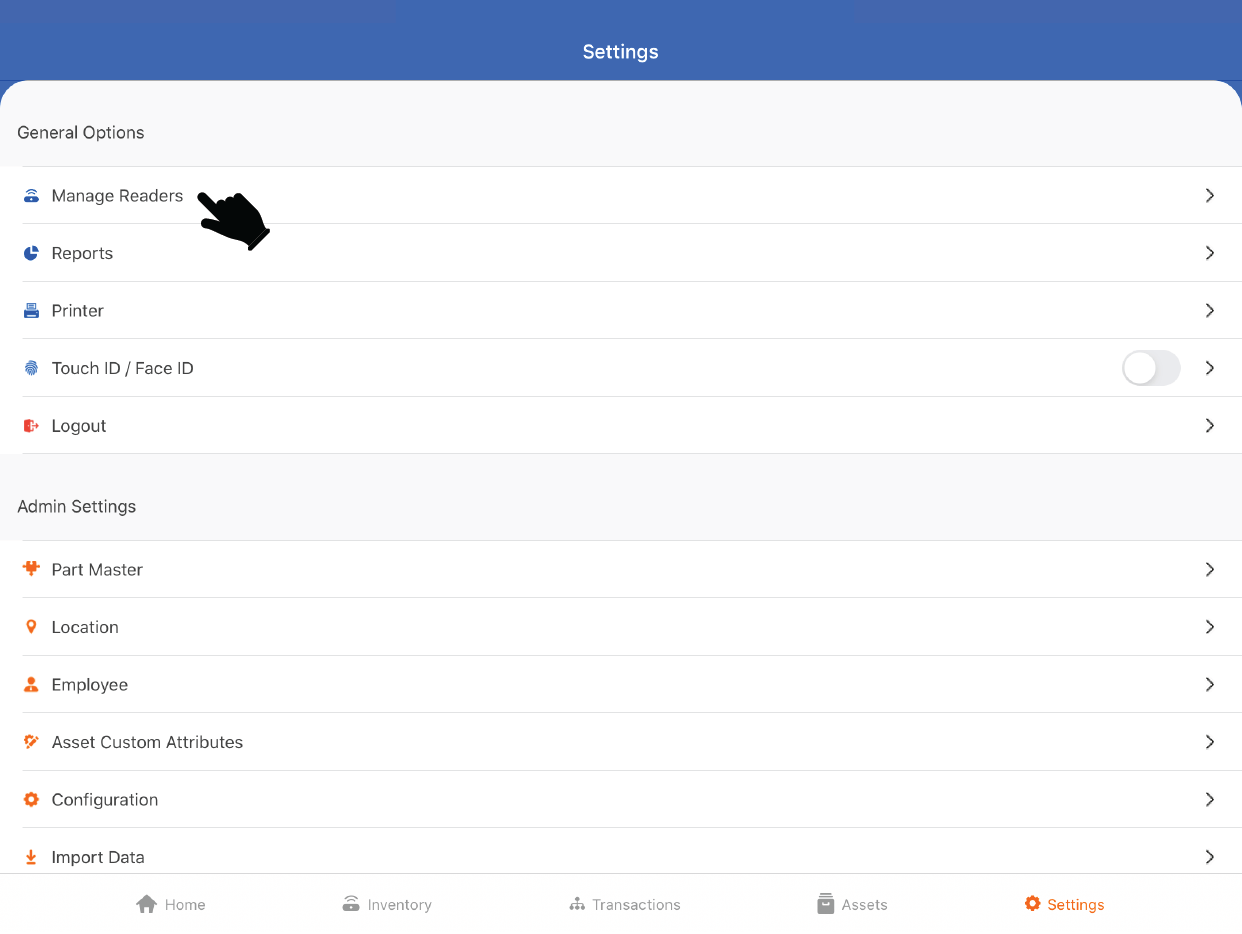
5. Please click on the “Manage Readers” option.
6. Click on the “Zebra RFID Readers”.
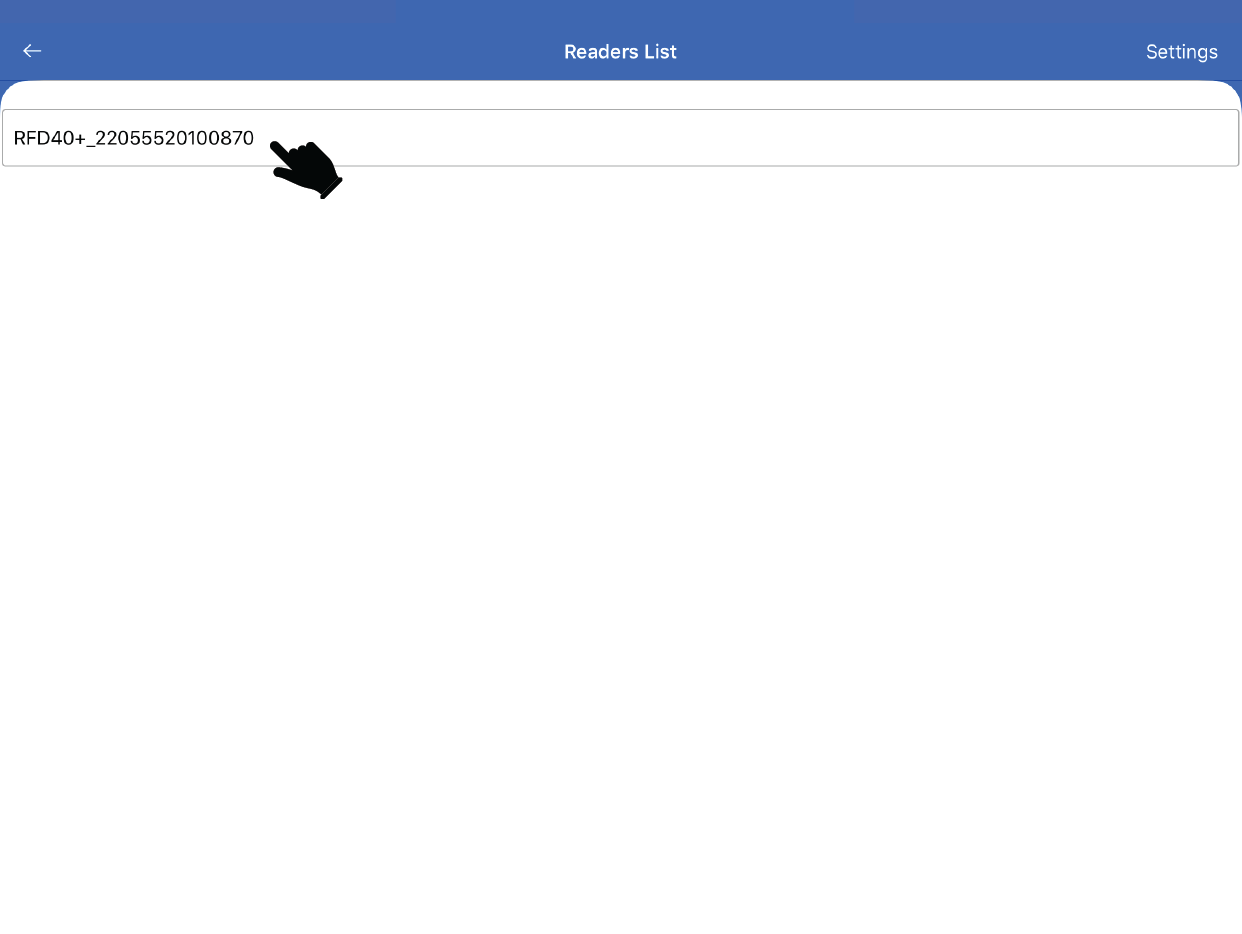
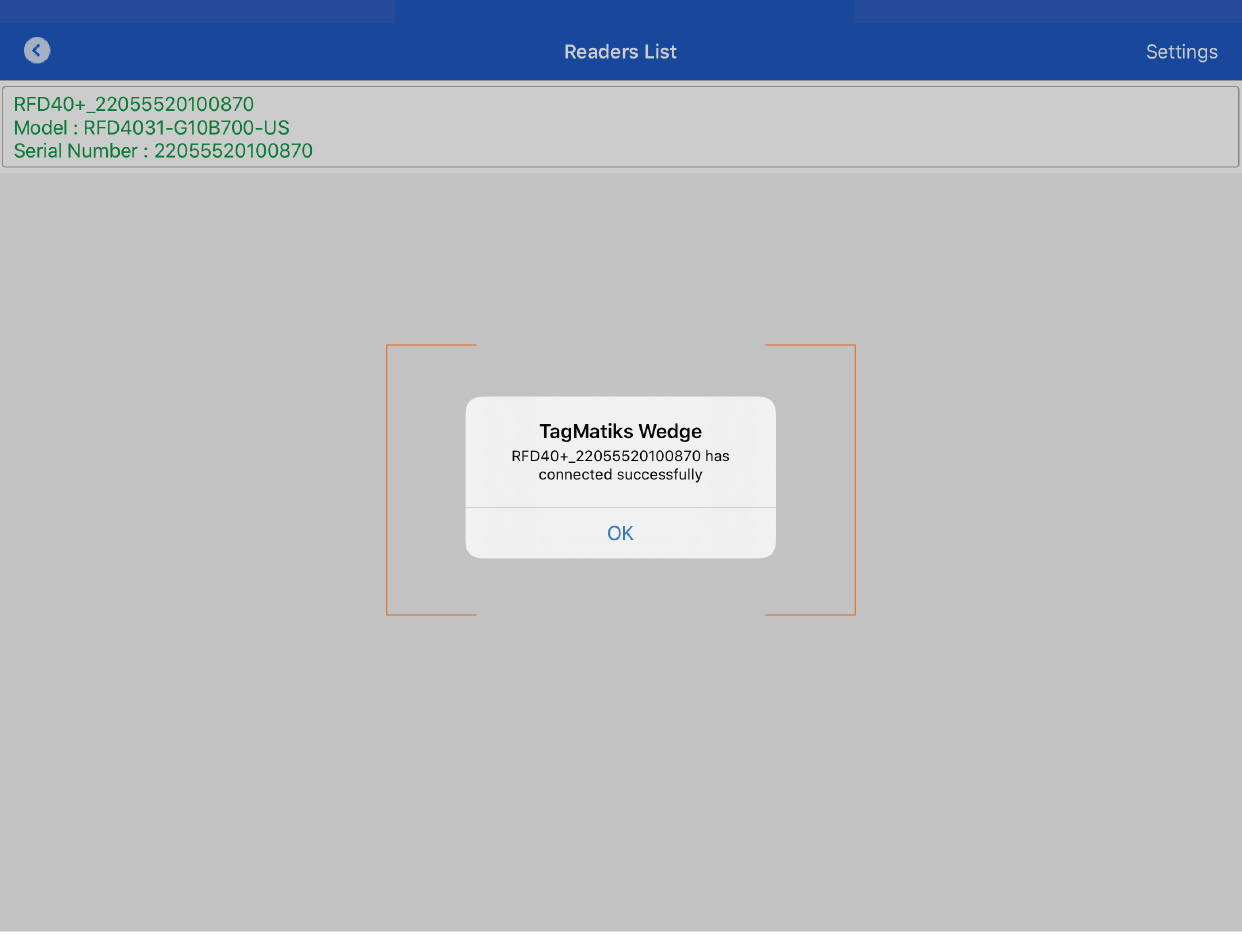
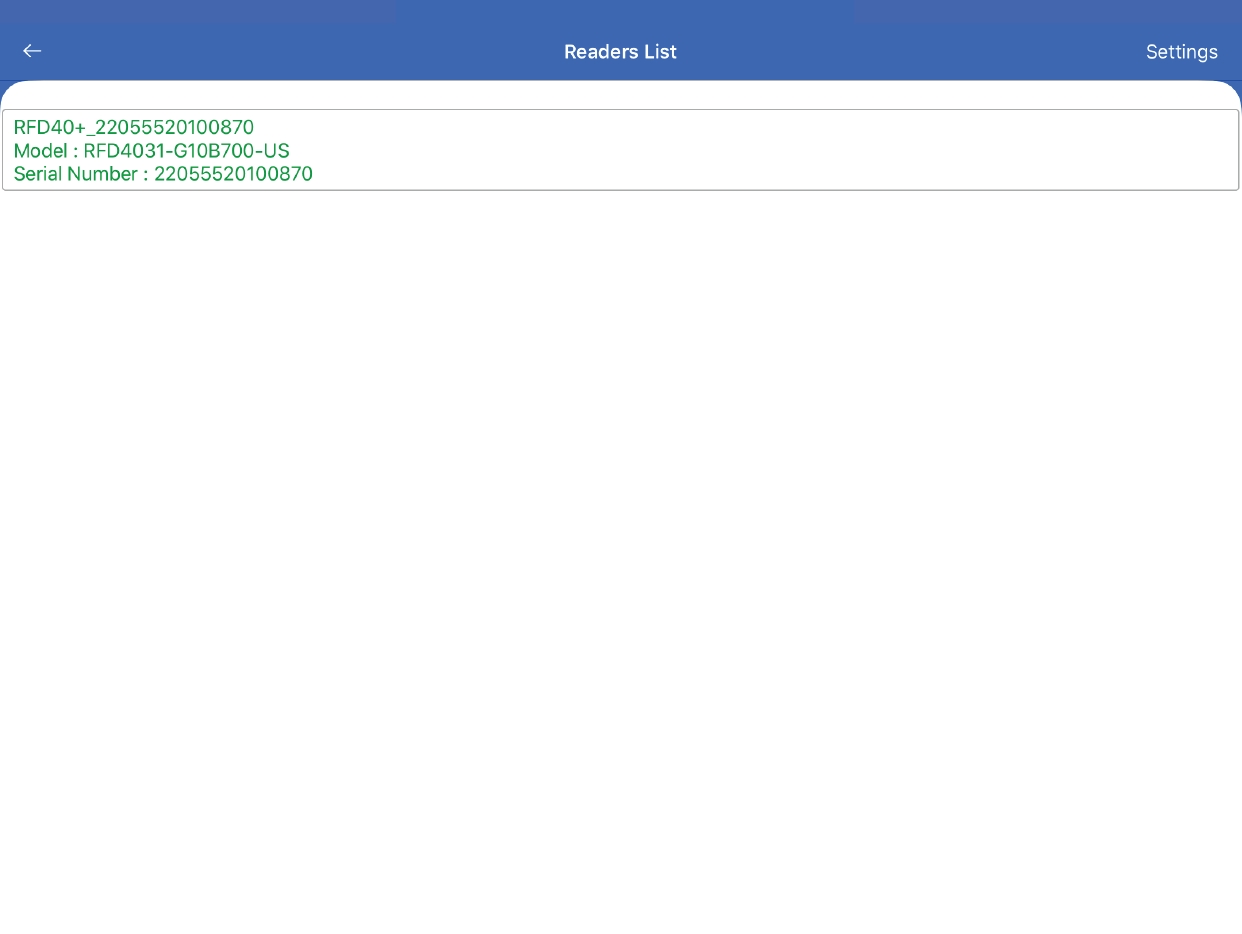
7. Please click on RFD40 from the Reader List.
8. A popup will appear that “RFD40+_22055520100870 has connected successfully” where 22055520100870 is reader Serial Number.
9. Click on the top of the “Settings” menu to adjust the settings of the reader.
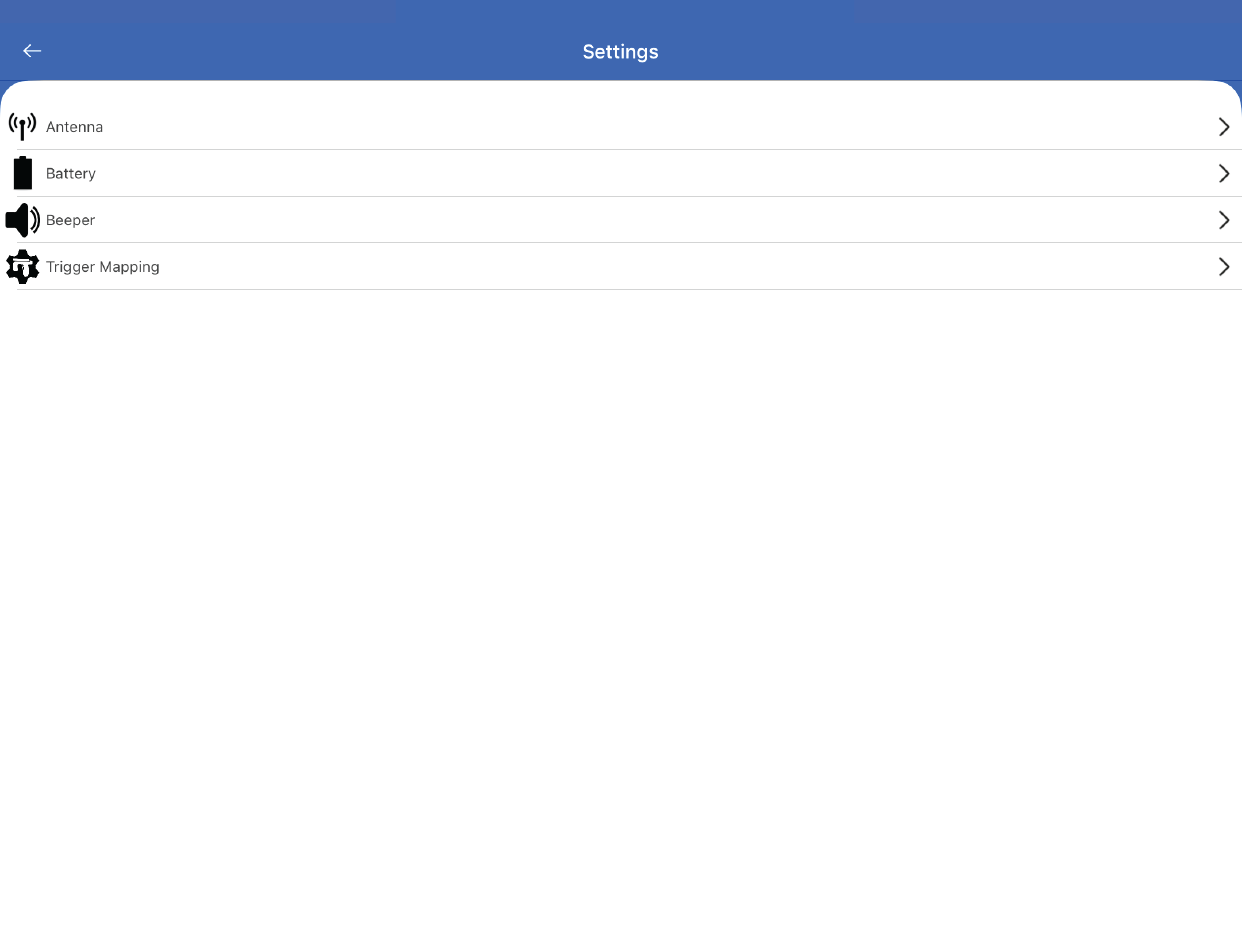
The Settings menu has the following options:
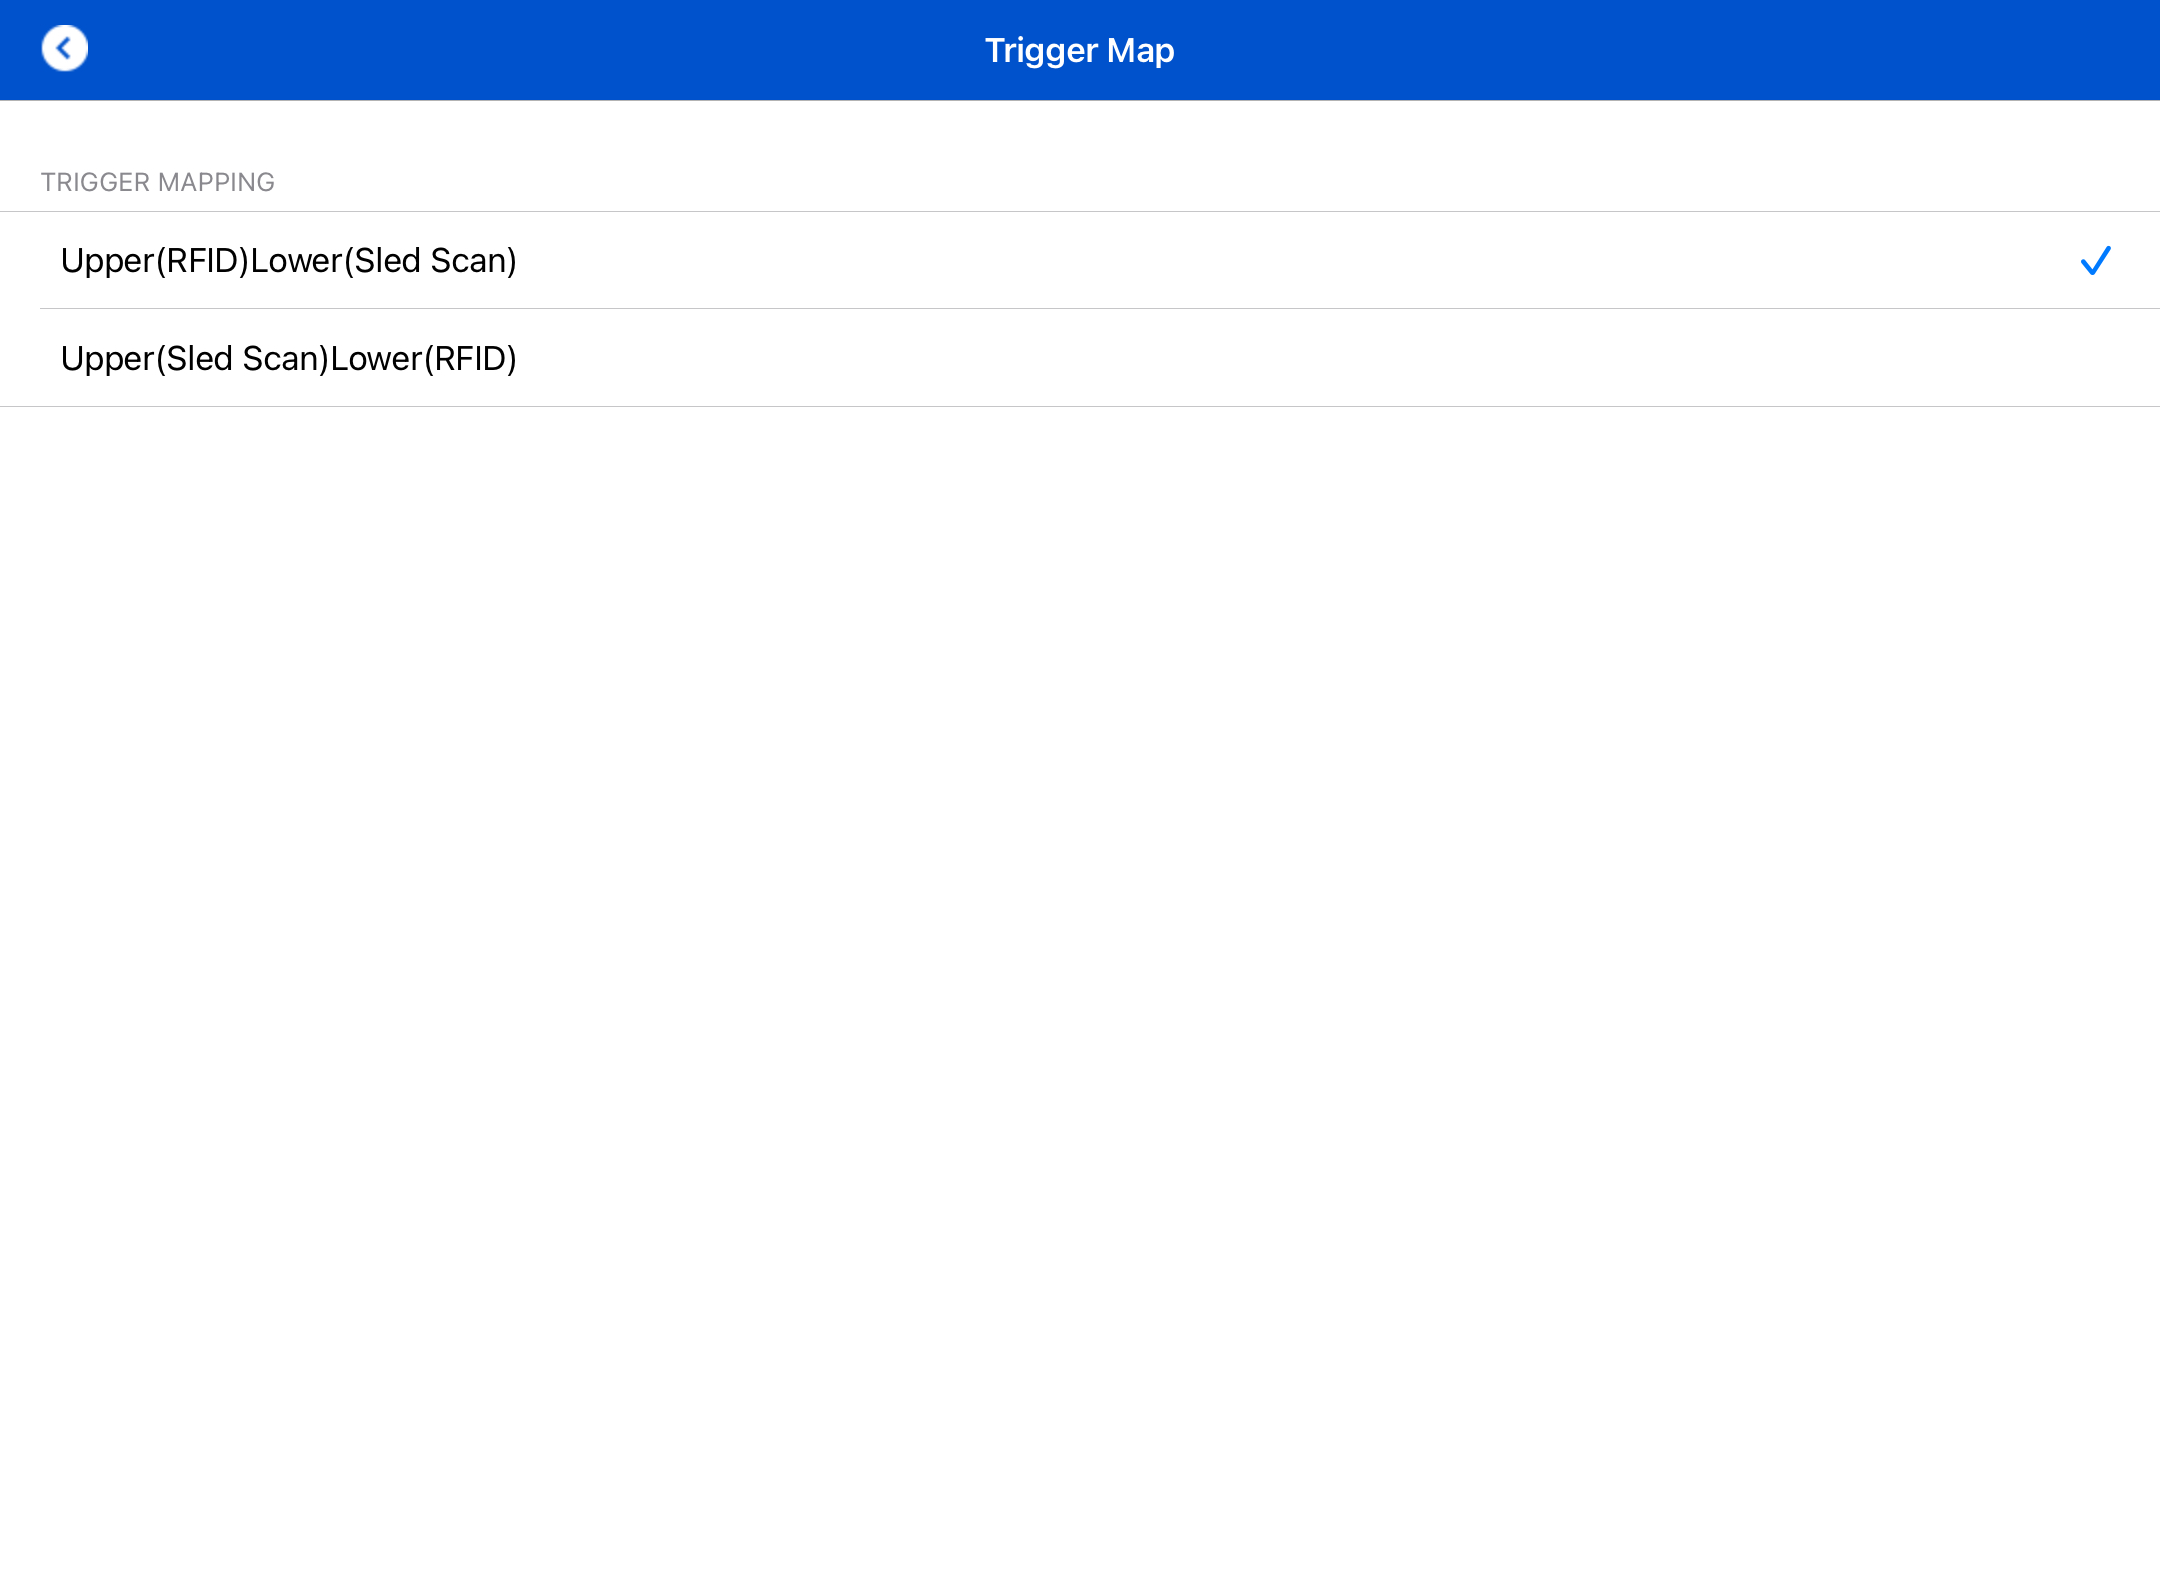
1) Upper (RFID)Lower (Sled Scan) - When you select this option, Means Upper Part of the Trigger will be set to read the RFID Tags and Lower Part of the Trigger will be set to scan the Barcodes.
2) Upper (Sled Scan) & Lower (RFID)-When you select this option, Means Upper Part of the Trigger will be set to scan the Barcodes and Lower Part of the Trigger will be set to Read the RFID Tags.
Note : Make Sure to Press the Trigger Lightly and the corresponding porting of the Trigger only (Either Upper or Lower) whatever is set and not to press the joint section of the Trigger to avoid any misbehave.