This document provides information about Zebra Printer Setup, label design in Zebra Designer, Writing the tags with TagMatiks AT Lite
This document is divided into multiple sections as:
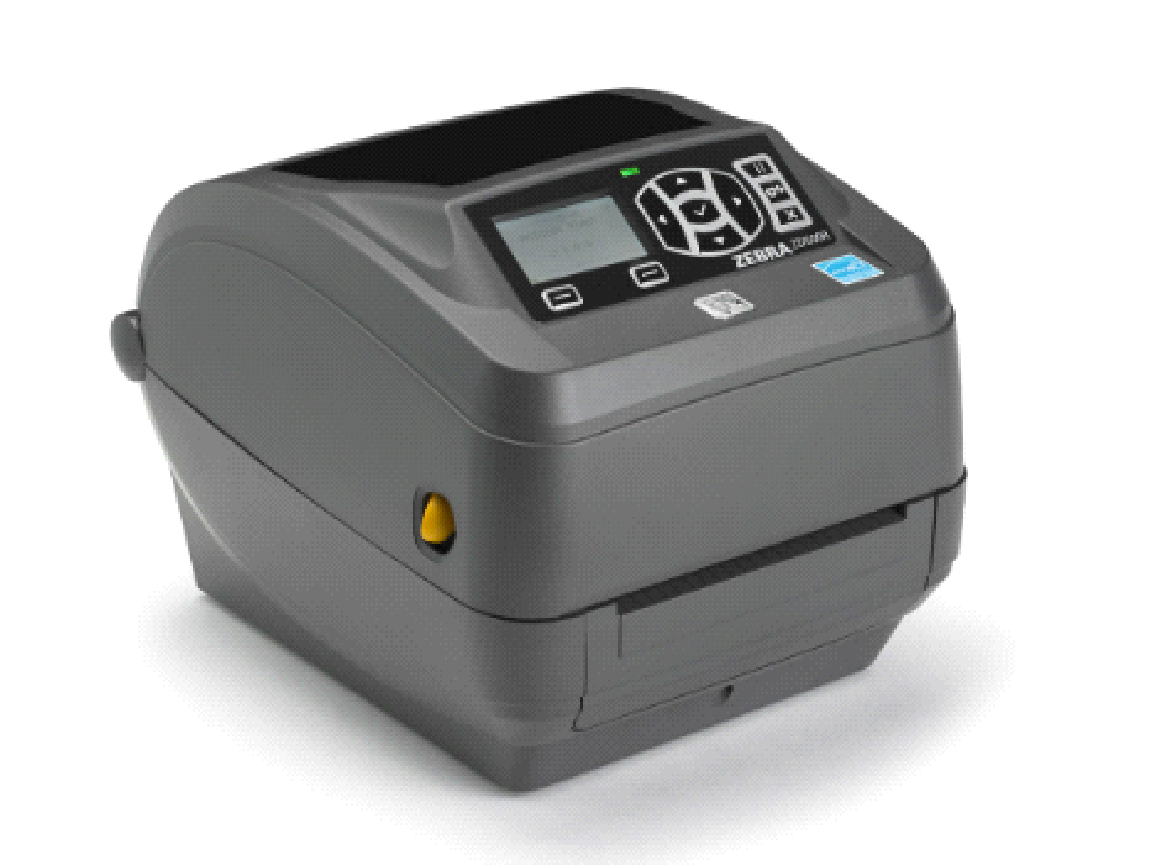
Consider Zebra thermal desktop printer which is ideal for printing and encoding RFID tags .Although many Zebra’s printers support both direct thermal and thermal transfer printing and is compatible with inlays from almost all of the manufacturers. Here we are considering the Zebra’s ZD500R as a reference.
Below image shows the ZD500R printer :
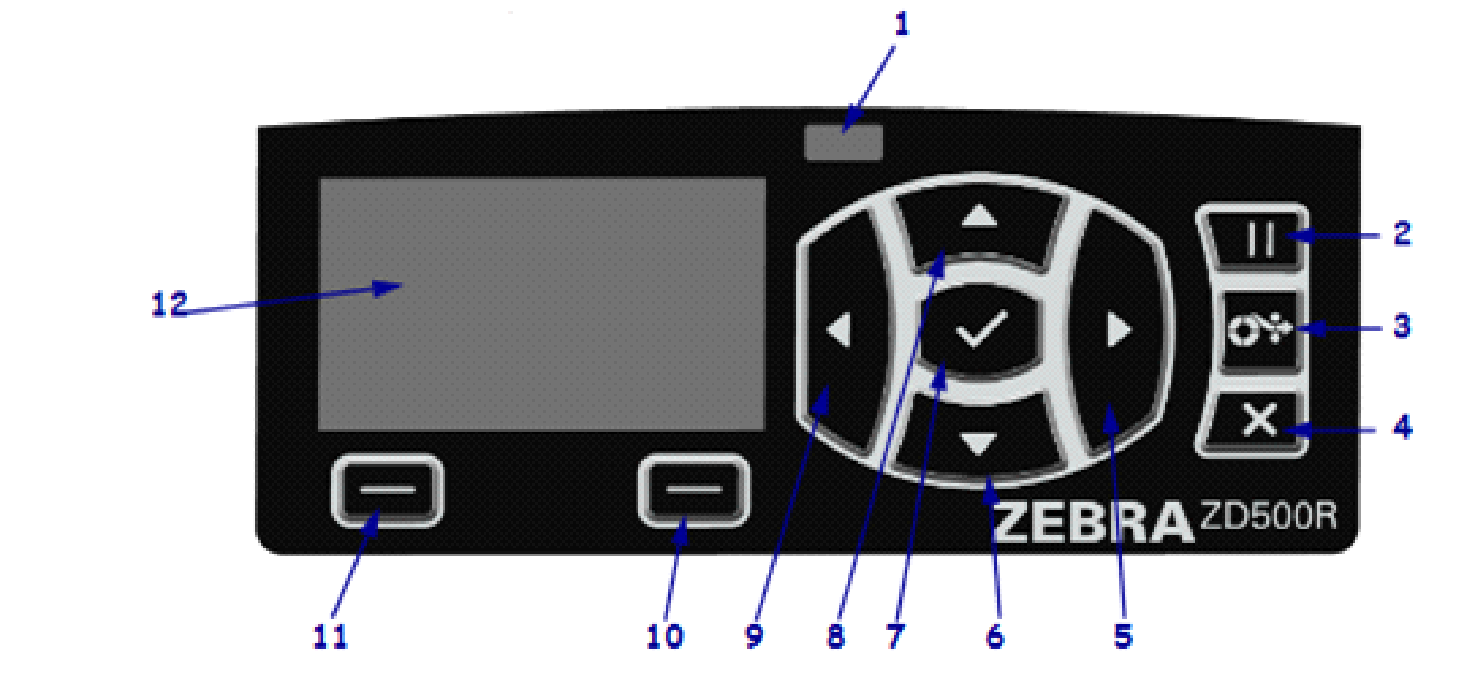
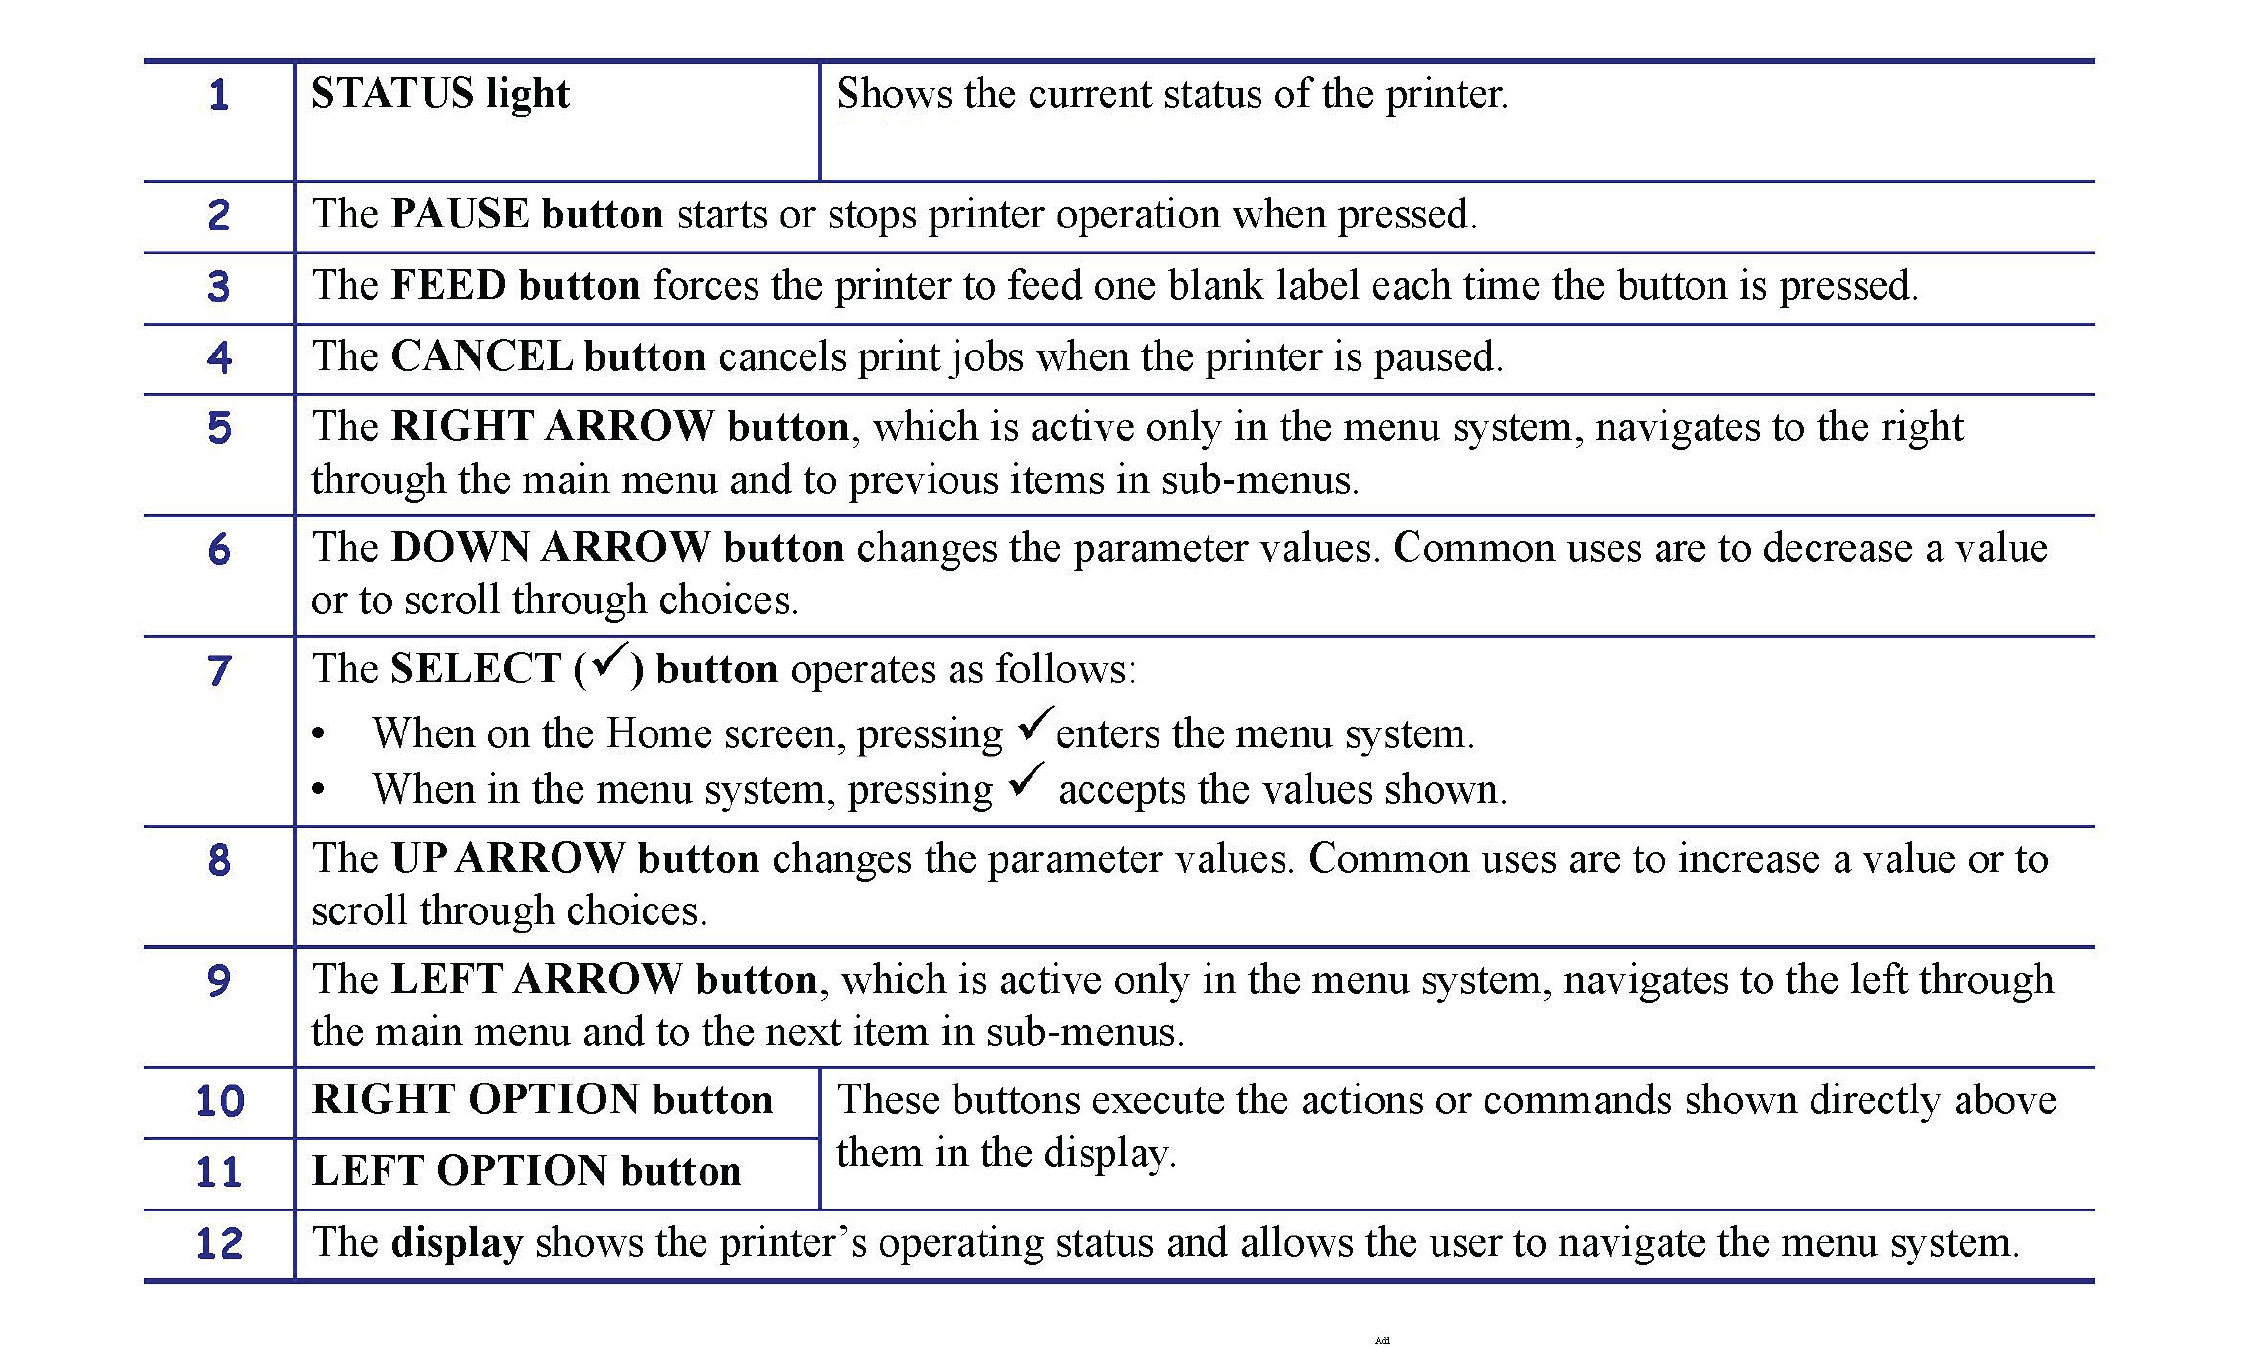
The Control panel and its functionalities are almost similar in all Zebra printers. As reference, ZD500R printer is considered for explaining the control panel functions.
1. Place the printer in a safe location with access to power and where cable or the wireless option communications can access your printer.
2. Attach the printer to a grounded AC power source.
3. Select and prepare media for your printer.
4. Load the media.
5. Load the transfer ribbon if you are using thermal transfer media.
6. Turn the printer ON. Print a ‘Configuration Report’ to verify basic printer operation.
7. Turn the printer OFF.
8. Attach the printer to the network or host system, and configure the printer as required for communicating to the print system host/network. For supported Windows Operating systems (most common) with a Local (cabled) connection:
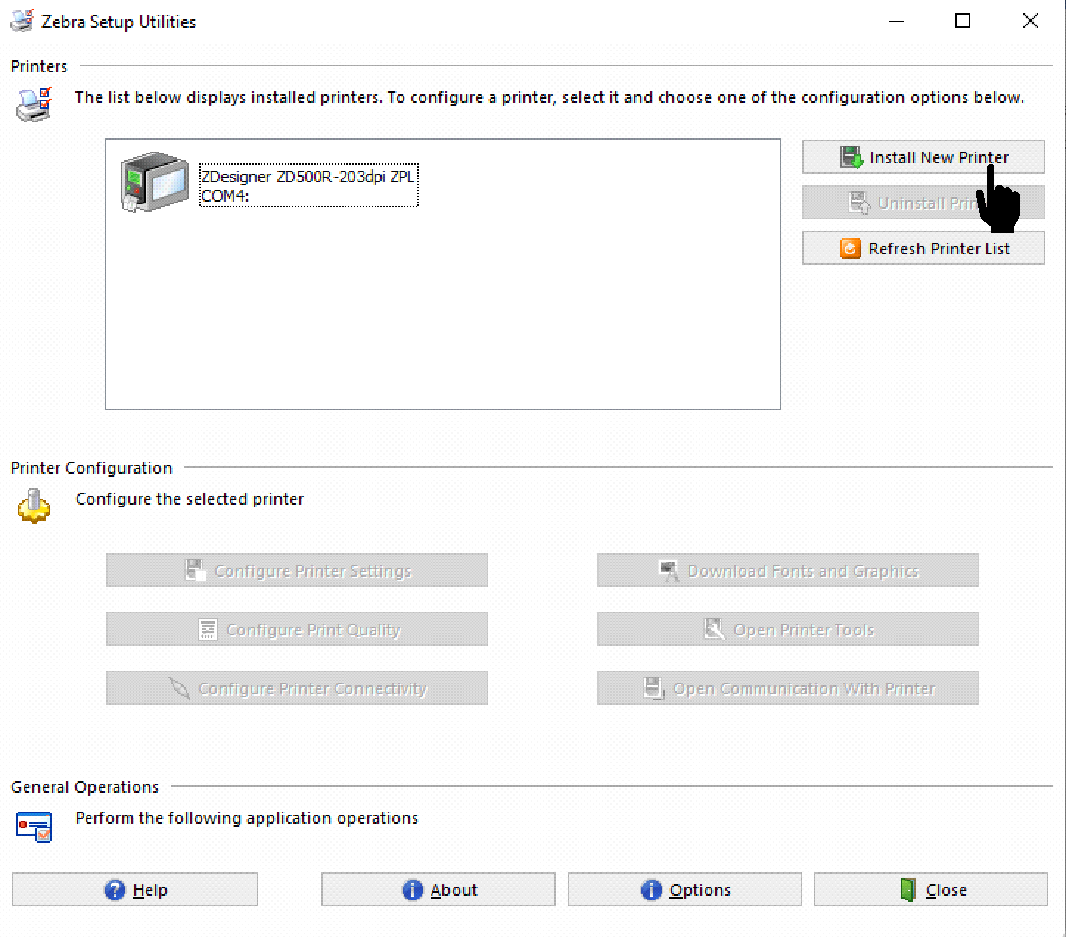
9. ‘Run’ the Zebra Setup Utilities for systems from the User’s CD or you can download it from the link
https://www.Zebra.com/ap/en/support-downloads/printer-software/printer-setup-utilities.html
10. Click on ‘Install New Printer’ as shown in image above and run the install wizard. Select ‘Install Printer’ and select the Printer name from the list of ZDesigner printers; here ZD500R is considered.
11. Select the communication port (USB, Serial or Parallel) that you connected to the PC.
12. Turn the printer ON and configure printer communications for your interface type.
13. Print a Windows driver ‘Test Print’ to verify operation with Windows.
Before beginning, load RFID media into the printer and perform the manual media calibration.
1. Press the Feed button once to feed (advance) one label.
2. Press the menu’s ‘Home’ ( ) button. Navigate to the ‘RFID’ ( ) menu button and press the ‘Select’ () button.
3. Use the ‘Left’ (τ) and ‘Right’ (υ) navigation arrows to browse to the ‘RFID CALIBRATE’ procedure. Press the select button (—) it is below the START on the lower right hand of the display.
4. The printer will slowly feed a label while adjusting the location and RFID read/write communication settings for your chosen RFID tag/label. The printer will feed an additional label in some cases when calibration has completed successfully with the display message reading: READY
5. Remove excess media. Media calibration has finished and you are ready to print.
Zebra Designer helps you design and print labels on Zebra printers from your computer. There are two editions to choose from:
1. Zebra Designer Essentials is free to use and requires no activation. It offers basic label design features.
2. Zebra Designer Professional is free to use for 30 days, then requires purchase and activation. It offers advanced features to help you design more complex labels based on fixed or variable data and also includes database and RFID support.
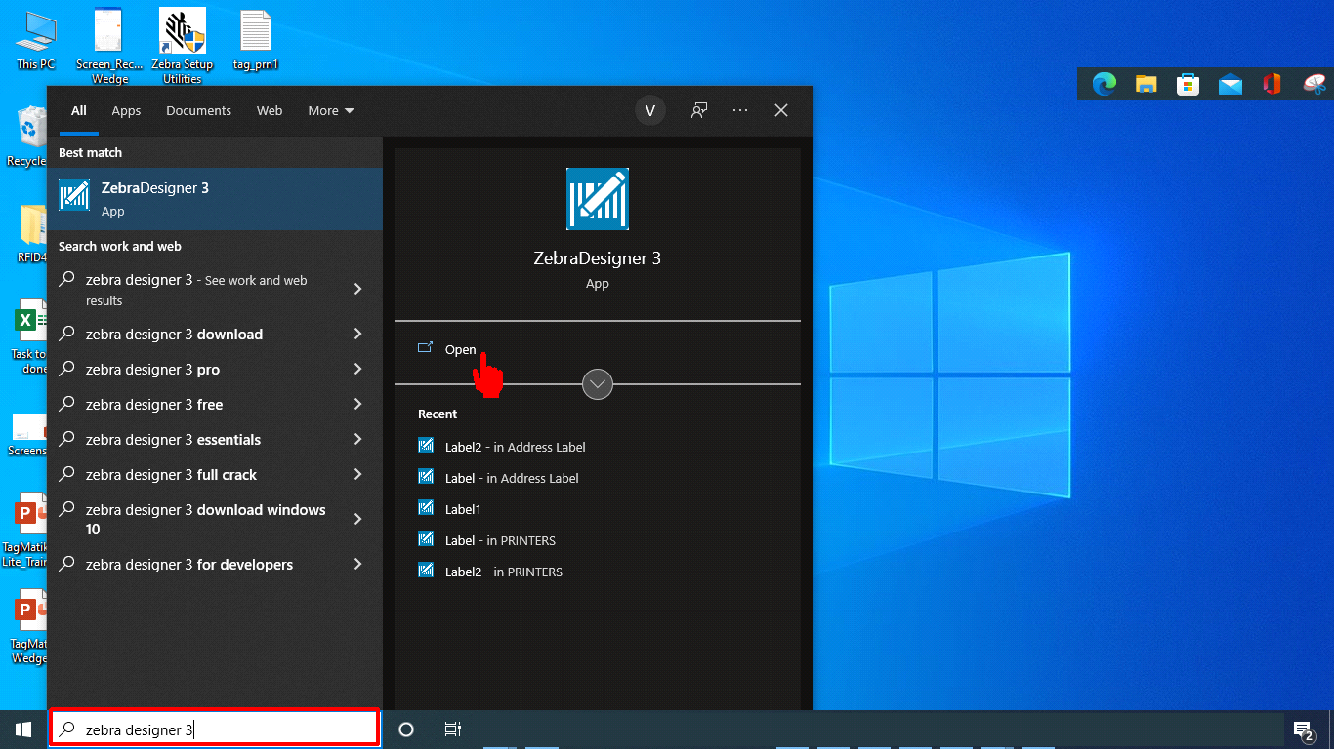
3. Download the Zebra Designer 3 and install in your computer.
4. Please search Zebra Designer 3 in your windows search bar and click on “Open” as shown in image below.
5. Click on create a New Label.
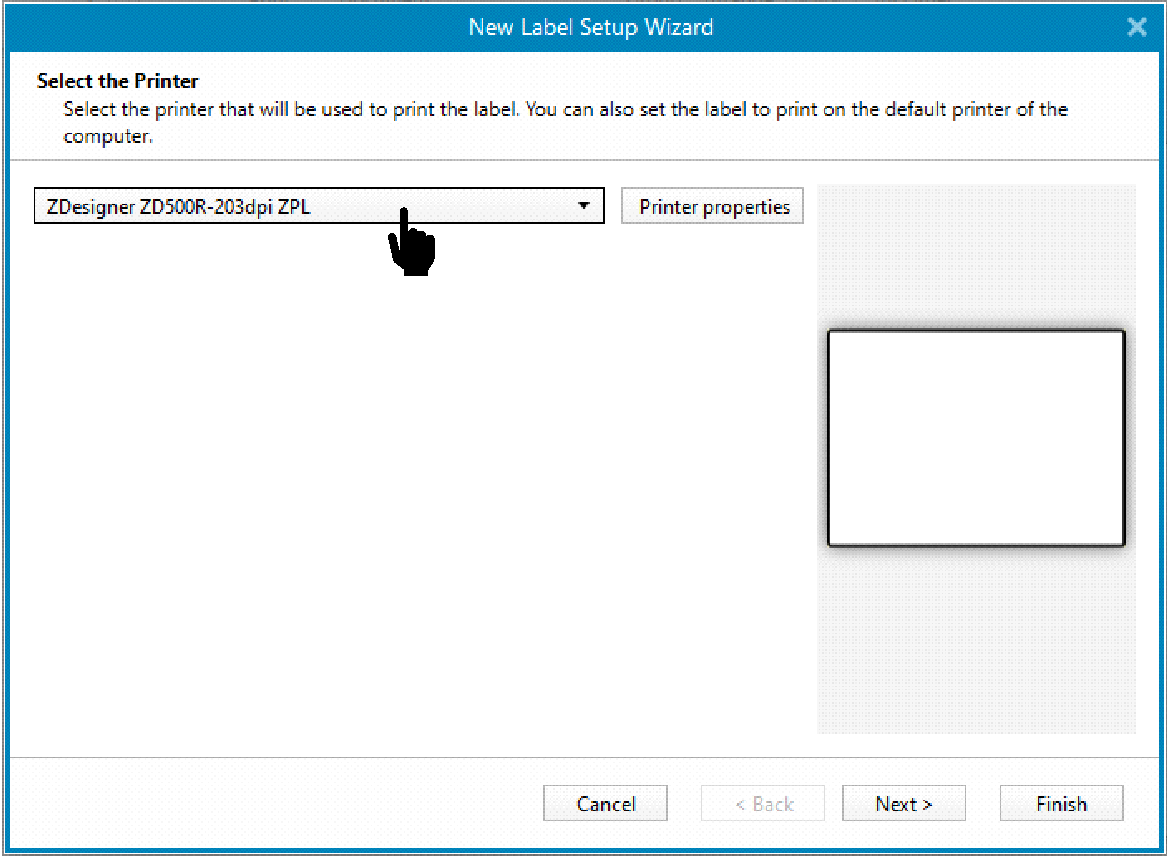
6. Select the printer from the dropdown list as shown in below image. Label setup wizard remembers the last selected printer. When creating another new label, the wizard will automatically select the printer that you selected for your last created label. If this printer is currently missing, your default printer is selected
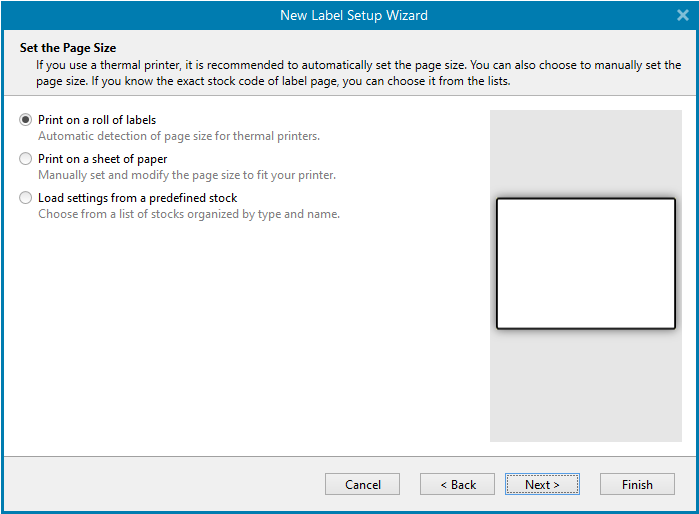
7. Please set the page size.
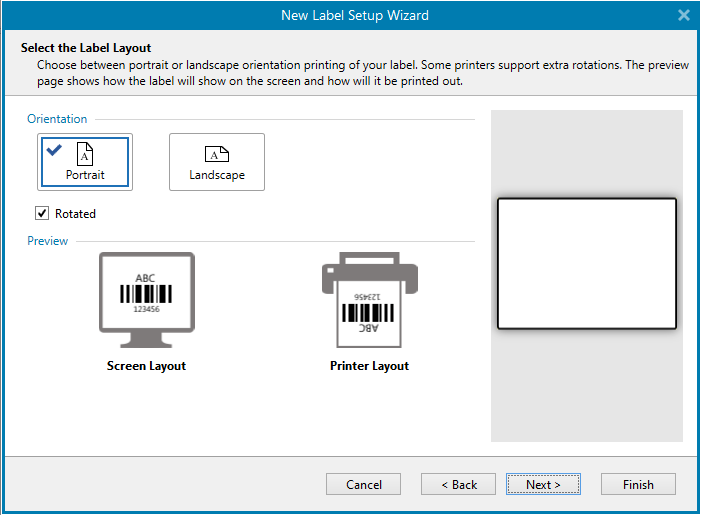
8. Select the label layout orientation, like here selected as : “Portrait”.
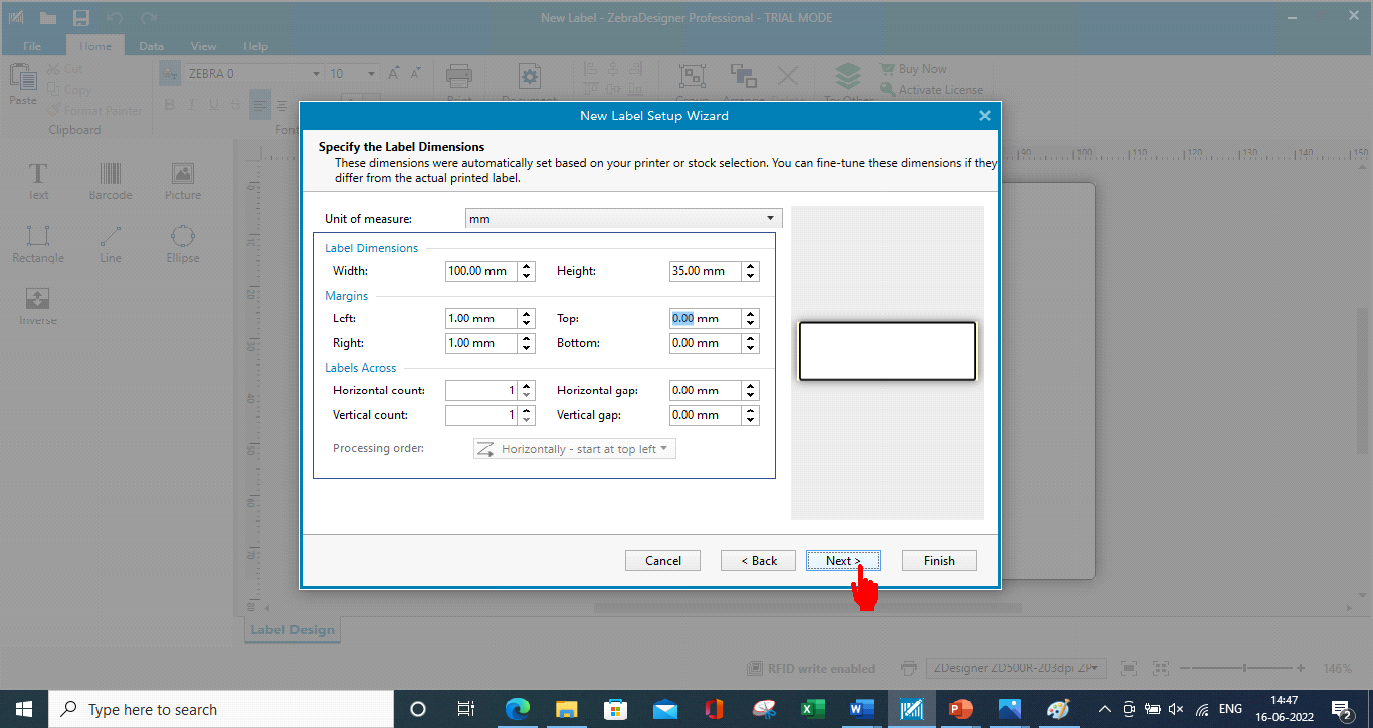
9. Specify the label dimensions and click on “next” as shown in the image below.
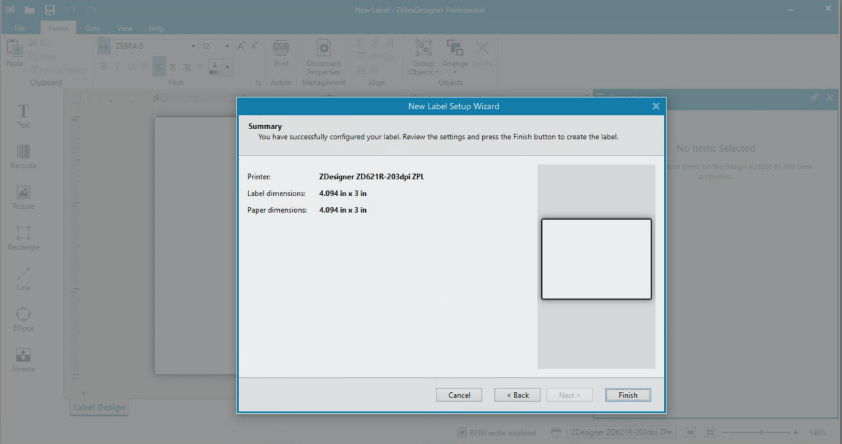
10. You will see the summary of the Label dimensions; then click on “Finish”.
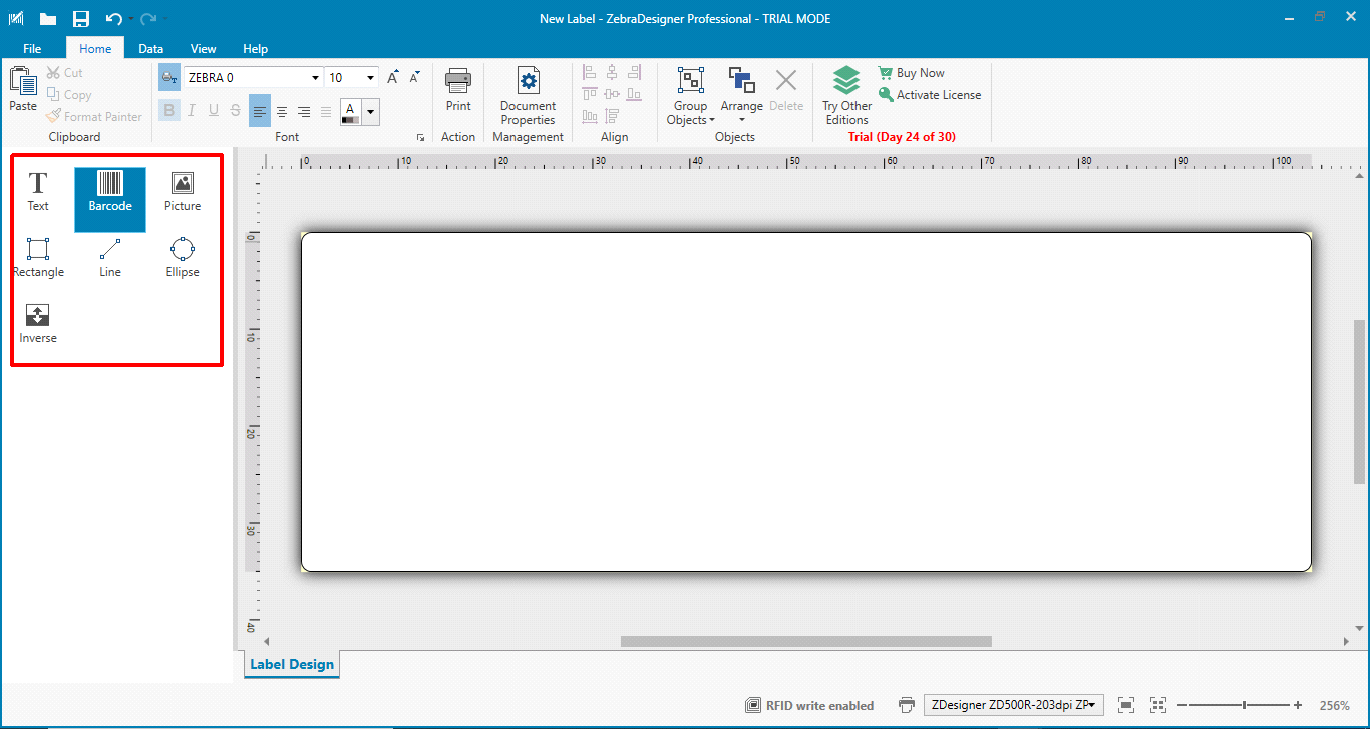
11. After setting the label properties, it's time to start adding content into the label.
12. Label objects are basic design items that are used for adding and editing various content types. Each object has its own function.
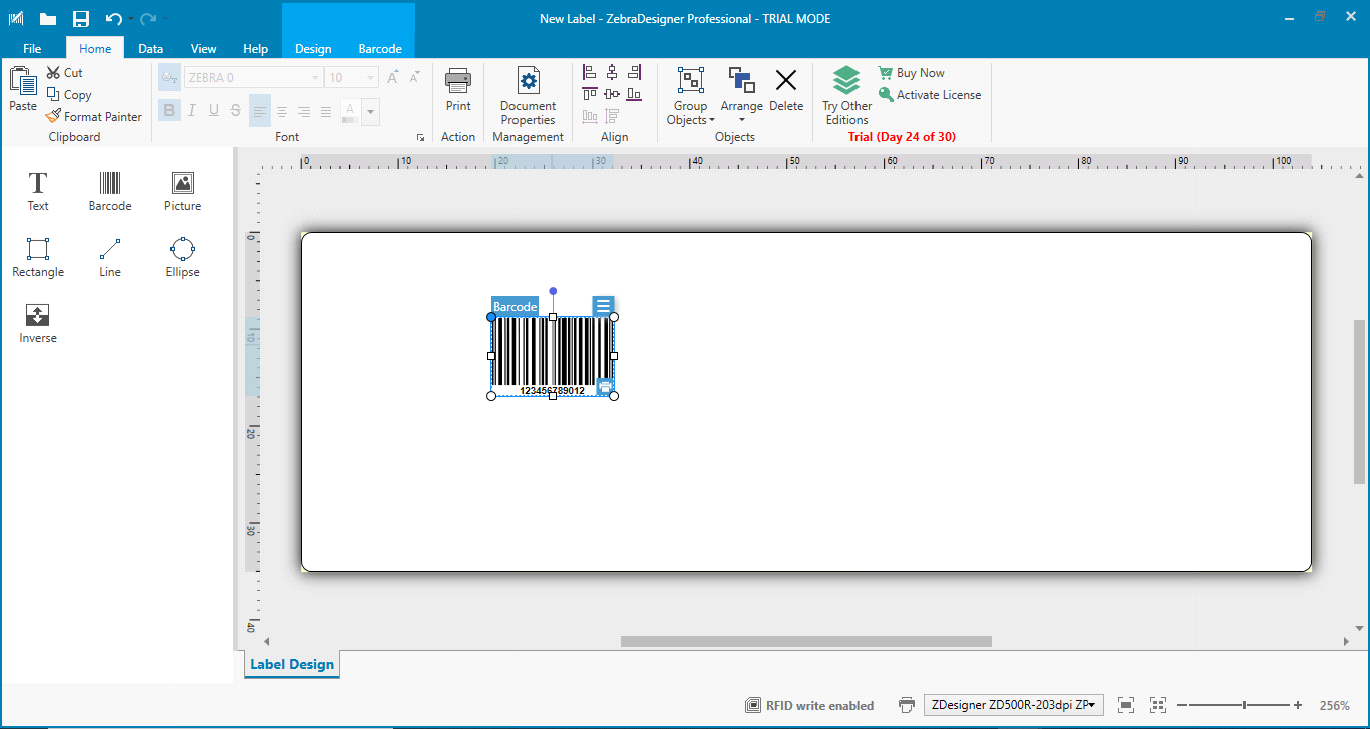
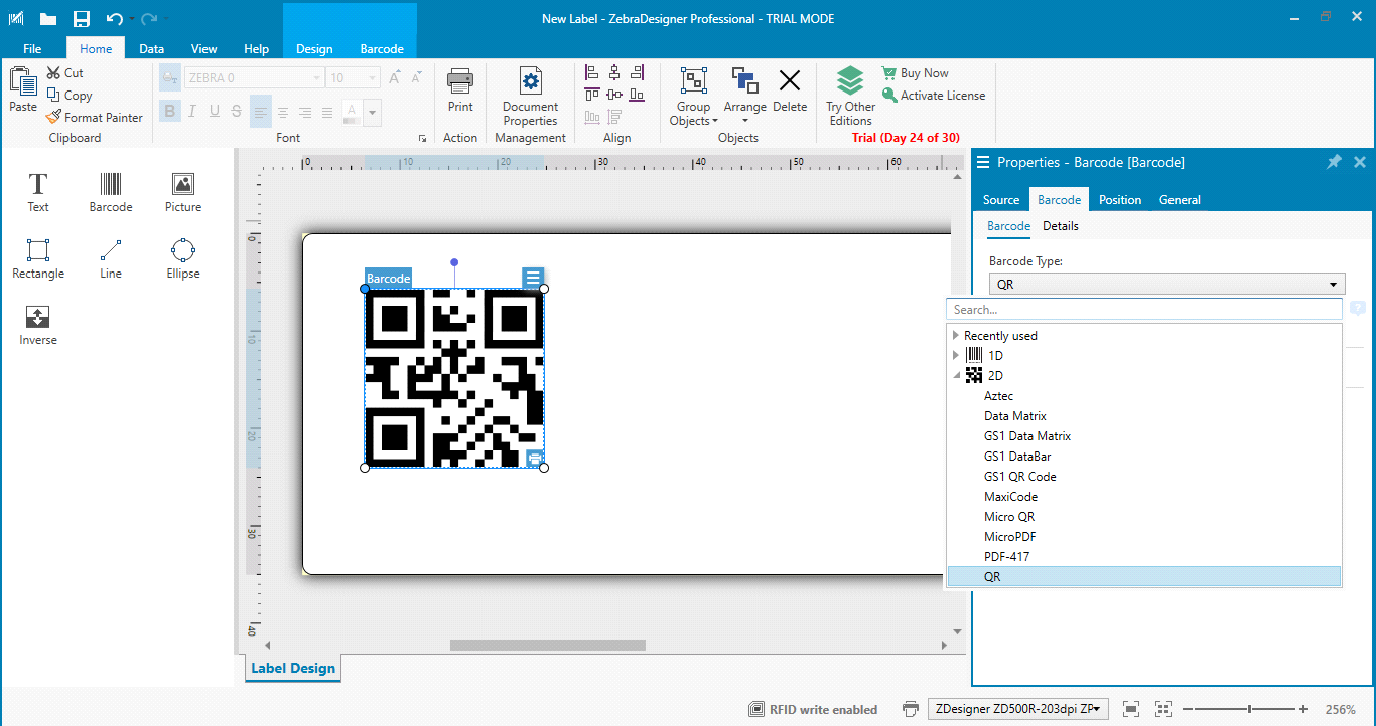
13. Click on object which you would like to add on the label and drop it on label area as shown in the image below.
14. Double click on object to change the properties of object like data, symbology and fonts.
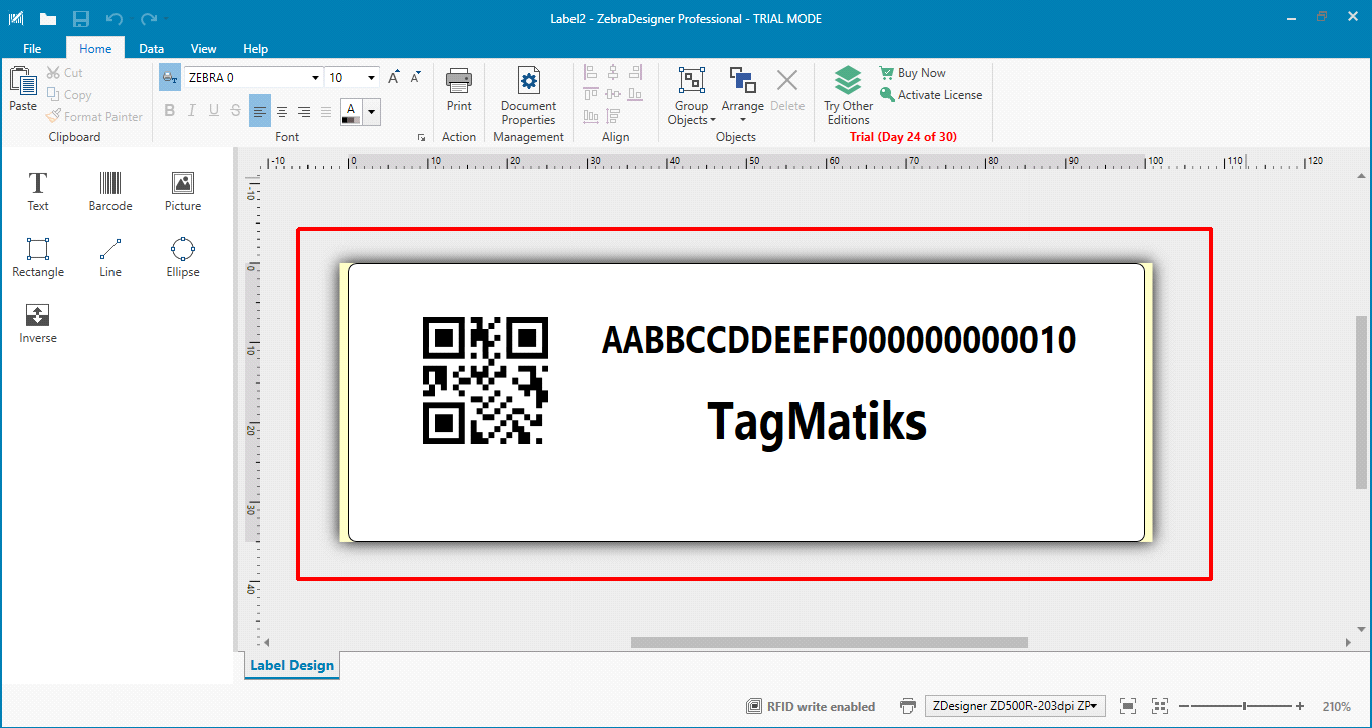
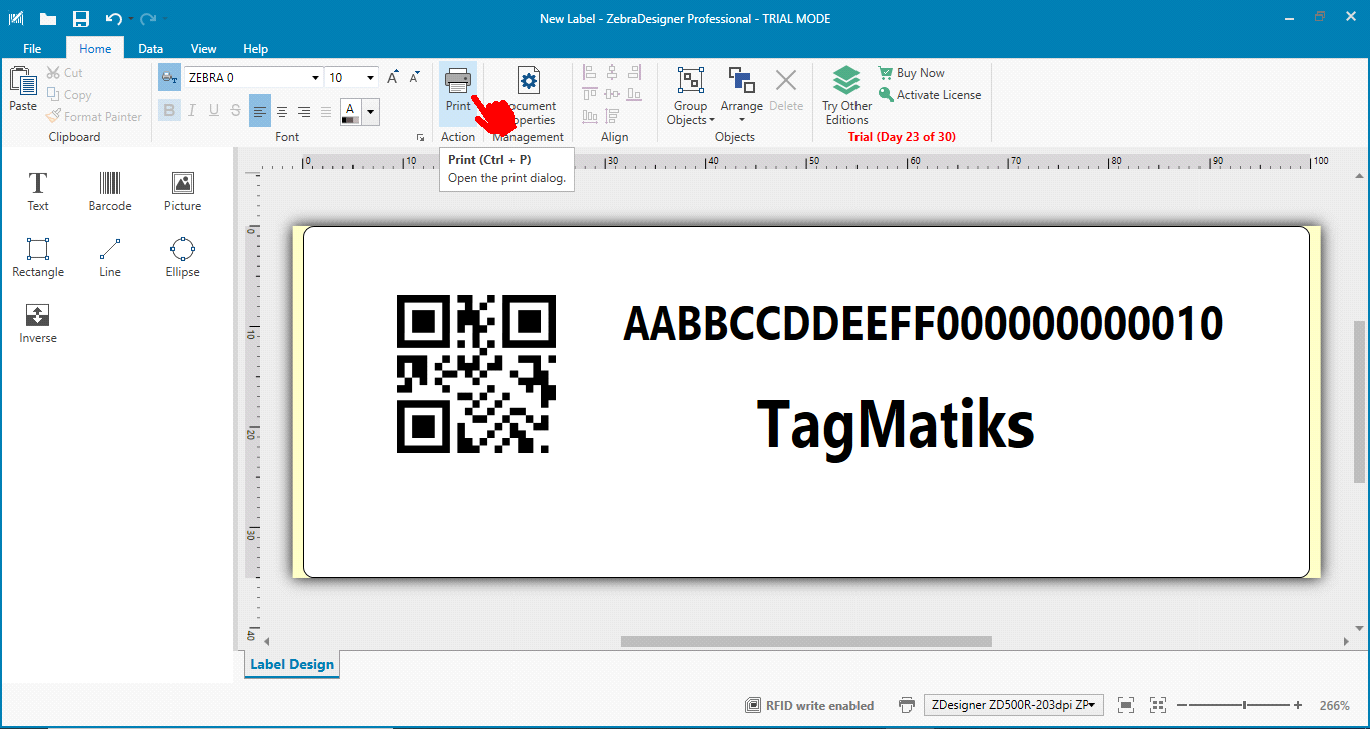
15. Add all objects, like barcode and text which you are required, as shown in the image below.
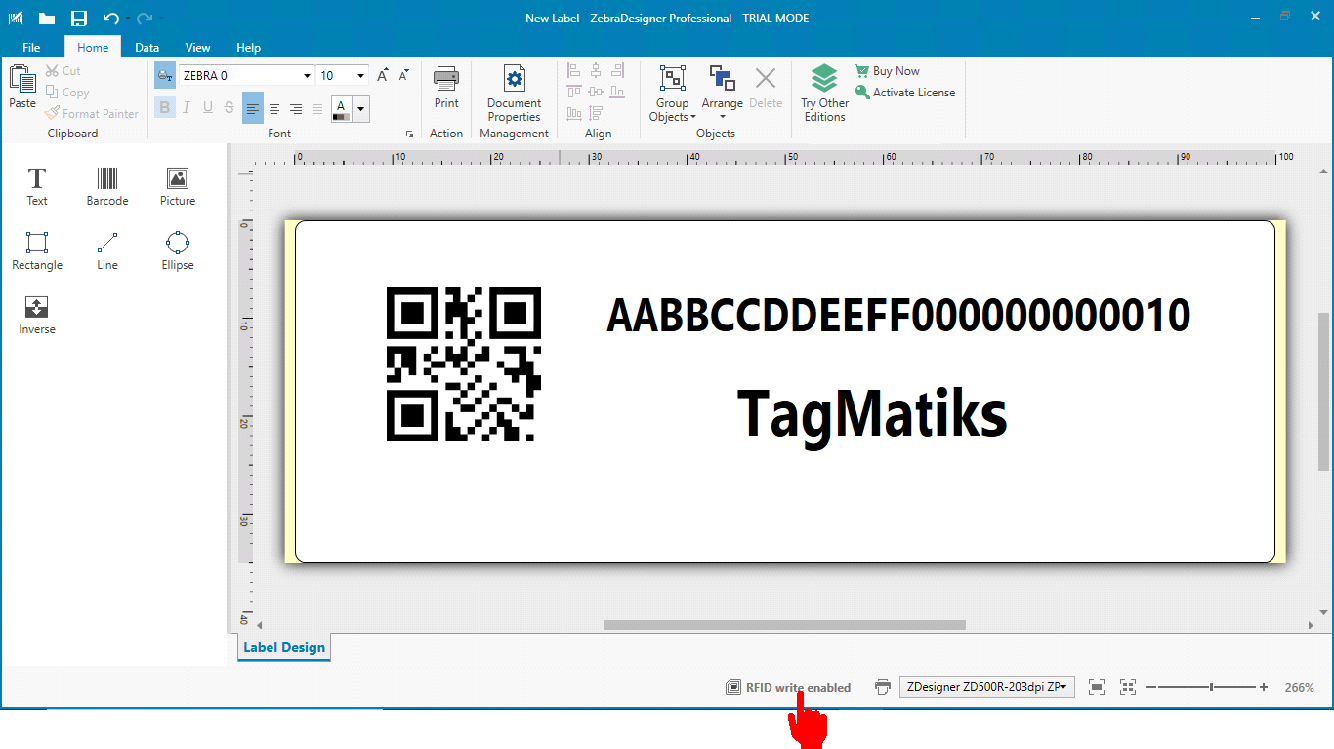
16. Please click on “RFID write enabled” at the bottom of the application.
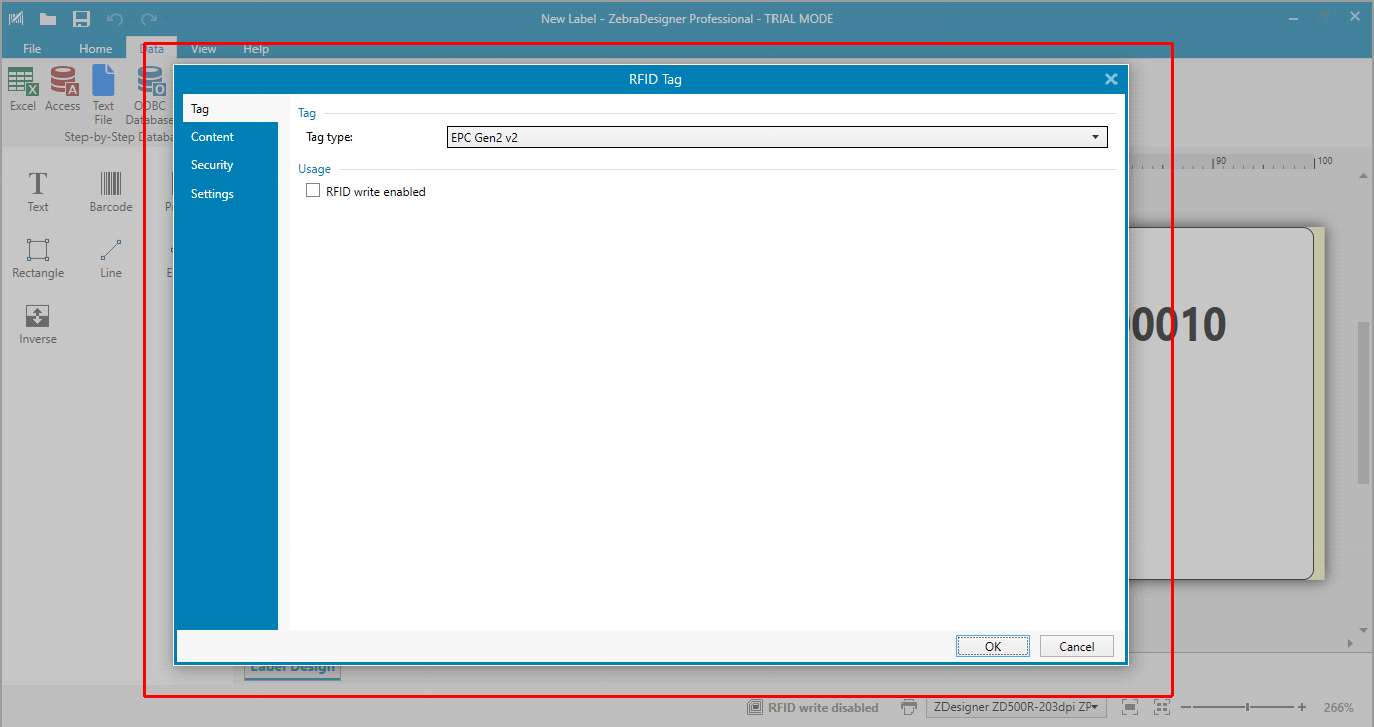
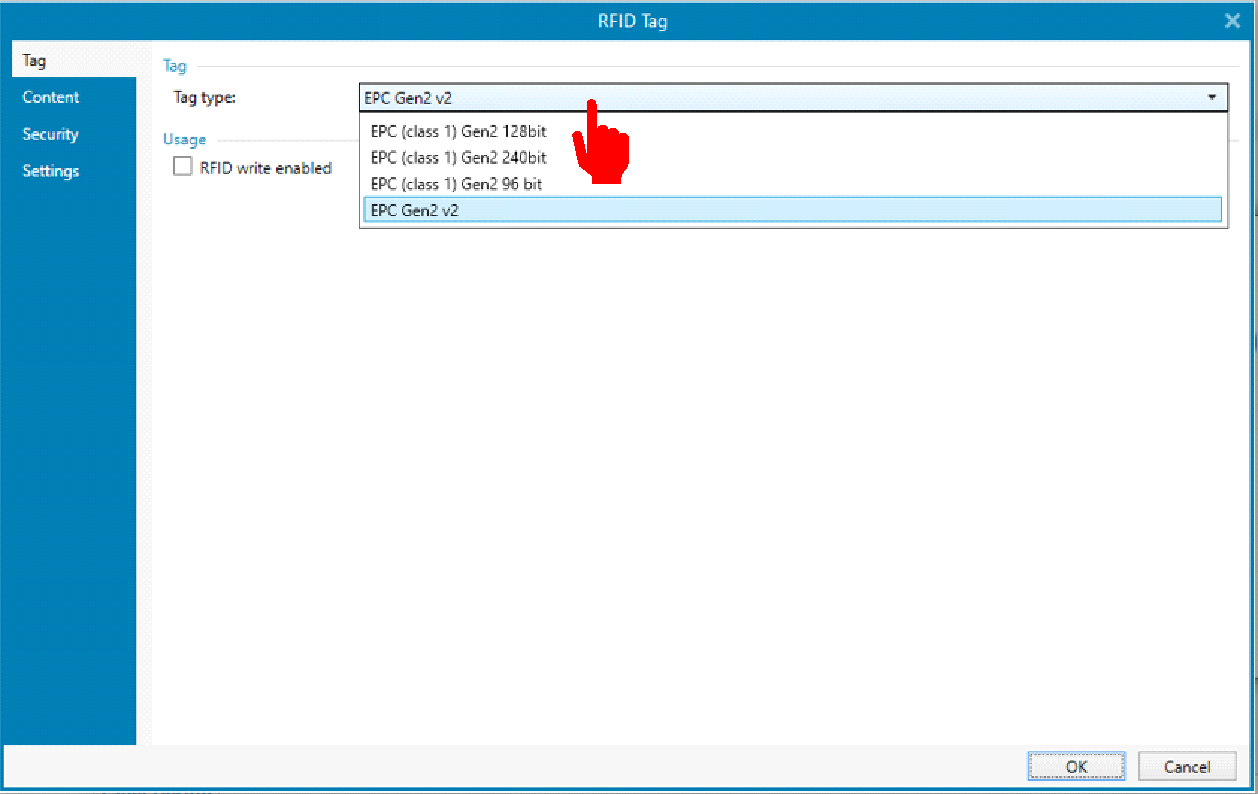
17. New popup windows will open with name “RFID Tag” as highlighted in red.
18. Click on “Tag Type” dropdown to select the tag type. This is basically the memory size of the tag.
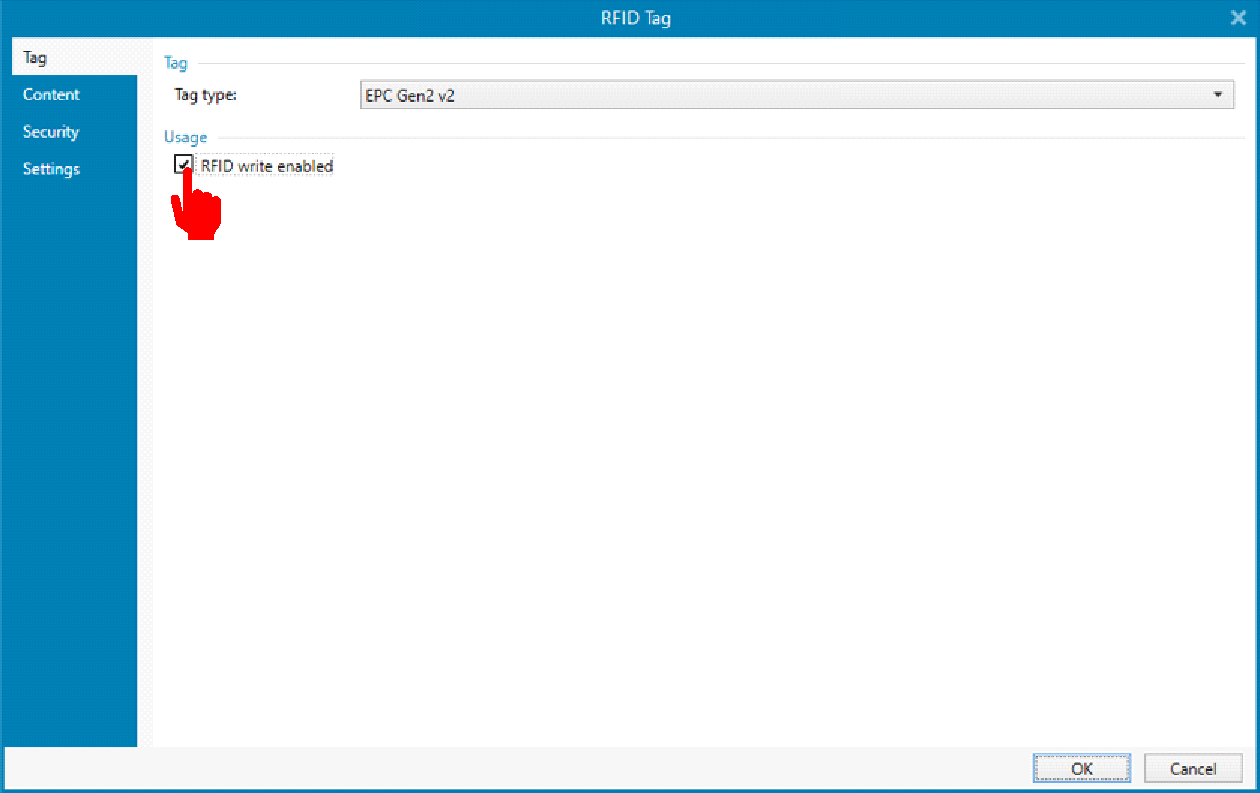
19. Under “Usage”, enable the check box “RFID write enabled”.
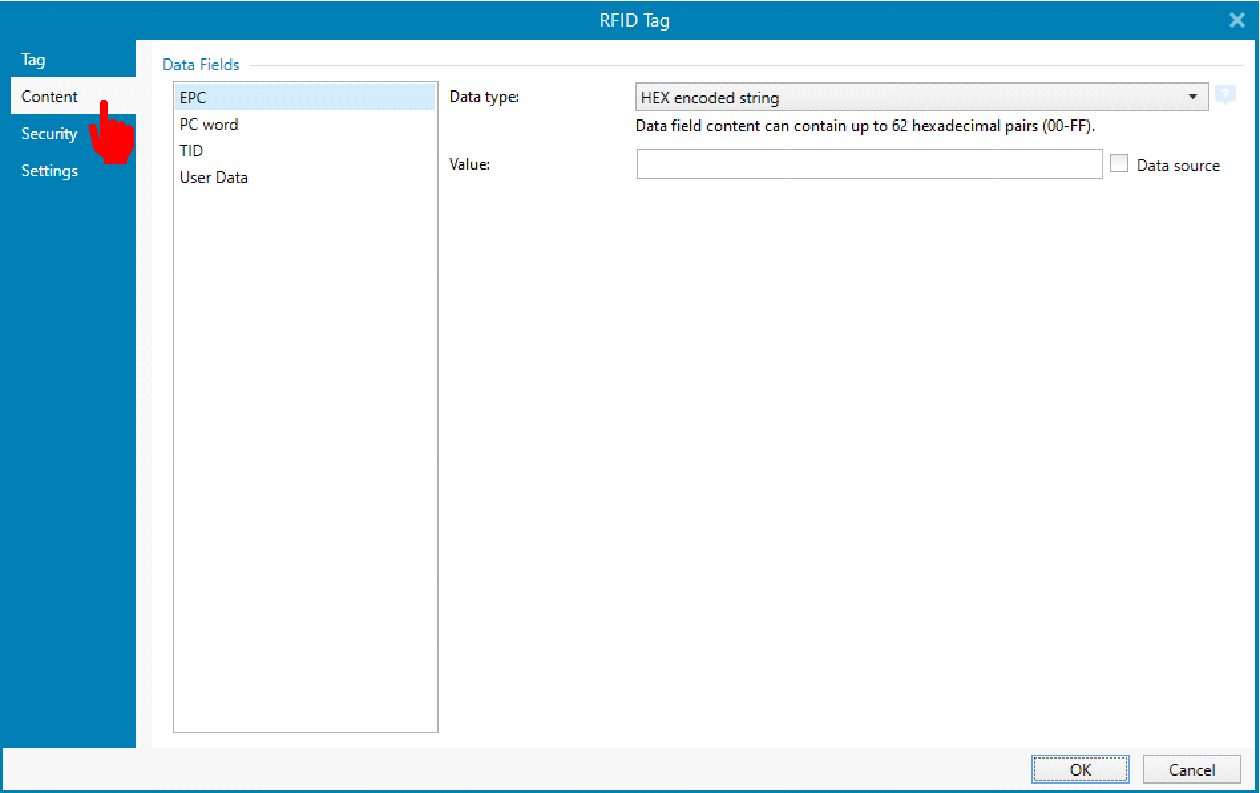
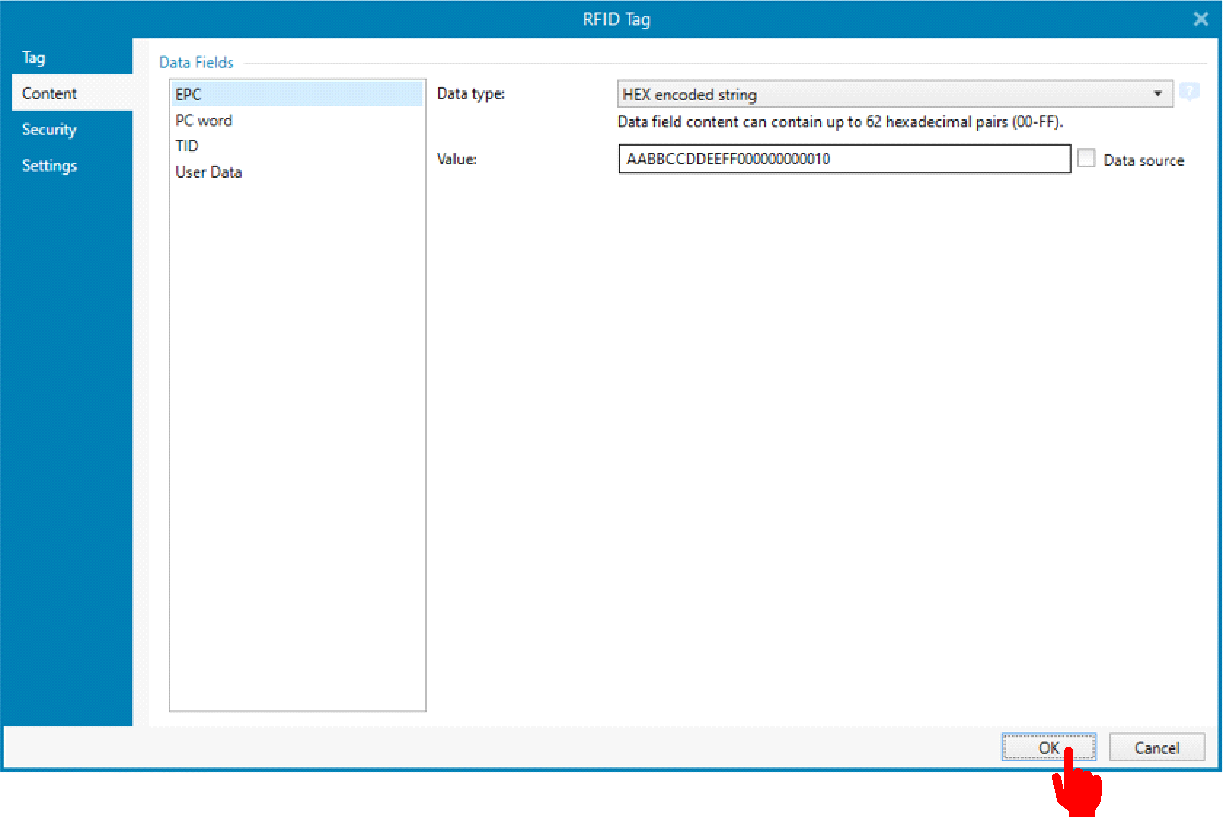
20. Please click on the “Content” and then select “EPC”
21.Please select the “Data type” as “Hex encoded string” from the dropdown.
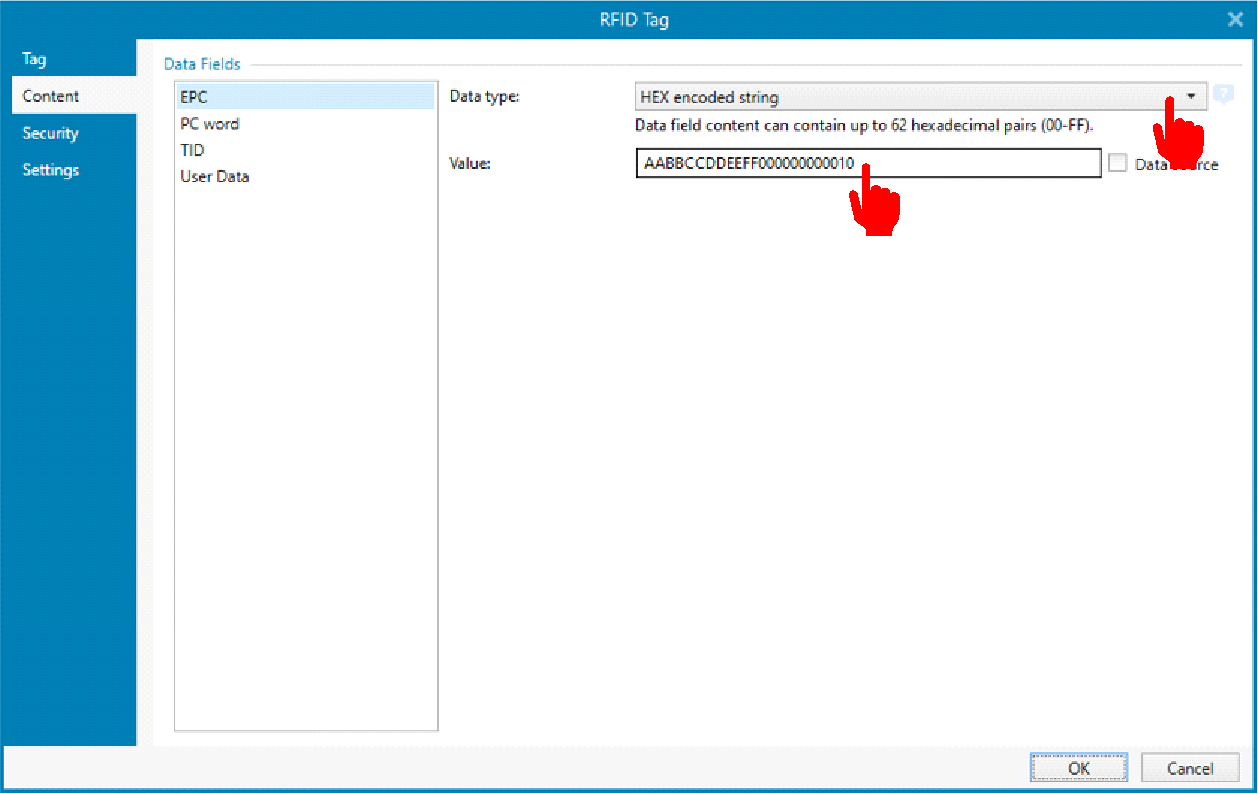
22. Then enter the 24-digit hex values of EPC as shown in the image below.
23. Please click on “OK” button to save the settings.
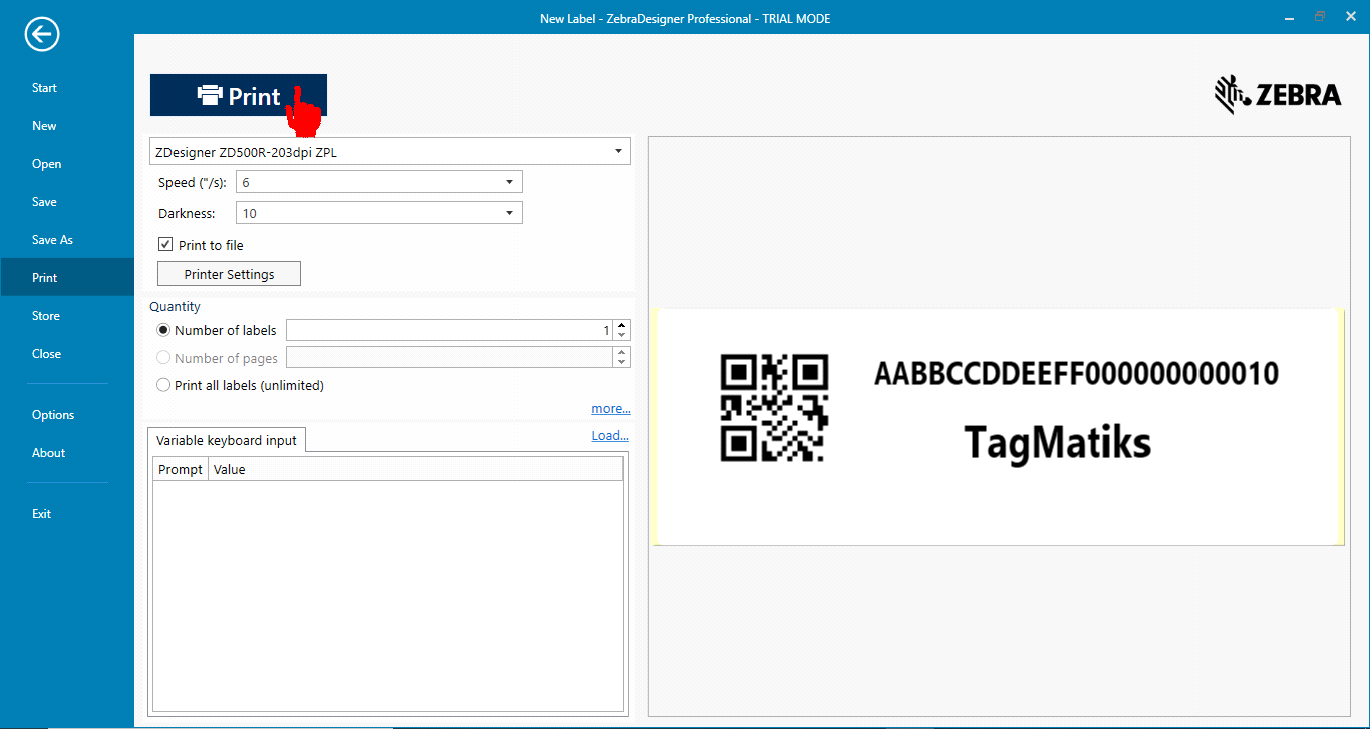
1. Please click on “print” icon or press “ctrl+p” for open the print dialog window.
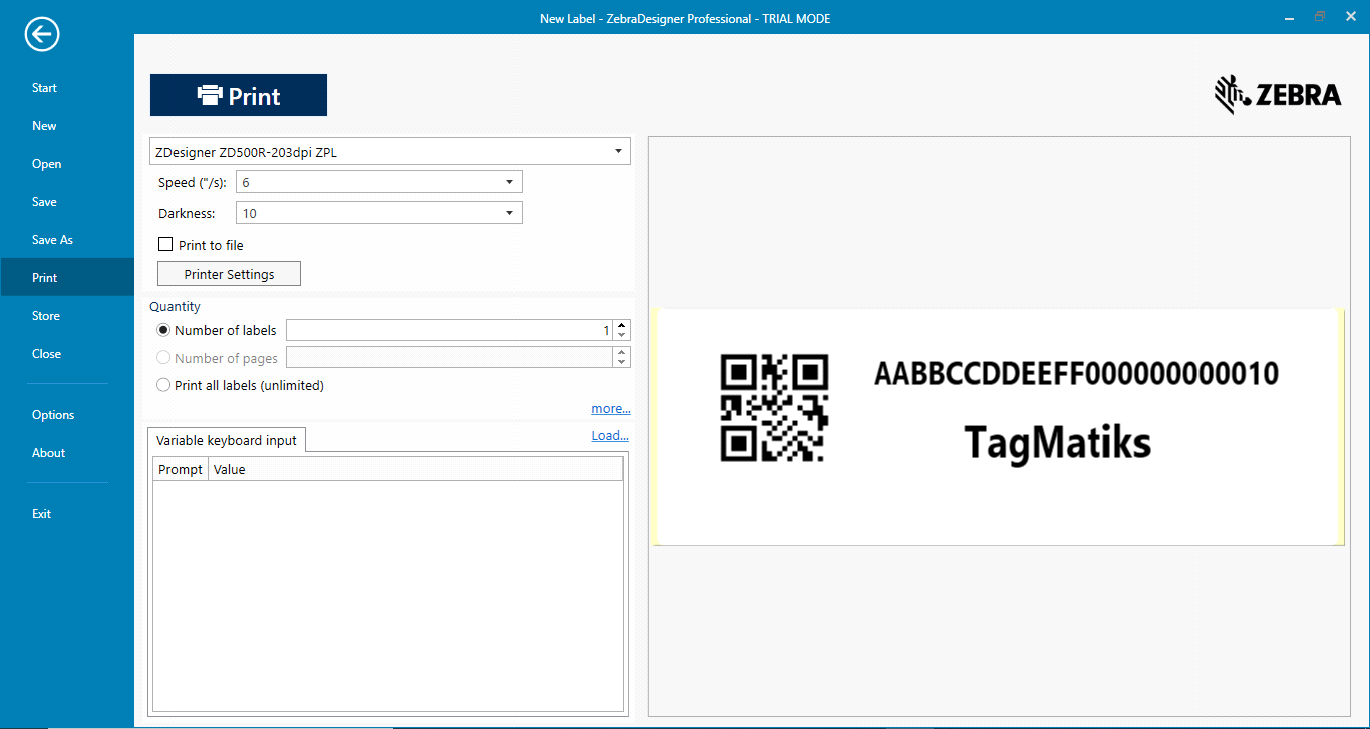
2. Print dialog window will open as shown in the image below.
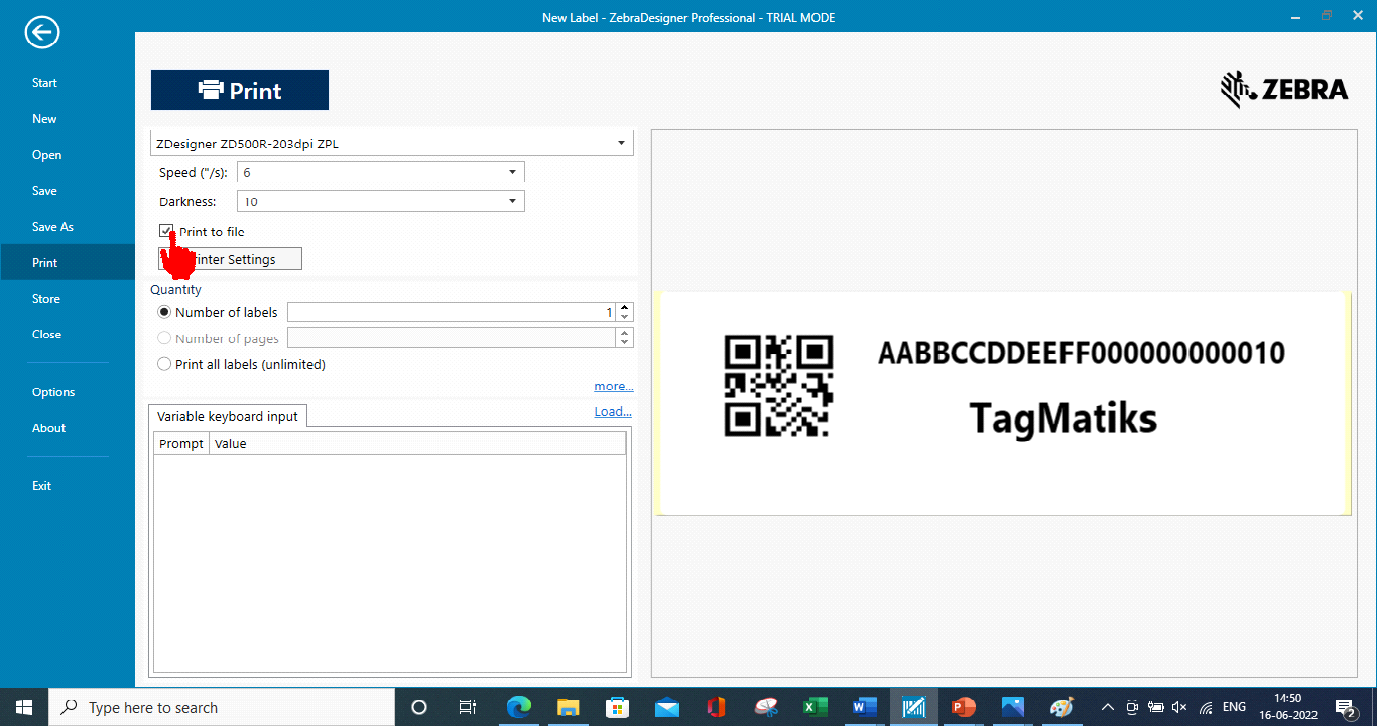
3. Please enable “Print to file” check box to create the print file.
4. Please click on “Print” button.
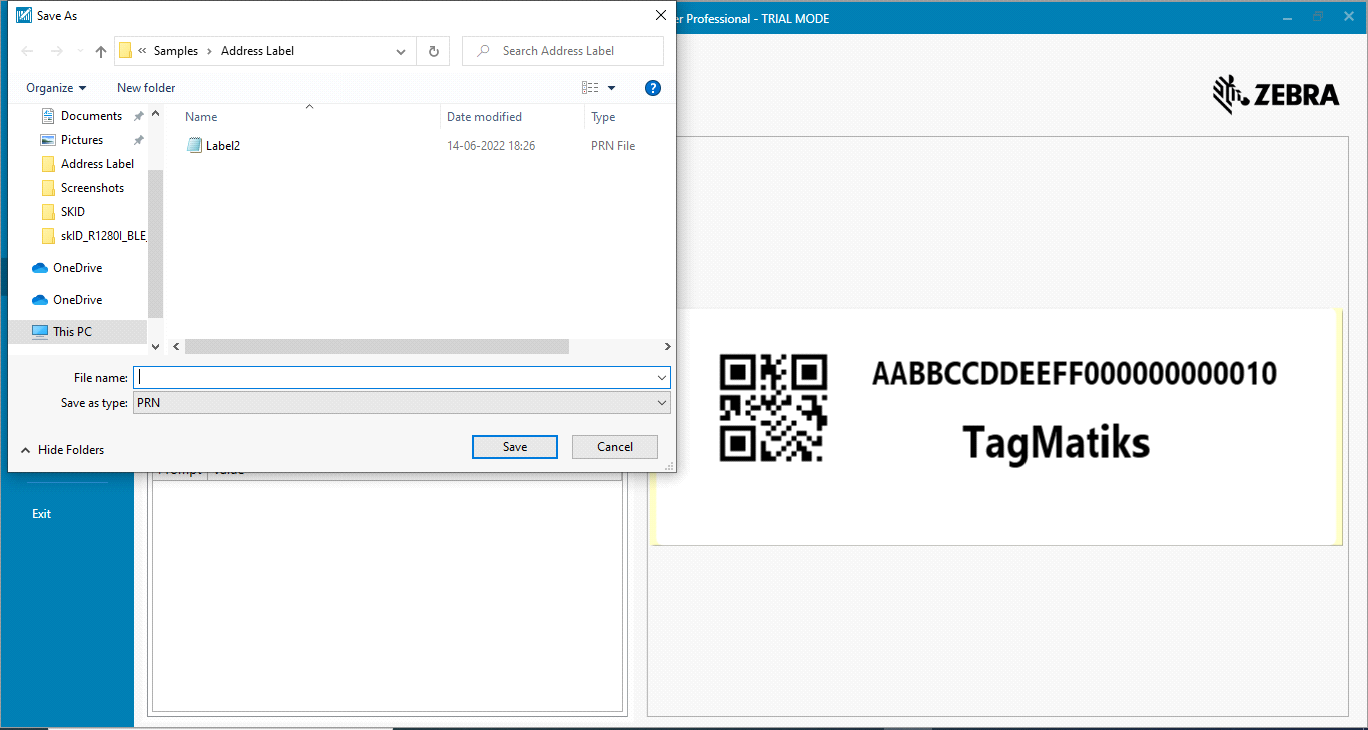
5. It will redirect you to a path to save the print file (prn file). Please select the folder, where you want to save the prn file.
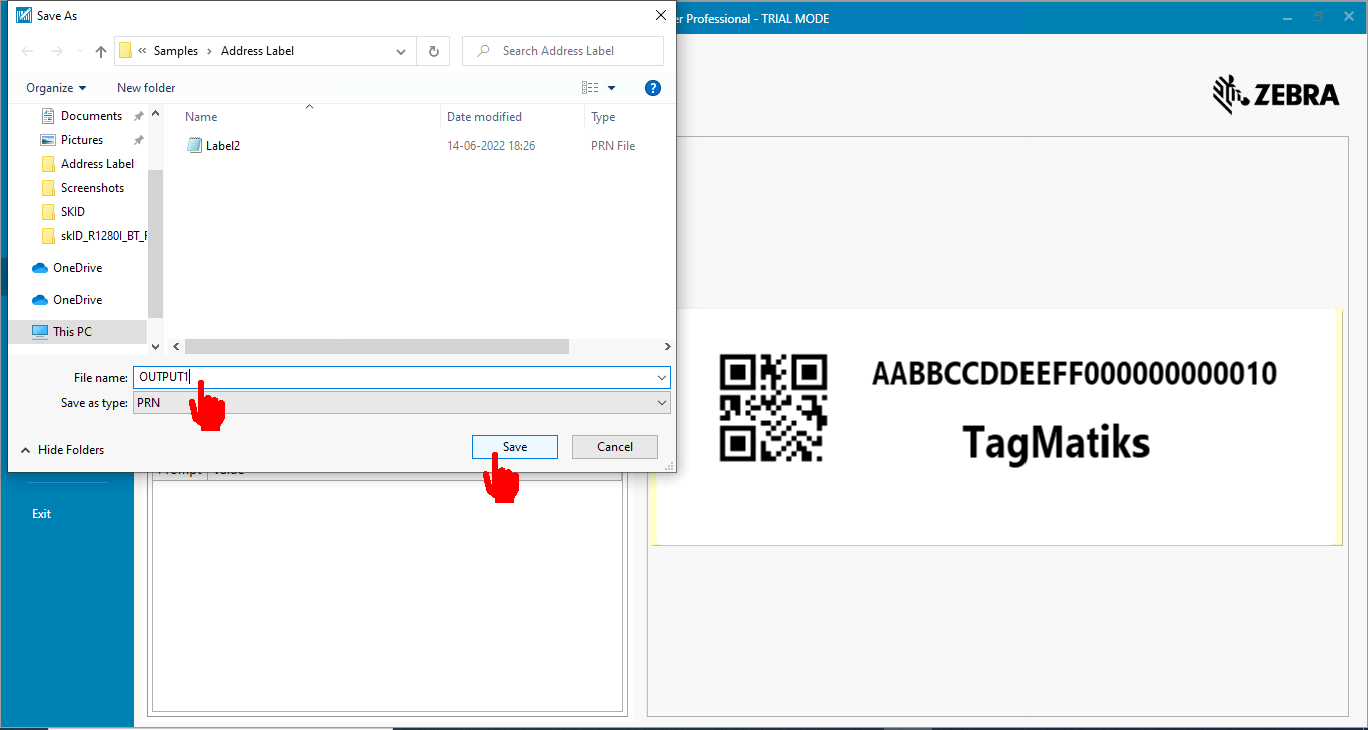
6. Please enter the file name and click on “save” button, as shown in the image below, here the file name is given as “OUTPUT1”.
7. Open TagMatiks AT Lite & Log into it.
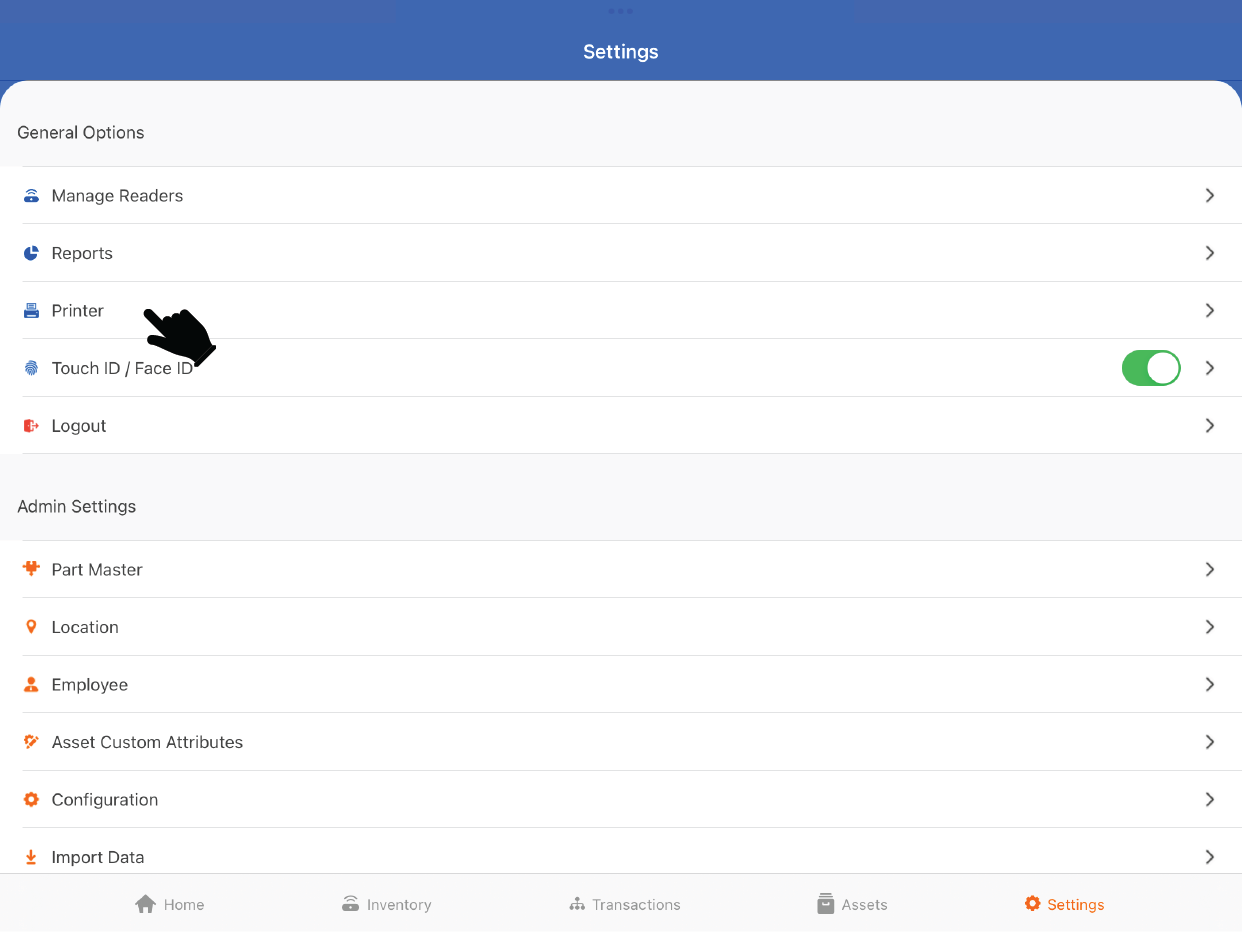
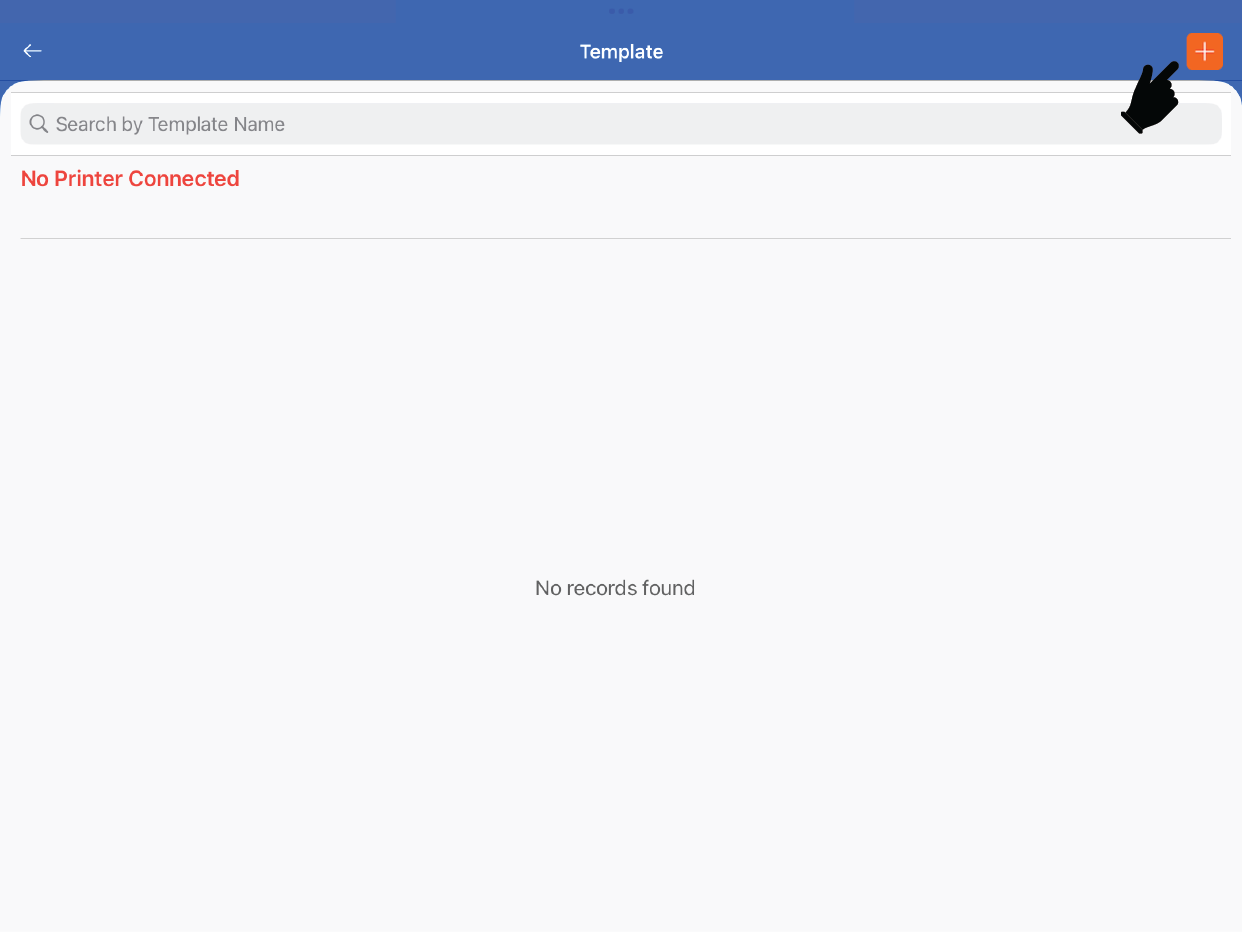
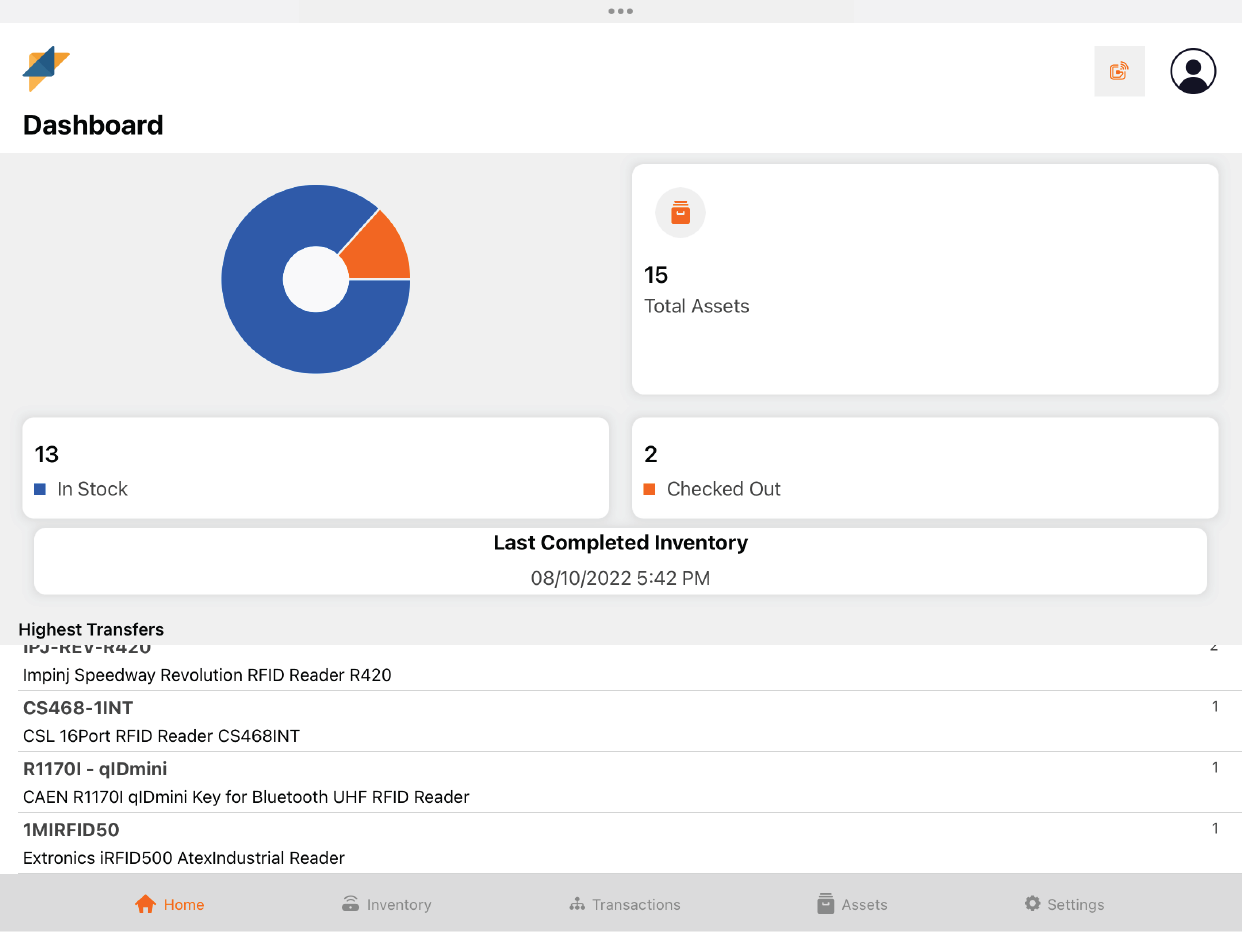
8. On the Home Page, click on the Settings Icon (at the bottom right side of screen); as shown below:
9. Select the “Printer” option.
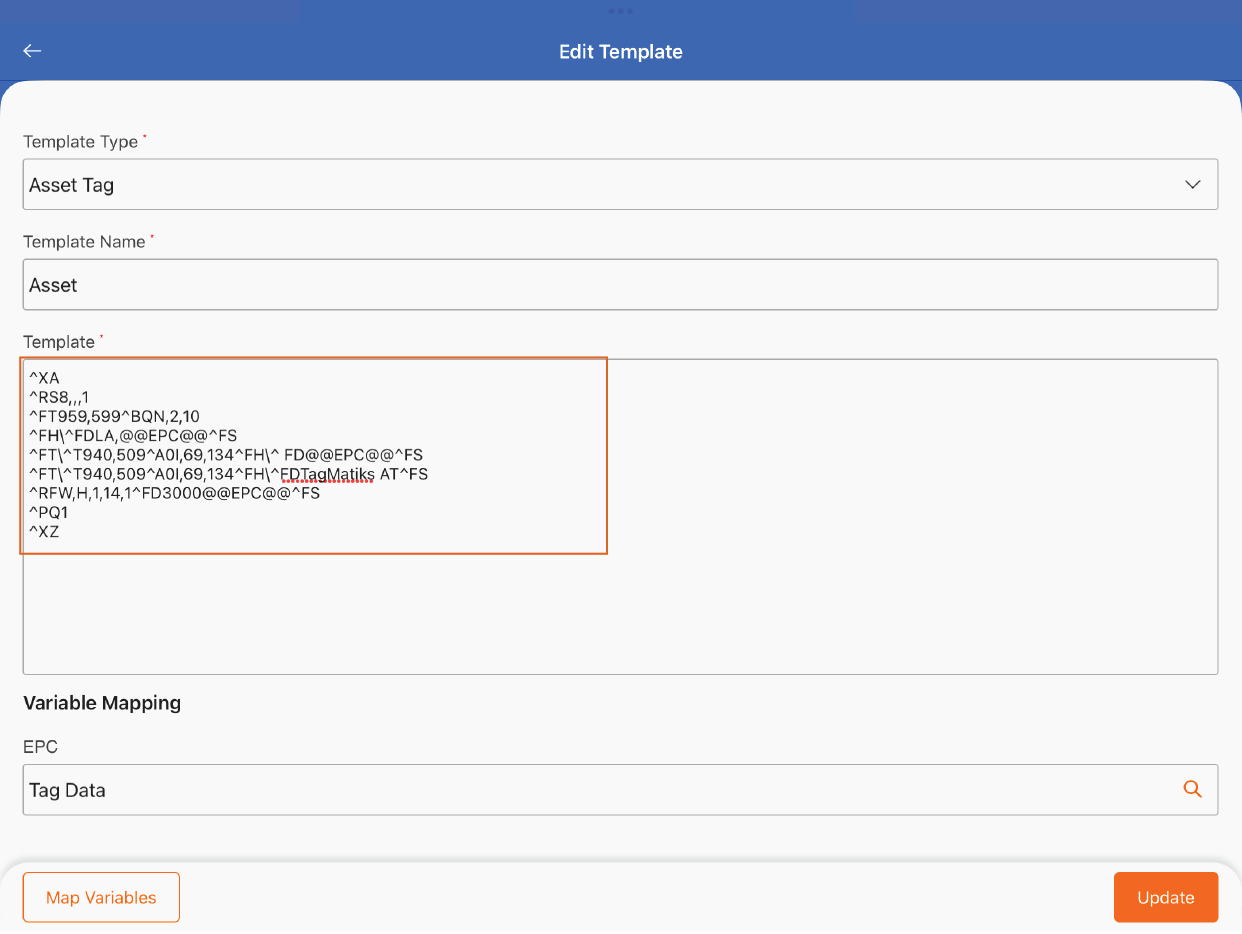
10. Press ‘+’ to enter the “Asset Template Type”; it can be either for “Employee” or “Asset” tag template.
11. Enter the “Template Name”; to save it into the device.
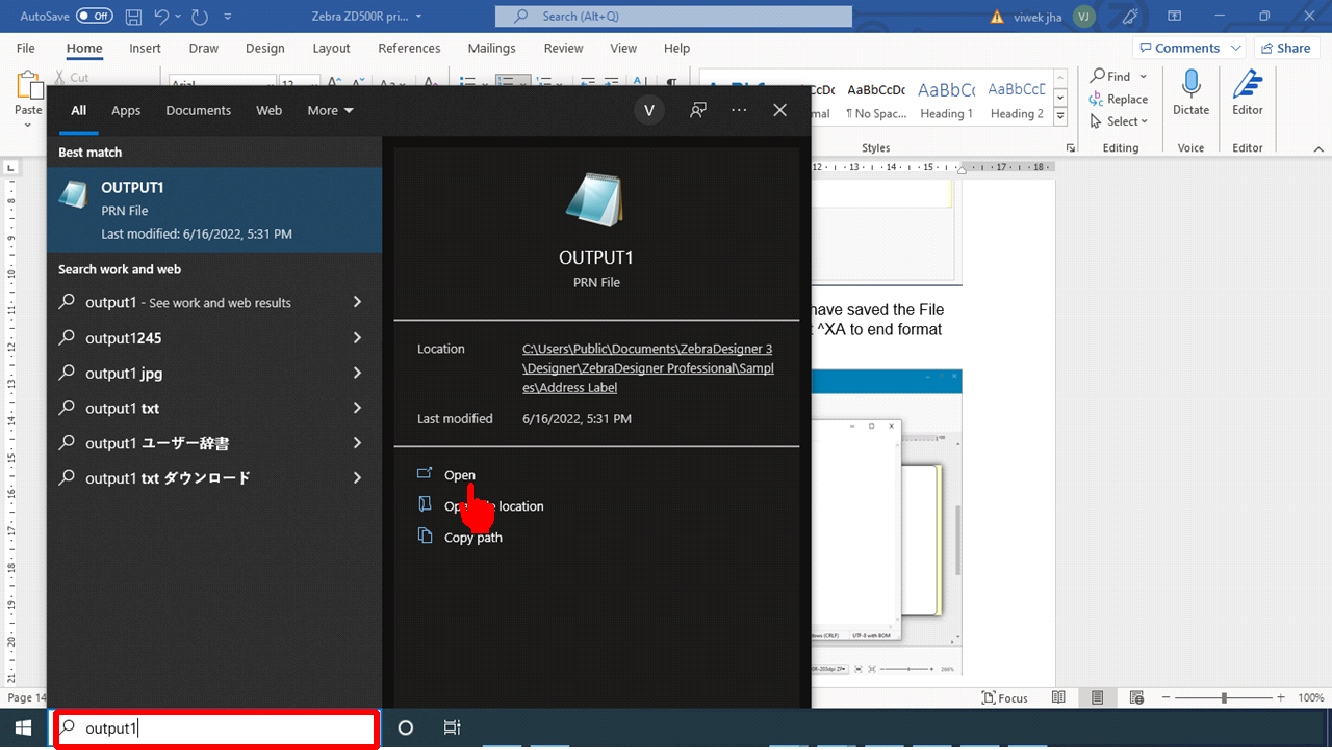
12. Transfer the PRN file to the iOS Device & copy the text of the PRN file.
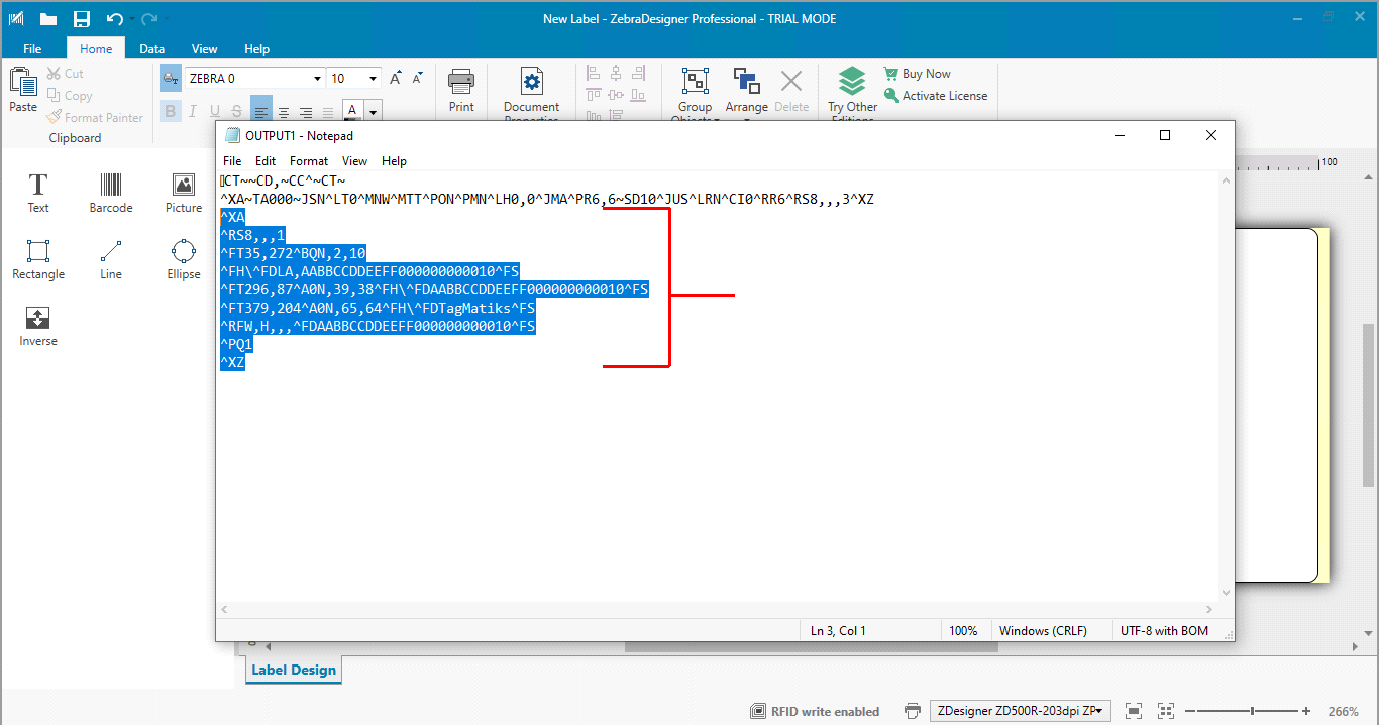
13. Select the command from start format “^XA” to end format “^XZ” command as shown in image below.
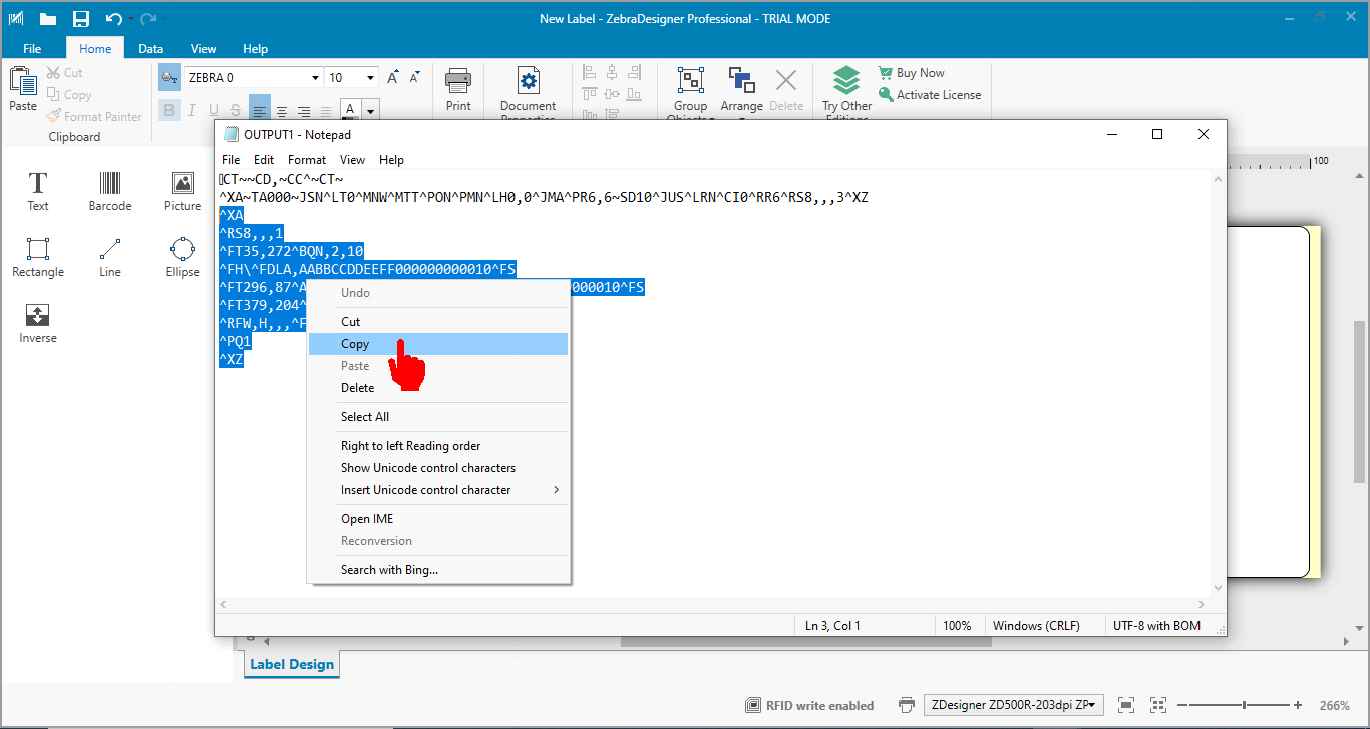
14. Copy the selected command as shown below.
15. Then paste it in the “Template” section
16. Click “Save” to save the changes.
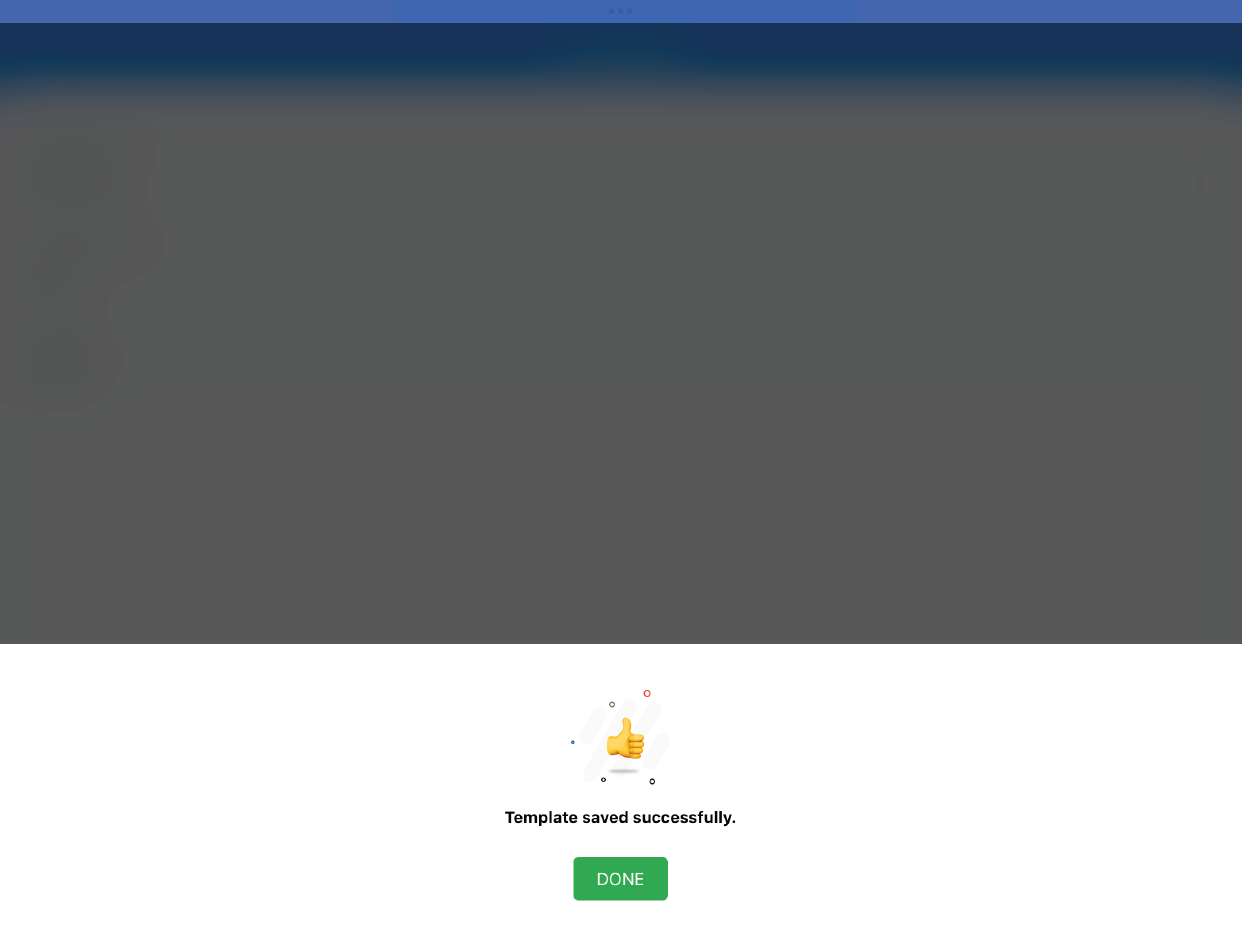
17. An Acknowledgement will appear stating "Template saved successfully".
To connect the Printer with the TagMatiks AT Lite application over LAN, please follow the below mentioned steps :
1. Open TagMatiks AT Lite application and log into it.
2. Then click on “Settings”.
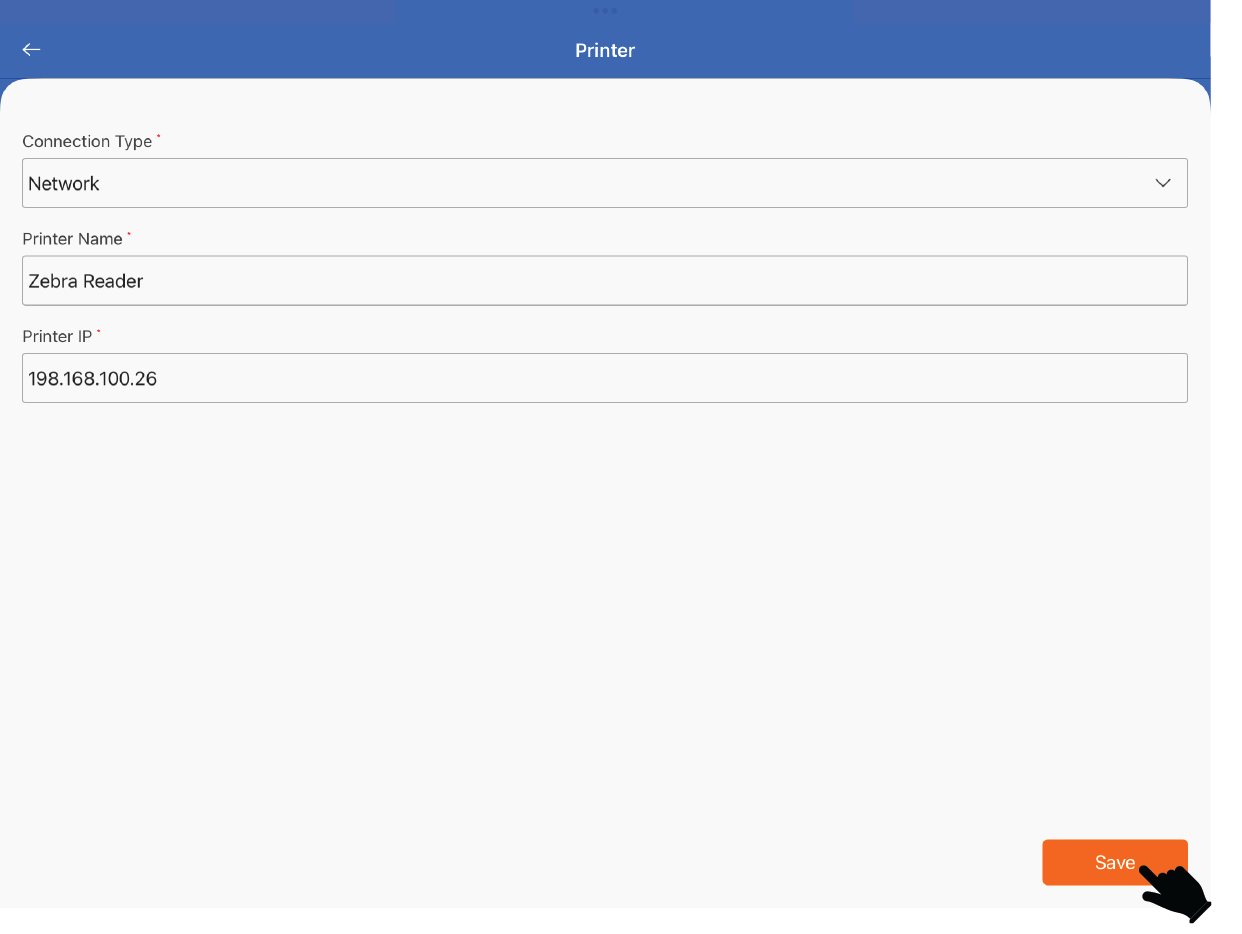
3. Select the “Printer” option available in the “Settings” page
4. Click on “+” to add a printer & connecting it with the application.
5. Since we are connecting the printer over ethernet network (LAN); thus, please select the “Connection Type” as “Network” from the dropdown options.
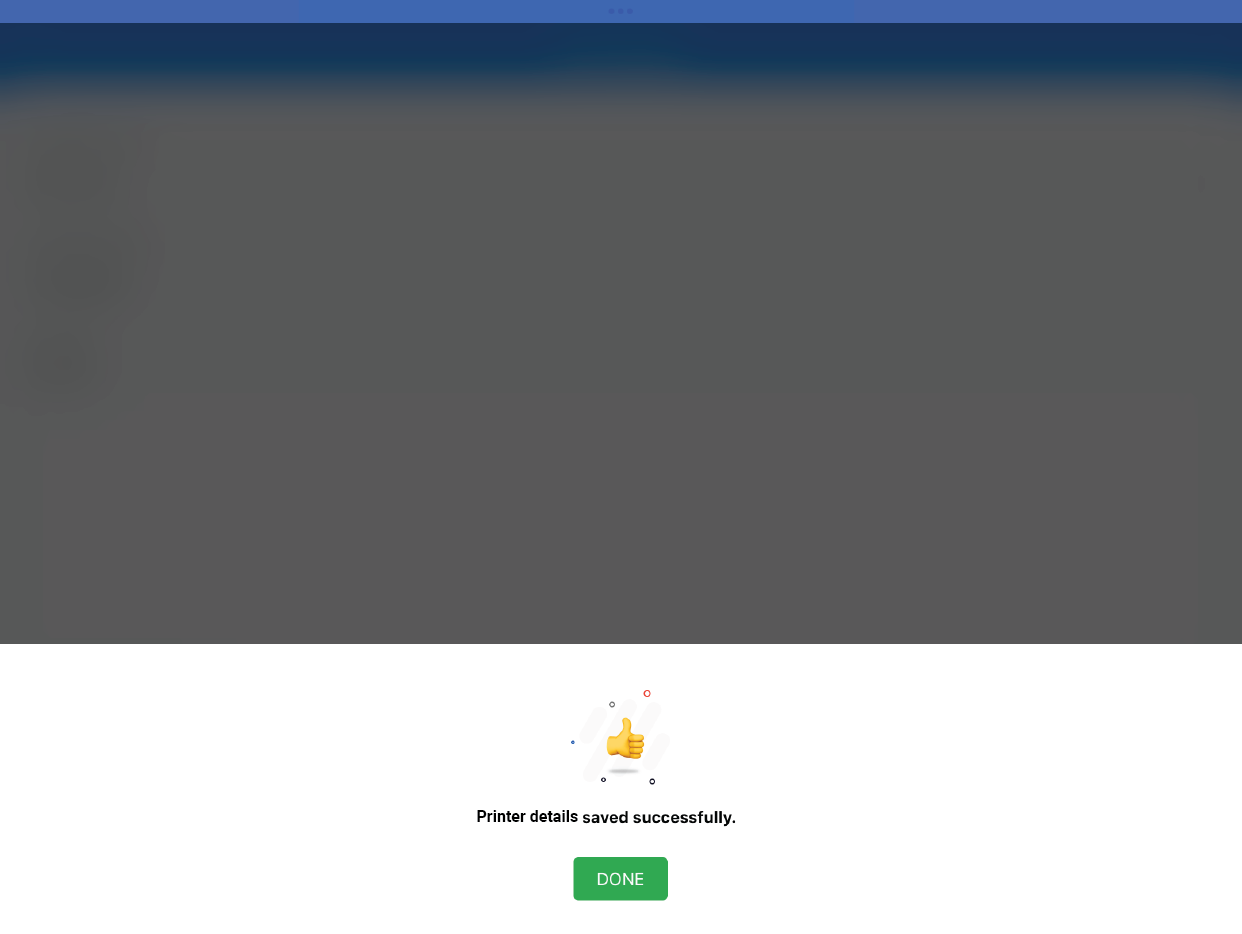
6. Then enter the “Printer IP” address of the printer and press “Save” to save the settings.
7. An acknowledgement will appear stating “Printer details saved successfully.”
Note : Here the IP Address of the printer is 192.168.103.254
Now you can start printing your new RFID labels for new assets.