
This article describes the fundamentals steps when you install the application for the first time. It is very helpful to understand the creation of location, part master, assets and connecting RFID handheld readers.
Before creating an asset we need to create part details and location. Please follow the steps to create your first asset.
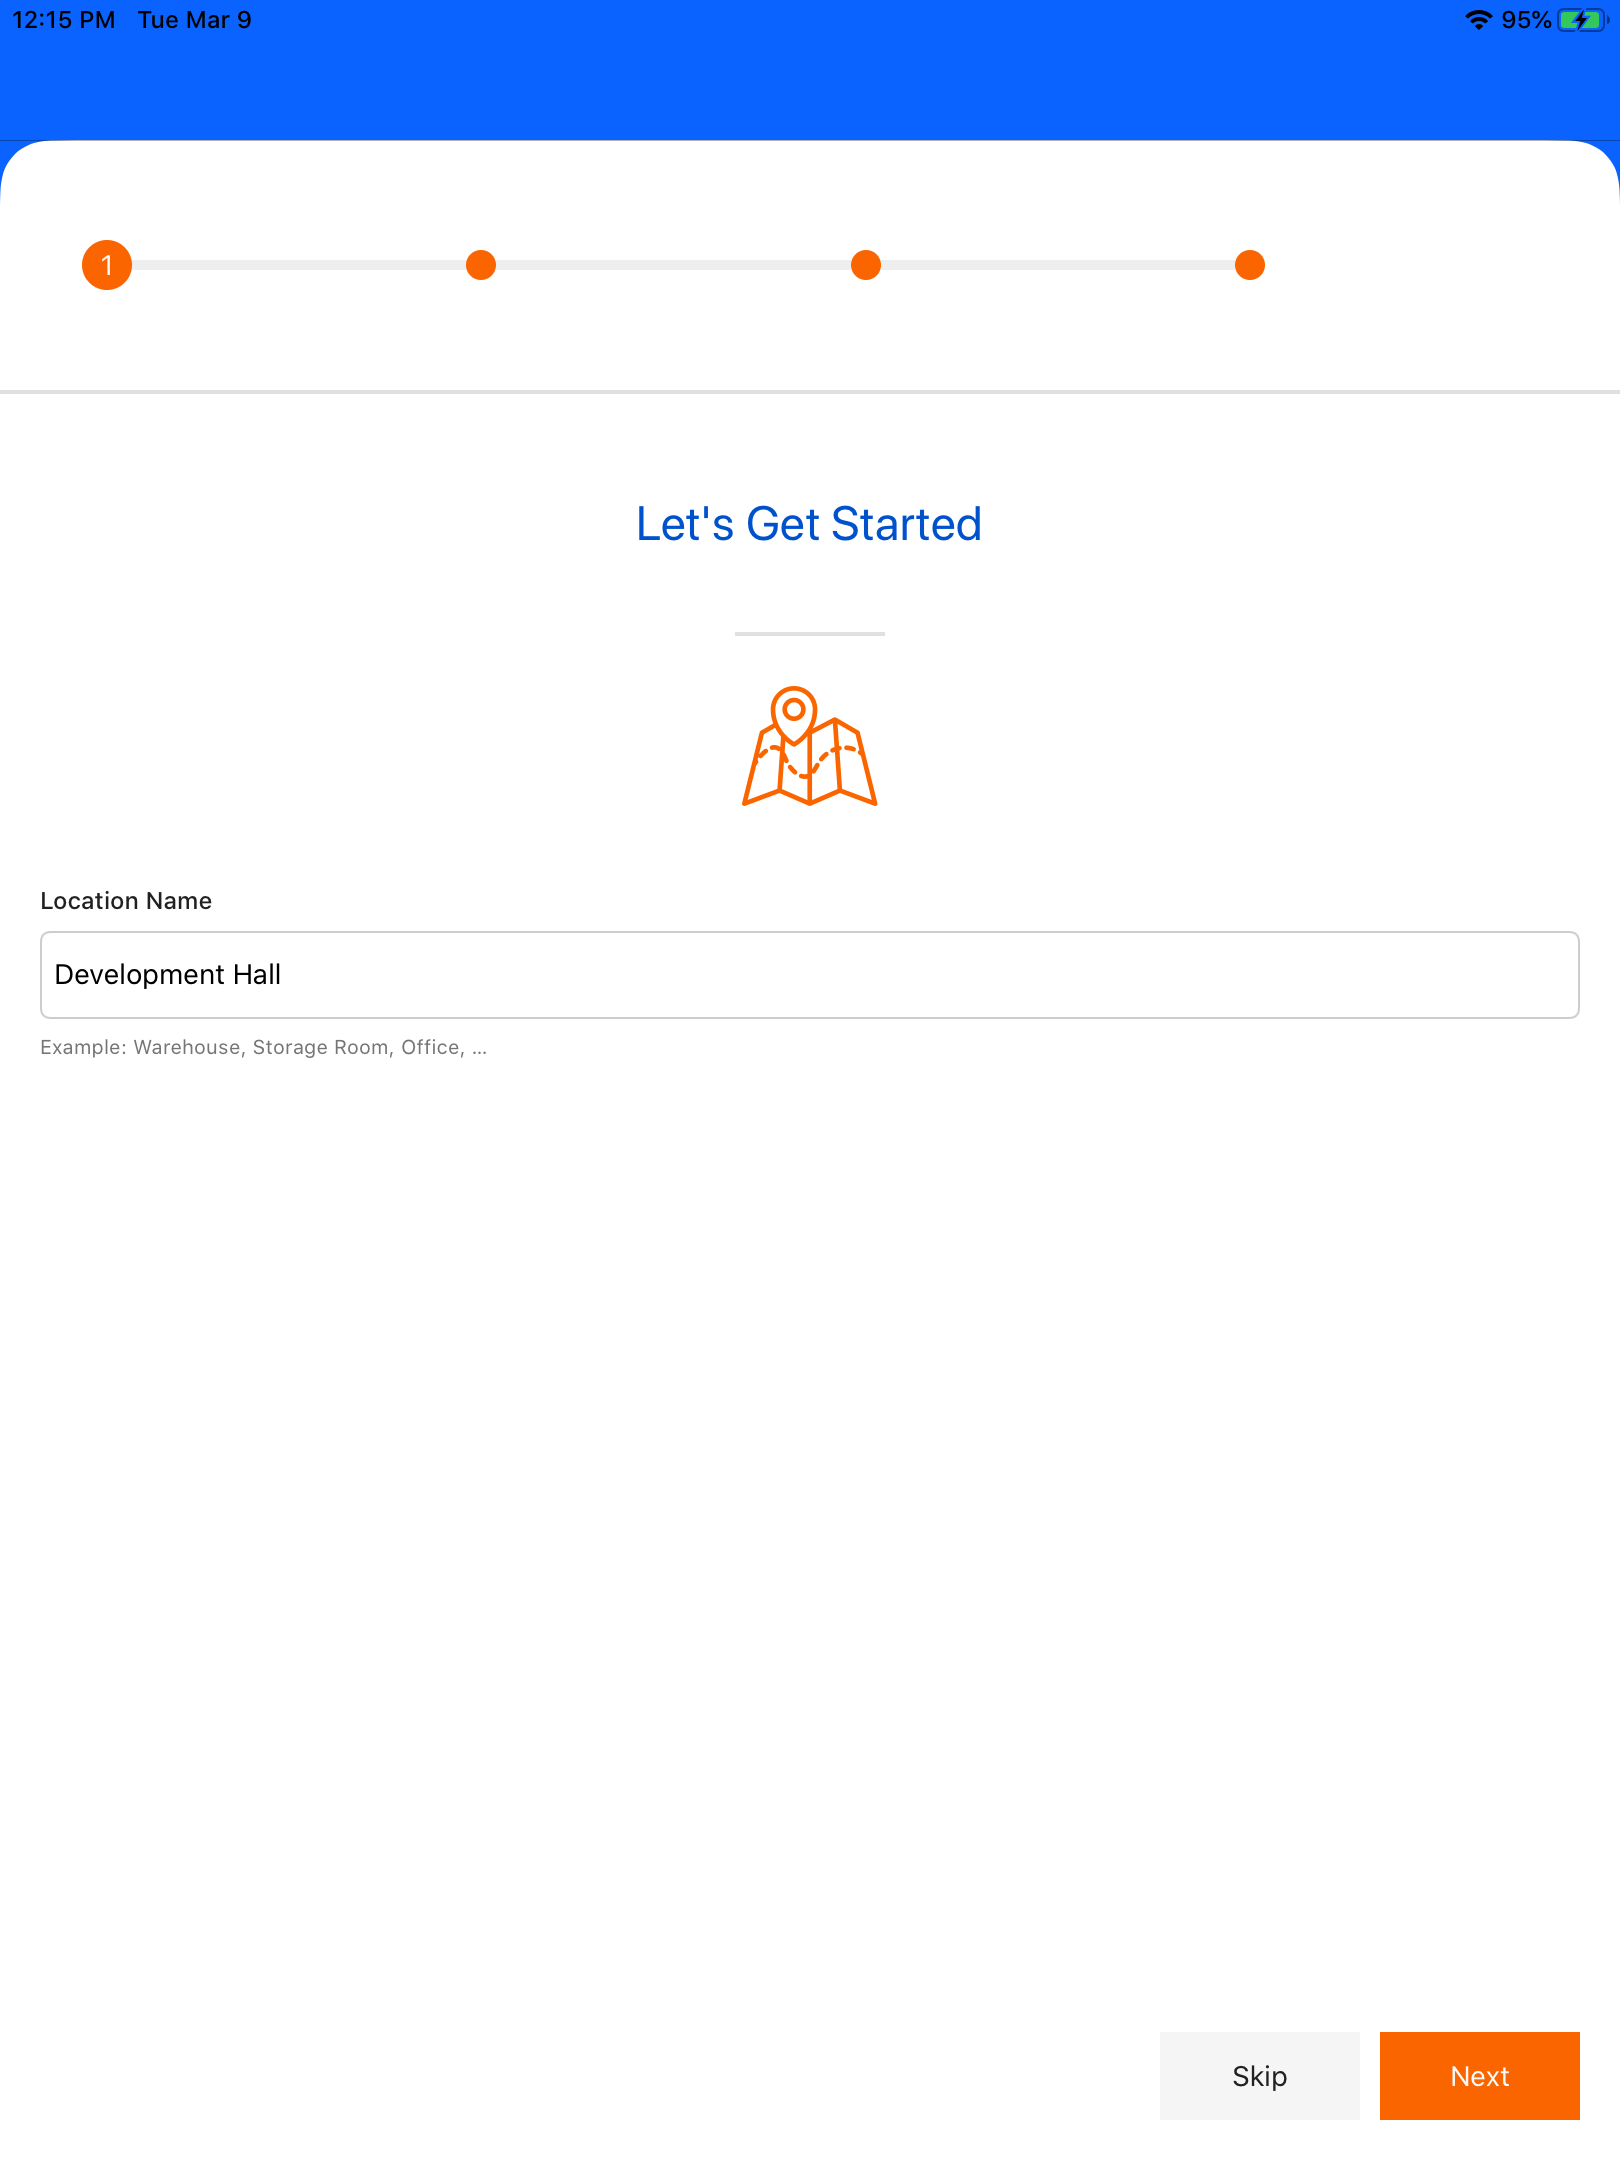
First Step - We need to create a location for where do you want to store the assets. On the Let’s get started page, enter the location name and click next to save the location and then it also redirects to the add part details page.
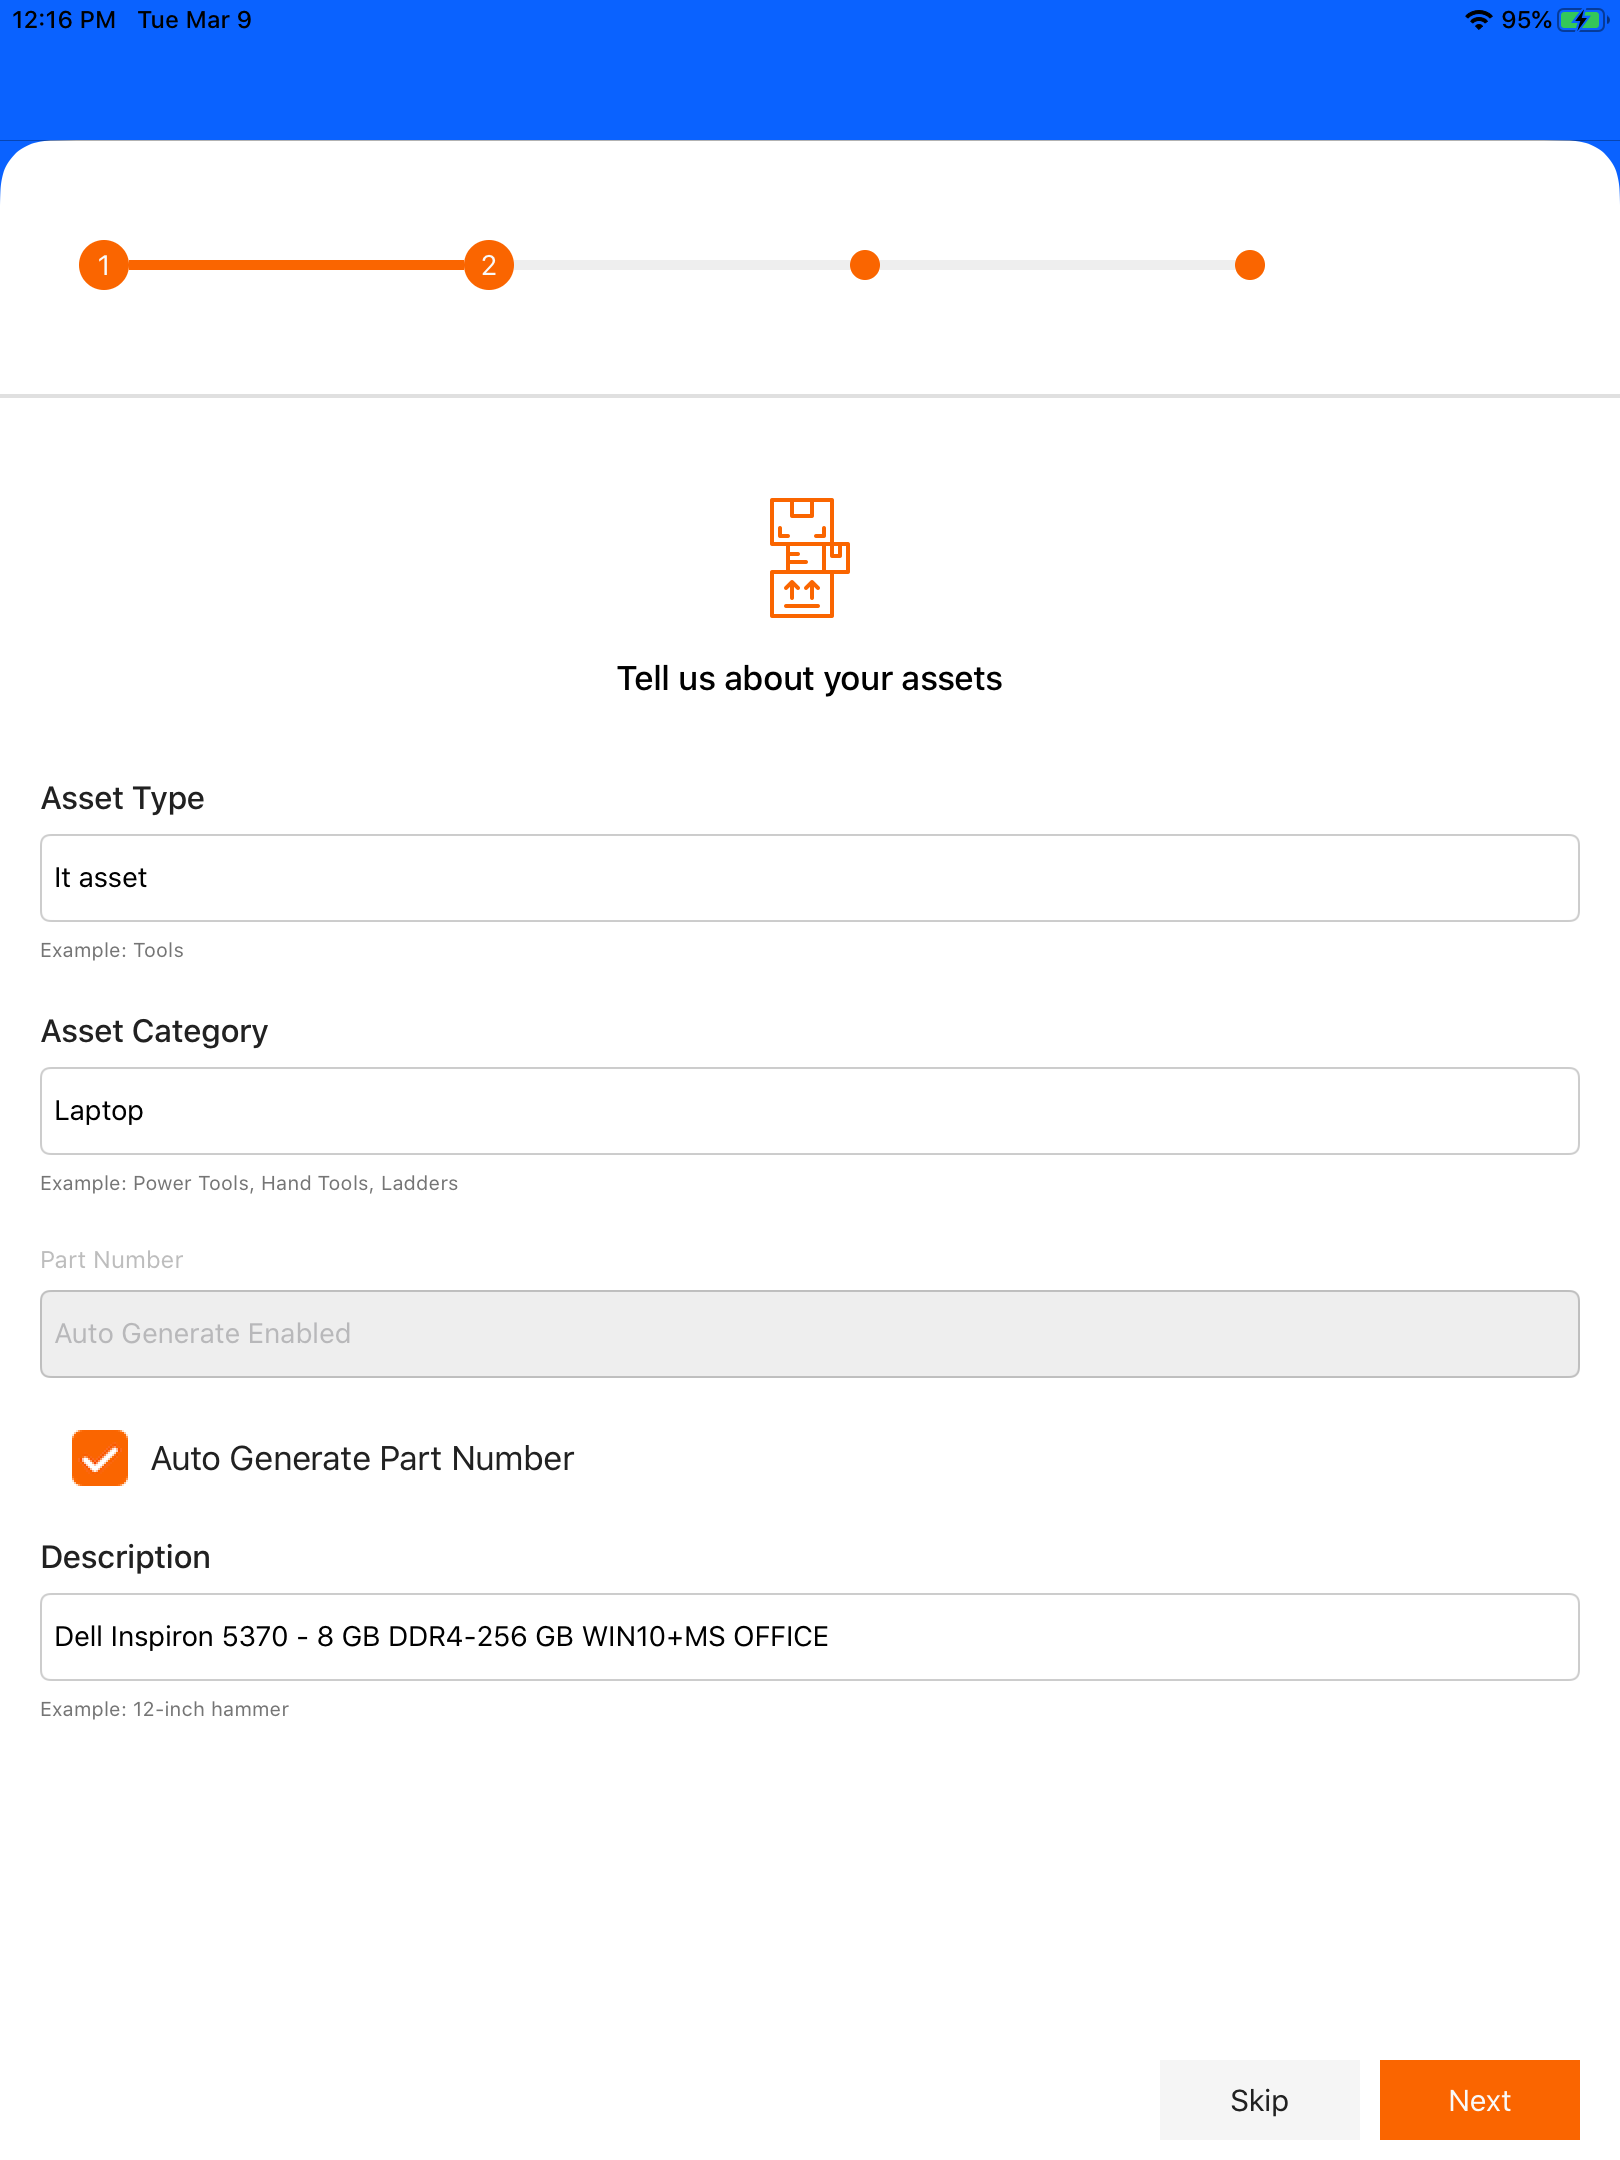
Second step - After creating the location we need to add part details for the assets. Enter the assets type, asset category, part number and description then click next to save the part details. In these part number can be created by any one of below
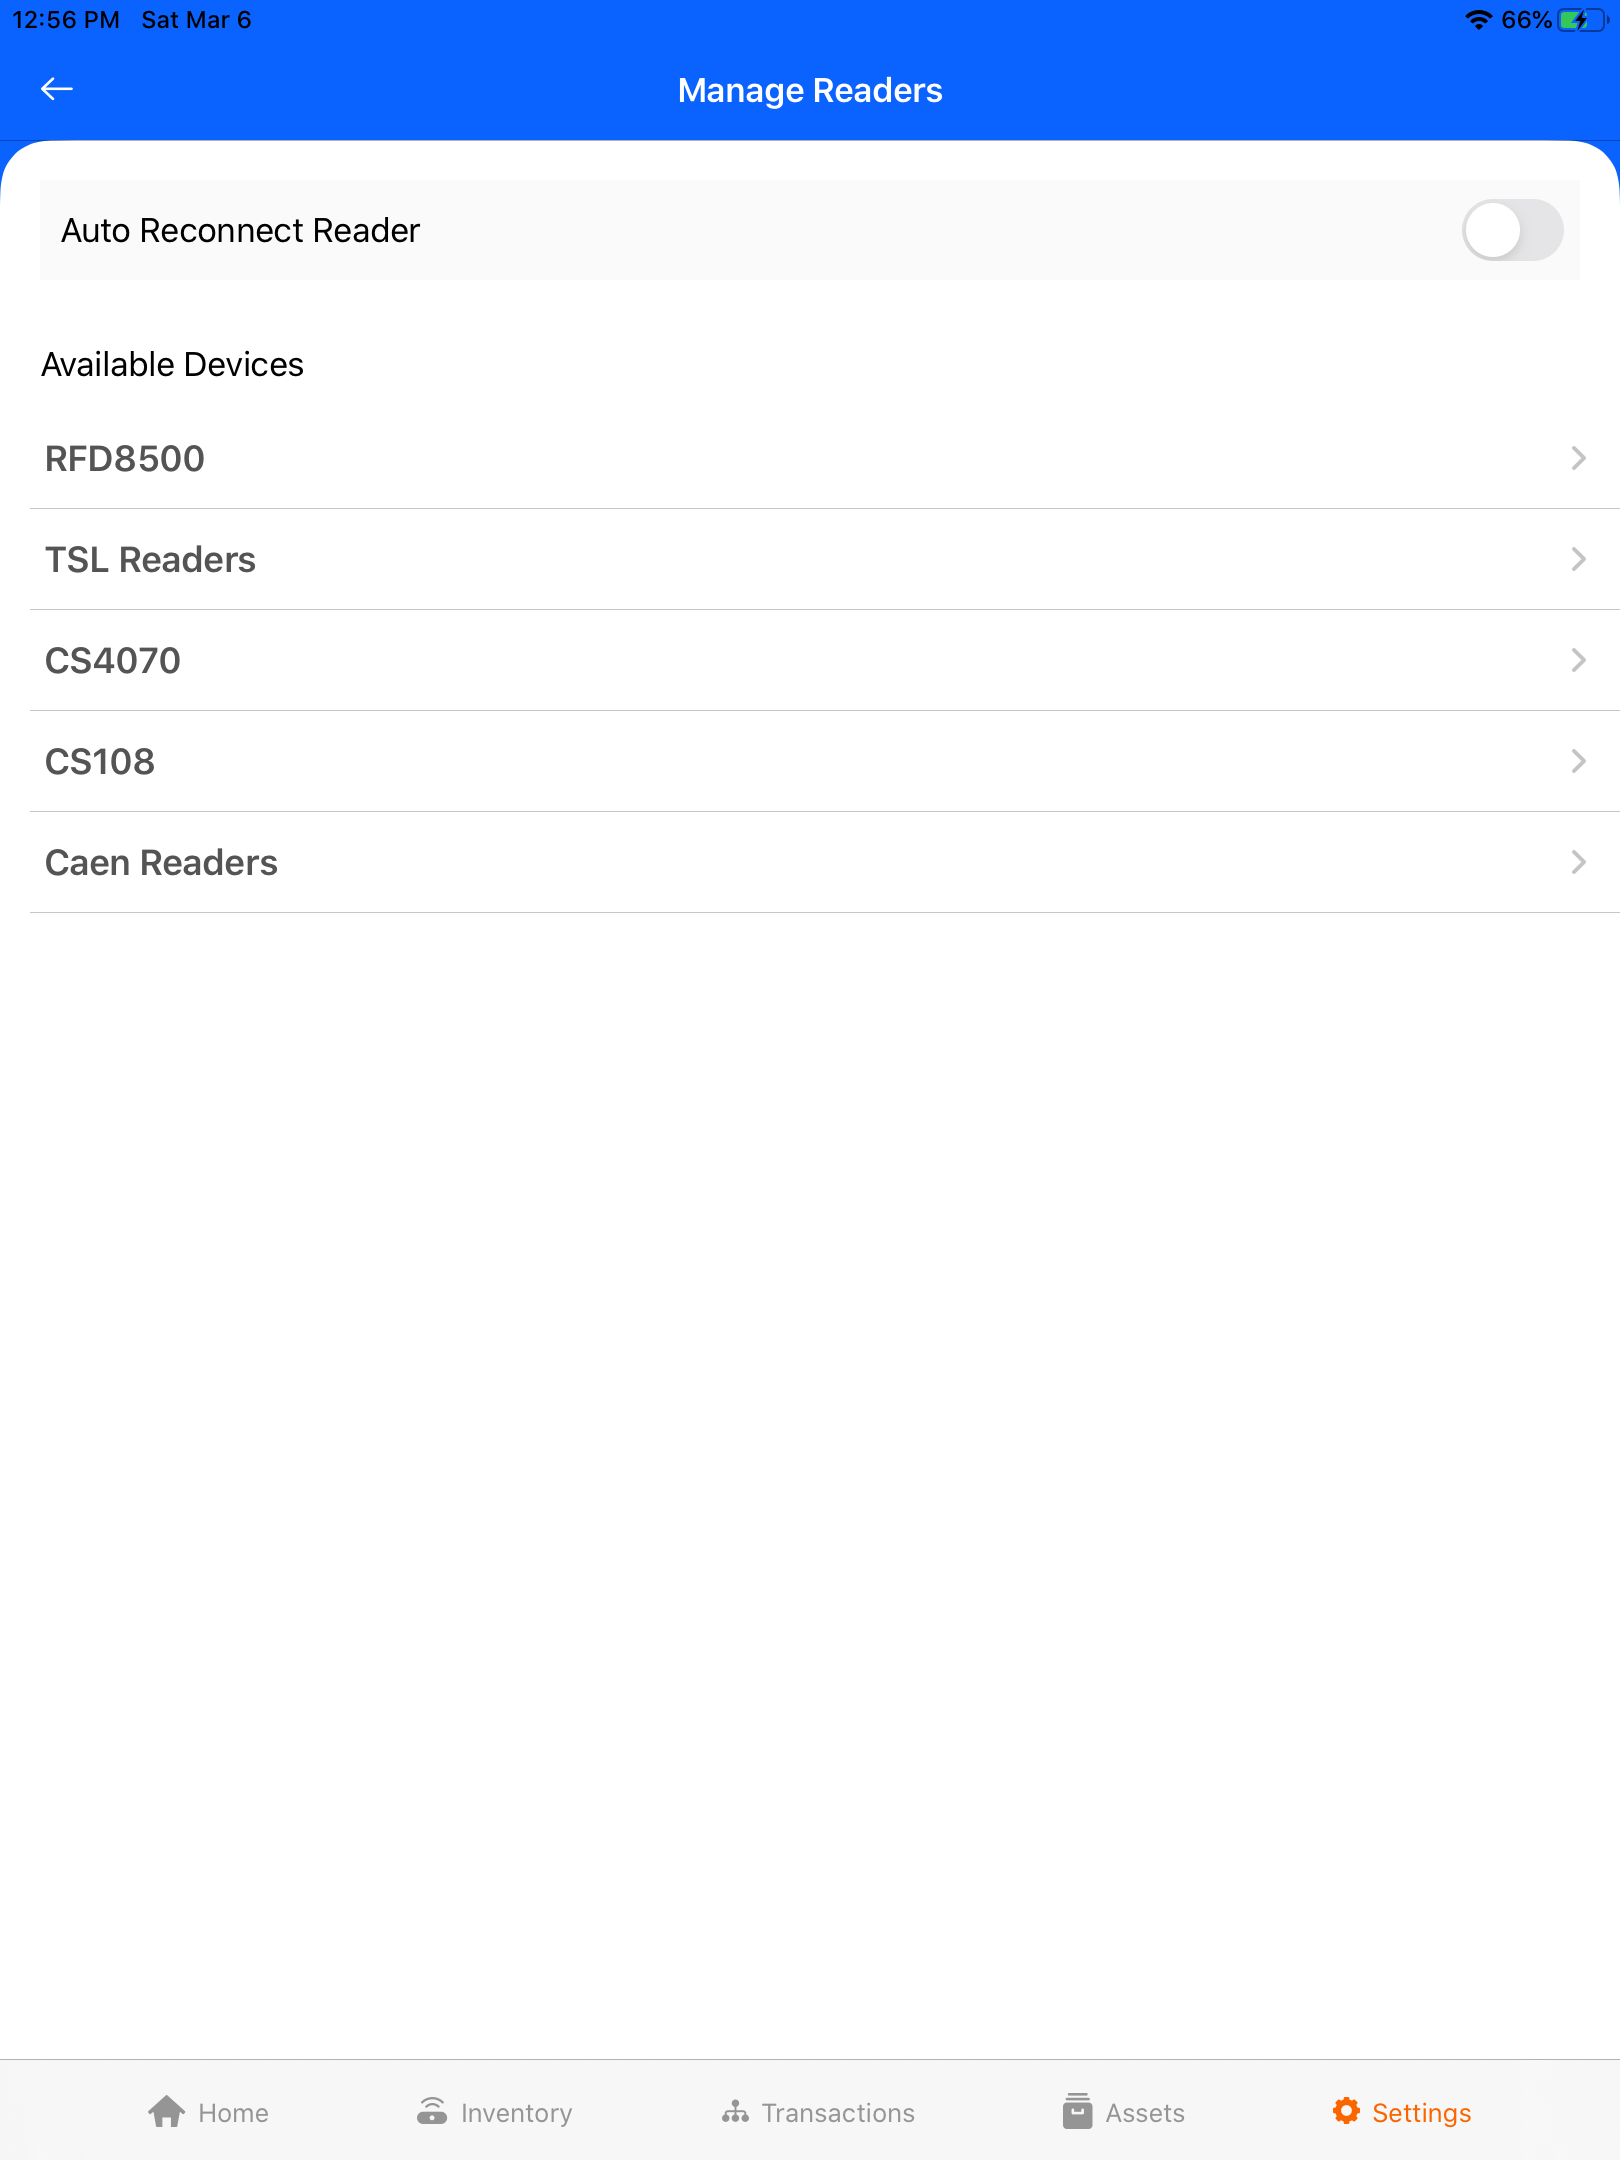
Third step - After successfully creating the location and part master, then we need to create the assets. For creating the assets we need to enter the Tag Id. Tag Id can be manual entry or by scanning the asset tags using RFID handheld readers. If we need to enter manually then click SKIP to skip the connecting reader process for the application.
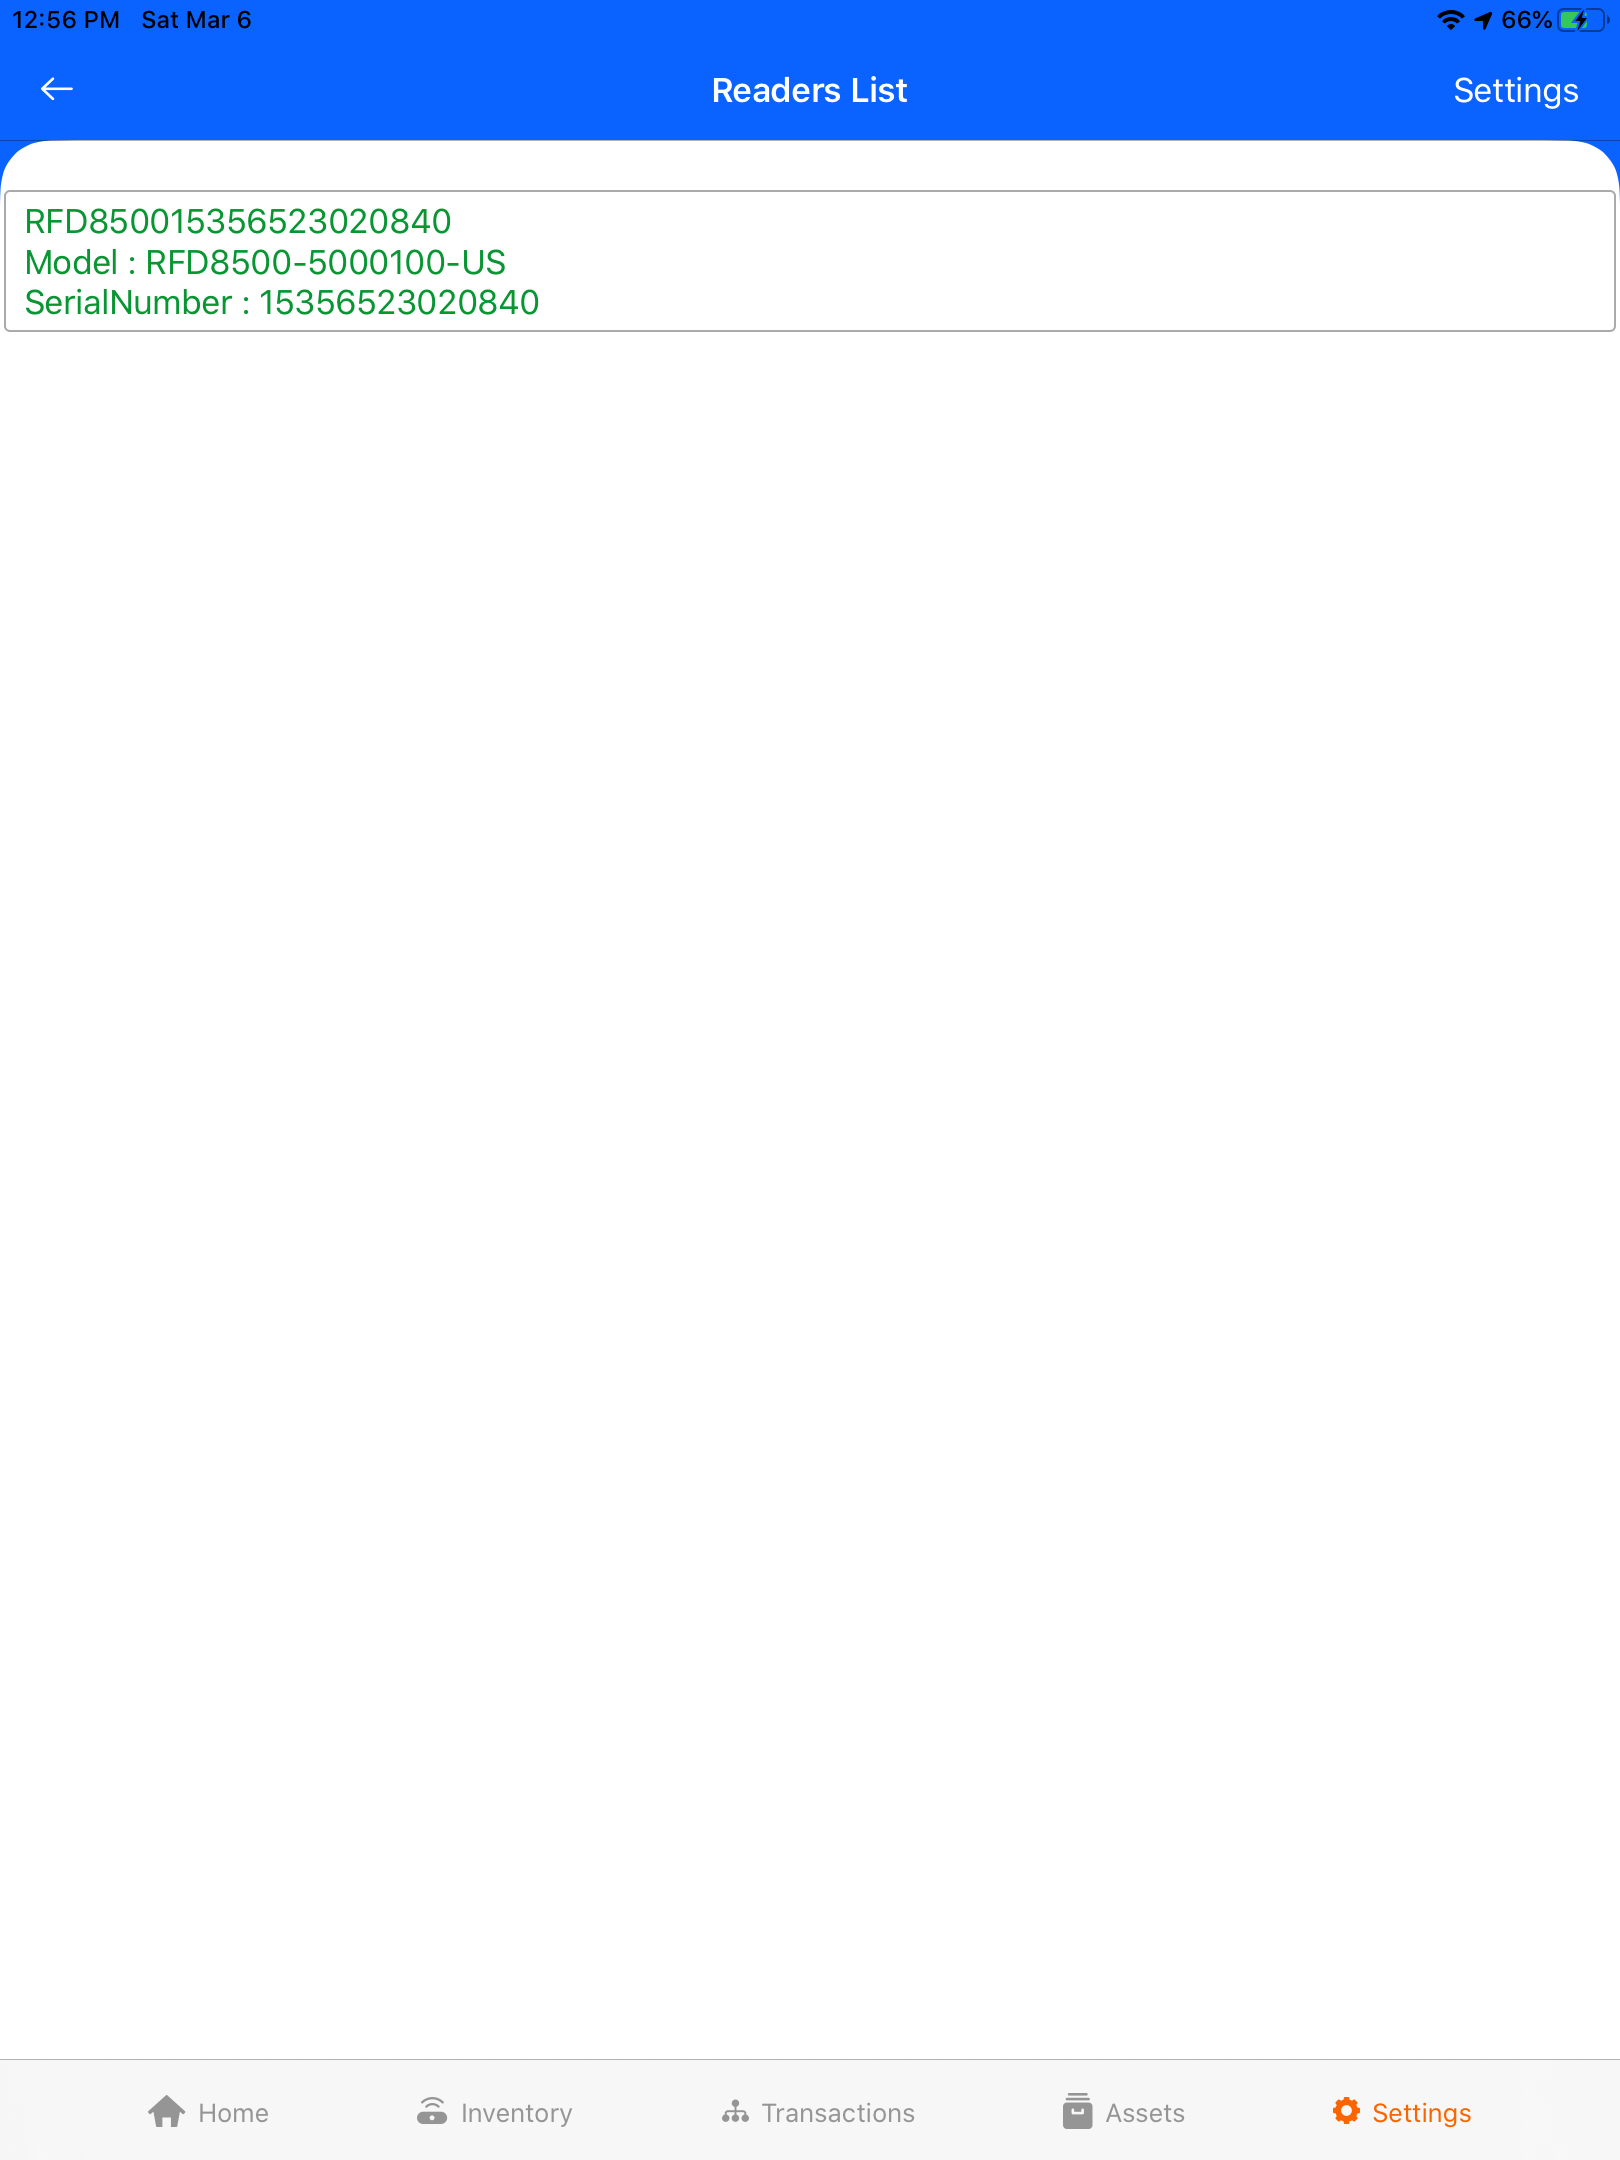
Click tap to connect the device, it redirects to the manage readers for connecting the RFID handheld readers to the application. Select the reader from available device that are already paired with your device.Once the reader is connected successfully a popup alert will appear.
Fourth Step: Part number, description and location can be auto-generated based on the created part master and location. You need to enter assets name, serial number, expiry date and Tag ID. If you already connected the reader, please scan the tags/barcode using RFID Handheld Readers or entered manually.
